The following procedures may be helpful for troubleshooting connection and configuration options in CONNX.
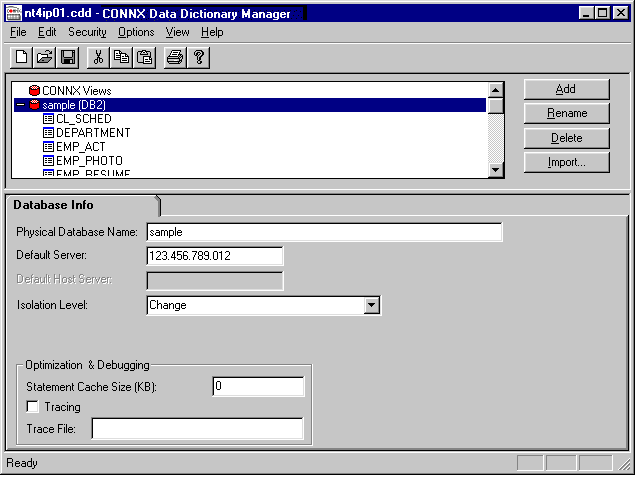
Click on any previously imported DB2 database, e.g. SAMPLE, in the CONNX Data Dictionary Manager window.

The name of the selected database appears in the Physical Database Name text box on the Database Tab in the lower pane. The TCP/IP address or SNA location appears in the Default Server text box.
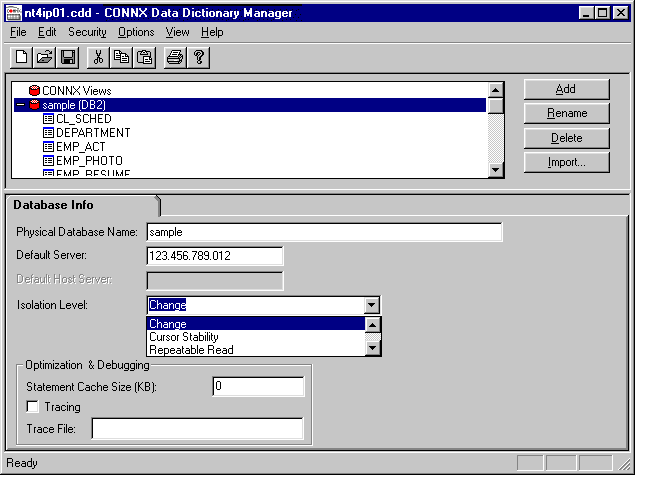
Select an isolation level in the Isolation Level text box.
Selecting the correct isolation level is very important for optimal performance. Note that as you move down the list, concurrency
decreases and exclusivity increases. For instance, if the CDD is to be used by a read-only report writer, the isolation level
Change (for mainframe or DB2 UDB targets) or No Commit (for the AS/400) is the appropriate choice, since it maximizes the
concurrent usage of DB2 objects. Also note that, in most cases, an online transaction processor requires an All or Repeatable
Read isolation level, which locks out updates from other clients until the unit of work is complete.

Under Optimization and Debugging, enter the Statement Cache Size, which specifies the maximum number of kilobytes CONNX can use to store cached information related to the most-frequently executed dynamic SQL statements. CONNX keeps track of the most frequently executed dynamic SQL statements in a virtual memory cache. This cache allows CONNX to optimize the length of messages sent to and received from the target host. Depending on the cursor behavior specified in the CONNX CDD, the cache is refreshed either after each COMMIT/ROLLBACK or whenever the cache exceeds its limit. A value of 0 instructs CONNX to allocate a default cache size of 64 KB. For long-running applications such as Web servers, this value can be revised upward to improve performance. To minimize the cache memory footprint, set the value to 32 (not 0).
Select the Tracing check box to diagnose potential communications problems. If the box is checked and no Trace File name is specified, CONNX writes a binary trace of all sent/received messages via either TCP/IP or APPC/SNA LU 6.2 to the cnxdb2.trc file in the CONNX32 directory. Simultaneously, CONNX writes a text file (cnxdb2.sql) of all executed SQL statements.
Type a file name in the Trace File text box to direct the binary trace to a specified file. The SQL text trace is also written to the same directory/file name,
with a file extension of .sql.
Turn the feature off after successfully tracing problem scenarios and submitting the binary trace file and/or ODBC API trace
to CONNX Technical Support.