
1. Click the Start
button, and then point to All
Programs. Point to CONNX
Driver, and then click InfoNaut
- The CONNX Query Tool. The main InfoNaut window opens. If you
have licensed InfoNaut Professional, it is noted in the title bar.
If you connected to a data source in a previous session of InfoNaut, a prompt appears asking whether you want to reconnect.

Click the Yes
button to reconnect, and then proceed to Step 4.
2. Select Connection
from the menu bar, and then click Add
New Connection. The Select Data Source window appears.

3. Click the Machine
Data Source tab to view user and system DSNs. Select a DSN for
your CONNX database from the list, and either double-click on the DSN
name or click the OK button.

4. The CONNX Integrated
Login window appears. If you are using Windows NT Integrated Security,
you are logged in automatically. Proceed to Step 9.

5. Type a CONNX user name in the User Name text box.
6. Type a CONNX password in the Password text box.
7. The default selection for the Application list
box is a connection to all applications. If you want to change the default,
enter the application type from the Application
list box. See Managing Applications for a description of how to set up
applications and application security.
If you are using RMS or VSAM databases, the CONNX Database Logon dialog
box appears. Type the server name,
a user name, and a password
in the corresponding text boxes on the Logon
Information tab. Port 6500 is listed in the TCPIP Port text box
by default. Any change made to the port setting in this text box becomes
a permanent change to the port setting of the database.

8. Click the OK button to establish a connection to your data. The Connection Established message box appears.
9. If you have not previously connected to a database, the CONNX Database Logon dialog box appears. If you have a previous connection, proceed to Step 11.
Type the server name, a user name, and password in the corresponding text boxes on the Logon Information tab.
Port 6500 is listed in
the TCP/IP Port text box by default. Any change made to the
port setting in this text box becomes a permanent change to the port
setting of the database.
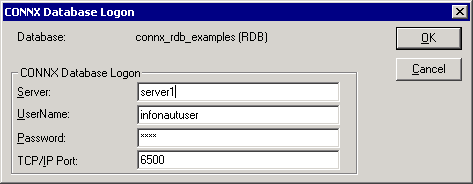
10.Click the OK button to establish a connection to your data.
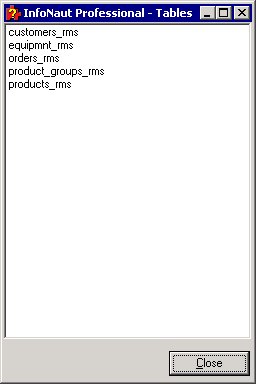
11.To view the tables in the selected database to
which you have access, click the Show
Tables button in the InfoNaut window. The Tables window opens with
a list of your tables. Double-click on a table to create a query that
selects all data from the table.
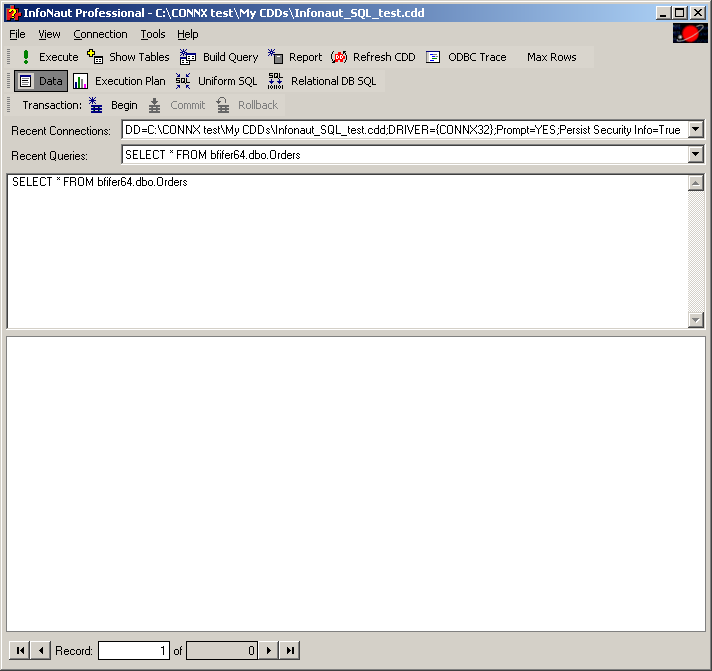
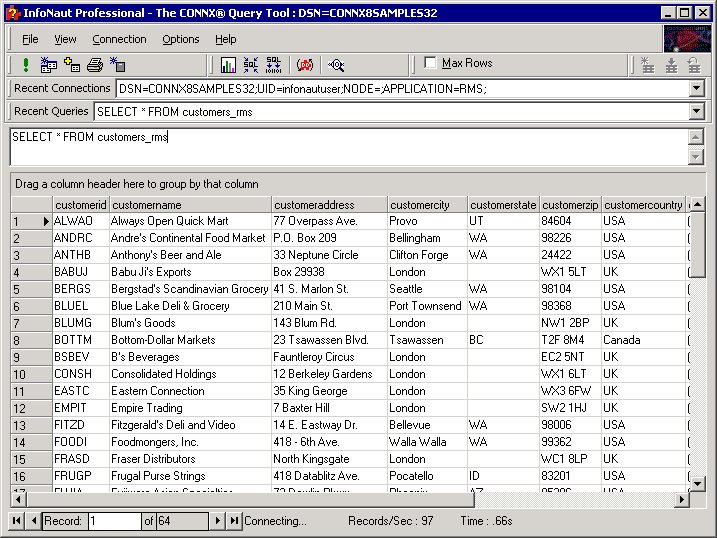
12.The query SELECT * FROM <TABLENAME> is inserted
into the query text box on the main form.
13. On the File menu, select Execute
query or click the Execute query
button to run the query and view the results.
![]()
Execute query button
Returned
data appears in the lower pane. See "Chapter 2: CONNX Security"
in the CONNX User Reference Online Guide or the Security and Administration
Guide for more information on database and application management.
To run a new query against the same database, type a query in the Query text box. The Query
button is enabled if you have an established connection to a data source.
14.To create a query graphically, click the Build query button to open the Query Builder window.
![]()
Build query button
See InfoNaut Query Builder for more information.
15.Click the Execute query button to execute the query. Click the Execute query button again to cancel lengthy queries.
16.To open another data source, click on the Connection menu, and then click Add Connection. The current data source is closed before a new data source is opened.
17.To close the current data source, click on the Connection menu, and then click Close Connection. The current data source is closed, and a new data source can be opened by clicking Add Connection on the Connection menu.
18.Click the Exit button to close the application.