|
Adding a Replication to InstantdbSync includes:
Add a replication if:
After you add a replication you will be able to:
|
You can add additional source tables to InstantdbSync and associate them with a target database at the same time.
Warning: To maintain data integrity, a table cannot be both the source table in one replication and a target table in another replication.
Open the InstantdbSync Replication Administrator.
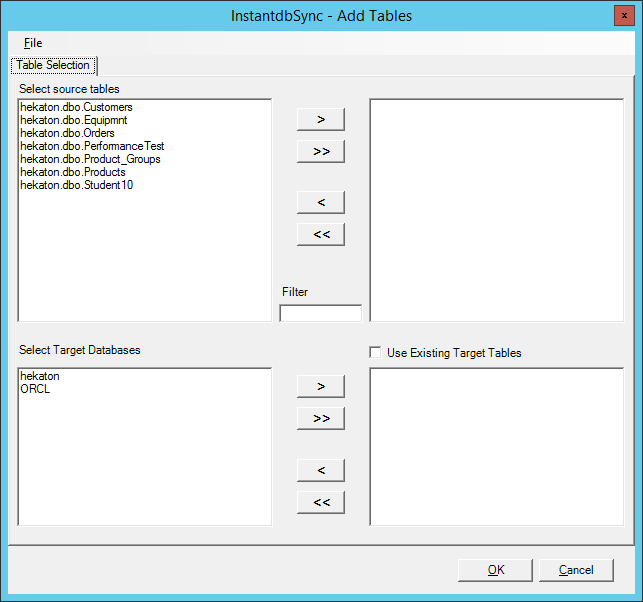
Click Add Tables. The Add Tables window appears.

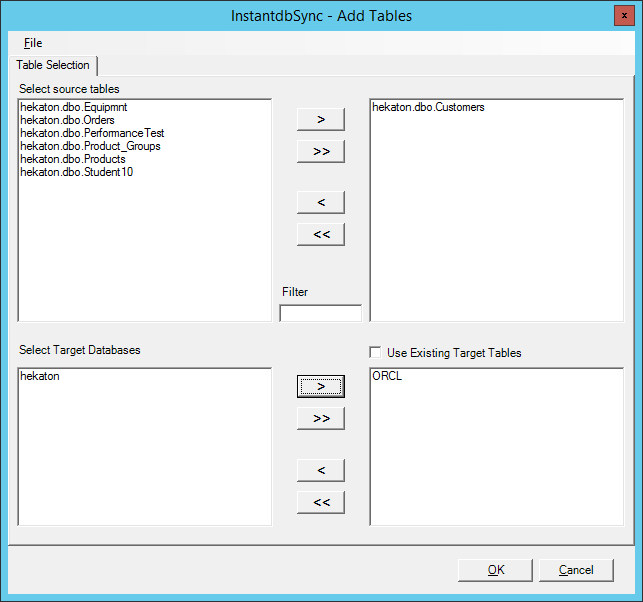
Select any additional source tables you wish to replicate and specify the target Database. By default the source tables will map to new target tables which exactly match the source tables to be created on deploy. Select the Use Existing Target Tables and the Replication Administrator will search for a table with the same name as the source table in the target database. If a table with the same name is not found in the target database, it will just create a new table with the same name. In this process it will also map columns with the same name from the source table to the target table. If there are columns in the existing tables with names that do not match the source they must be mapped manually in the Column Map window.

Note: If there are a large number of source tables, the Filter window can be used to reduce the number of tables displayed. For example, if you know the table you are interested in has the word "Account" in it, entering Account in the Filter window will display only those tables that contain that word in their name.
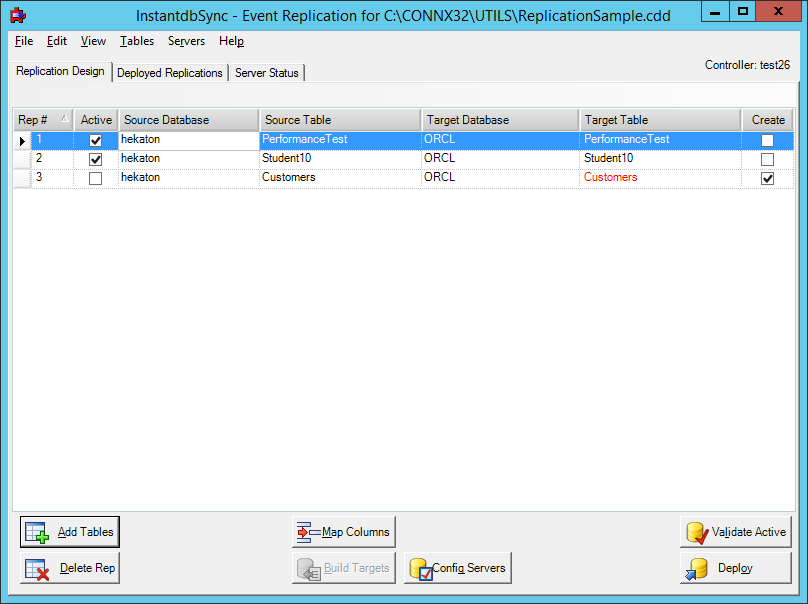
Click OK. The InstantdbSync Administrator window appears and the tables you added are in the list.

If
you want to deploy the changes you've made, check the Active
check box to in the second column and then click Validate
Active and then Deploy.
If you wish to save the changes but not deploy them until a later
time, click the File menu
and then click Save.
Note: Clicking Validate
Active is an optional step. All active replications will
be automatically validated during the deploy process. Use the
Validate Active button
when you want to validate newly added replications prior to deploy.
For more information about Validate Active, see Validating Active Replications. For more information about Deploy, see Deploying Replications.