
This tutorial shows how to add, delete and get BLOBs using SOA Gateway and Adabas.
SOA Gateway uses the MTOM specification to send/receive the XML and binary data to/from the required web service. This involves attaching the required binary file(s) to the SOAP message, and then transforming this into a MIME message to send across the wire.
For the purposes of this tutorial, we will use soapUi to send and receive messages to our web service.
Other web service clients may also be used, such as PHP with the WSO2 Web Services Framework extension
This tutorial assumes the following
You have at least soapUi v1.7 installed.
You are using a version of Adabas which support LOBs
You have set up a LOB file at FNR 90.
Start the Control Center and add a new resource.
Enter the following information
Name: adabas_blobs
DataView : Select 'adabas_photoblobs', which is one of the sample definitions delivered with SOA Gateway
DatabaseId: 212 ( or the DBID relevant on your system )
FileNumber: 90
Publish your changes to the server.
Start soapUi, and add the WSDL for the adabas_blobs service. If you are unfamiliar with soapUi, please run through this tutorial first
You should now have a screen similar to this

Under double-click
Remove the <soapenv:Header> element and all child elements.
Add the personnel_id of the record you would like the BLOB to be added
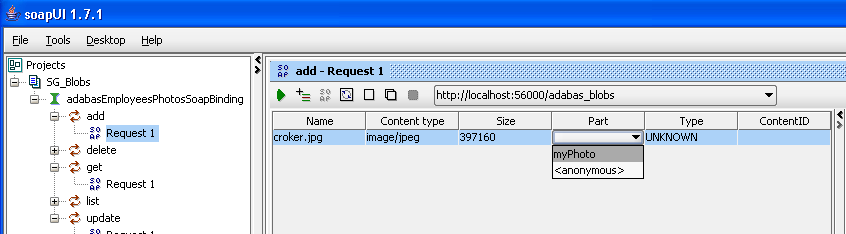
Change the cid:XYZ reference to be something familiar, for example cid:myPhoto

Click the tab, and click
Select the required LOB file and click

When asked to select
Click the column, and select the CID reference you changed earlier, for example myPhoto
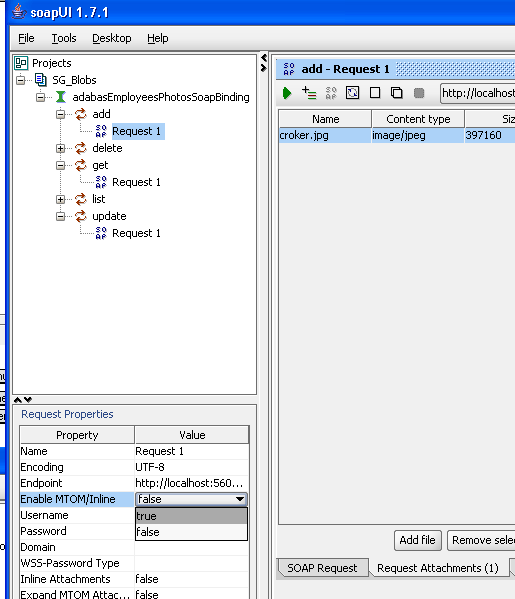
In the Request Properties change to true
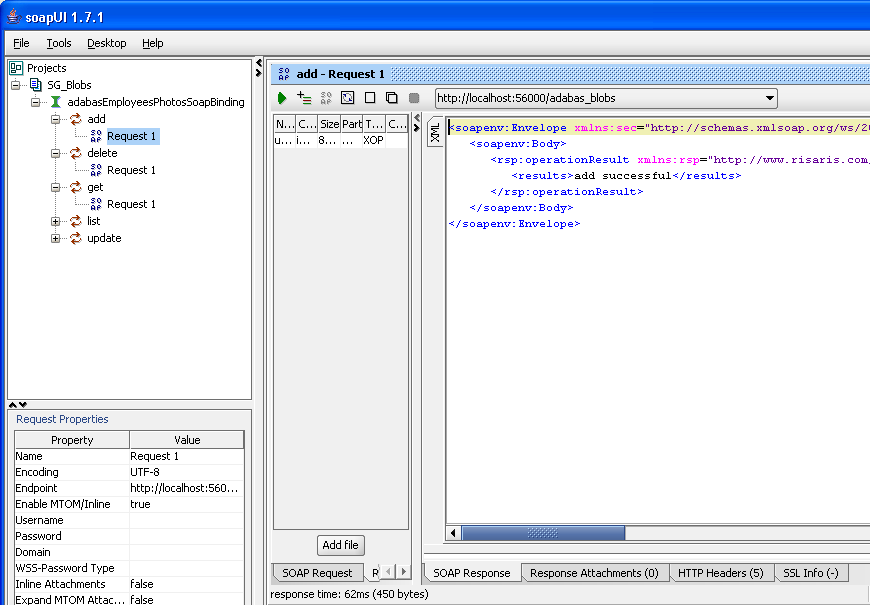
Click the green arrow to send the request. The server's response will appear in the right pane
Now that the record, including the LOB, has been added to your Adabas file, you will want to retrieve it.
In SOA Gateway LOBs can be retrieved using the request
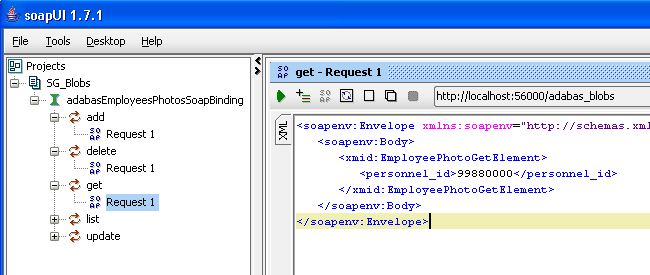
Under get, double-click . Remove the <soapenv:Header> elements as before.
Add the personnel_id of the record that you wish to retrieve, for example 99880000.
Click the green arrow, and this record will be retrieved from Adabas.
Select the tab, and double-click the attachment.
It should open in a web-browser, or you can save the attachment to disk by selecting

You may delete the record, including the LOB, by selecting the delete operation and entering the corresponding personnel_id.