
SOA Gateway and EntireX can be used together to enable sending SOAP requests to an EntireX service and to receive a response from a service. These request are asynchronous so it means that multiple requests can be sent from the client even though SOA Gateway may not be running. These requests are held until SOA Gateway reads and processes them. Likewise the responses are retained until such time that a client may request them.
Here is a top level view on the steps involved.
For a particular web service specify the Broker details required.
The resultant WSDL for the web service can be read by a client which will enable it to generate the appropriate SOAP request to send to the service.
The resultant WSDL for the web service can be read by a client which will enable it to generate the appropriate SOAP request to read from the service.
This tutorial will make use of Java wrapper/stub classes to access a SOA Gateway Service.
Java wrapper/stub classes are generated using the Apache Axis2 feature WSDL2Java.
If you do not have it already, download and install the latest Axis2 kit.
The web service which we will be using is that described by the "adabas_EmployeesMini" DataView supplied with SOA Gateway.
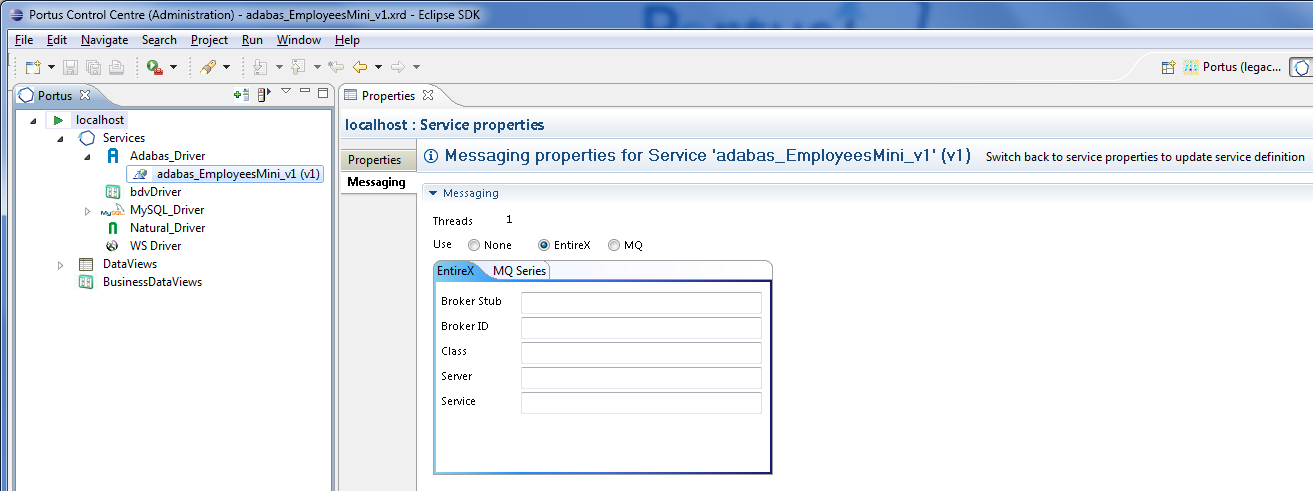
Select the adabas_EmployeesMini web service and open the Messaging tab. Select the EntireX radio button and tab. Fill in the details appropriate to your installation.
Note:
The Broker Stub value will depend on the system from which EntireX
is being called i.e. broker32.dll for Windows, broker.so for Linux etc.
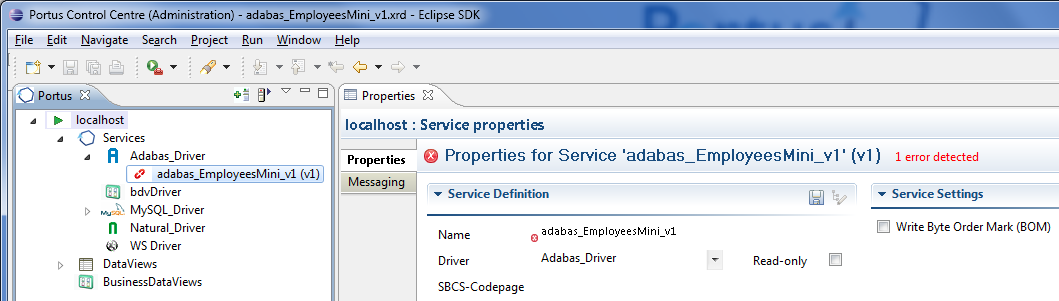
As per the hint, switch back to service properties and select the Save button when complete.
SOA Gateway will now make contact with the EntireX Broker. If an error occurs it will be highlighted as shown below.
Check the error_log to find the cause. The default location of the Apache error_log is [SERVER_INST]/Apache22/logs/error_log replacing [SERVER_INST] with the location in which you have installed SOA Gateway. Please correct and try again.
If successful then carry on to next step.
Switch to the Java perspective (Window -> Open Perspective -> Other... -> Java (default). For more information on this aspect of Eclipse see Getting started with Eclipse.
Create a new Java-project naming it "SOAPEntireXTutorial".
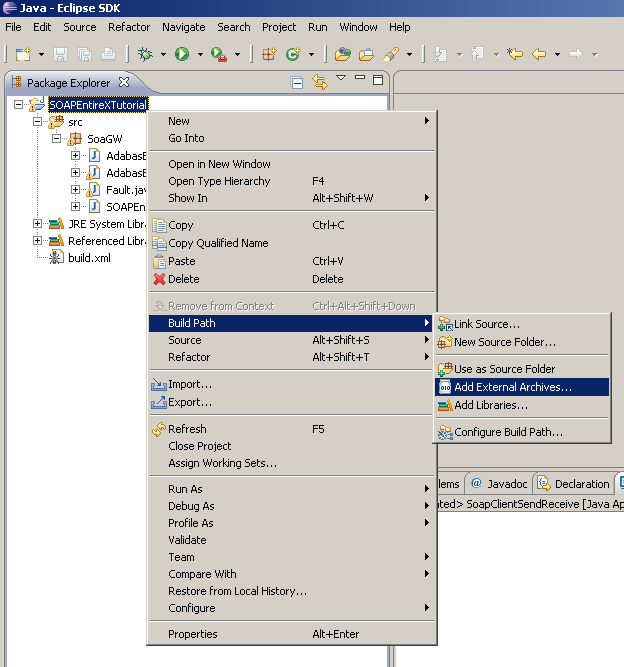
Right-click the "SOAPEntireXTutorial" project folder, select "Build Path", then "Add External Archives.."
Add all .jar files from the axis2 "lib" directory to the project's Build-Path.
Right-click the "SOAPEntireXTutorial" project folder, select "Build Path", then "Add External Archives.."
Add the entirex.jar files from your EntireX installation e.g. ..\SoftwareAG\EntireX\classes
Open a command prompt (aka "DOS box"), change to the "SOAPEntireXTutorial\src" directory and run the following command:
wsdl2java -uri http://<yourserver>:<yourport>/adabas_EmployeesMini?WSDL -o ..\ -p SoaGW
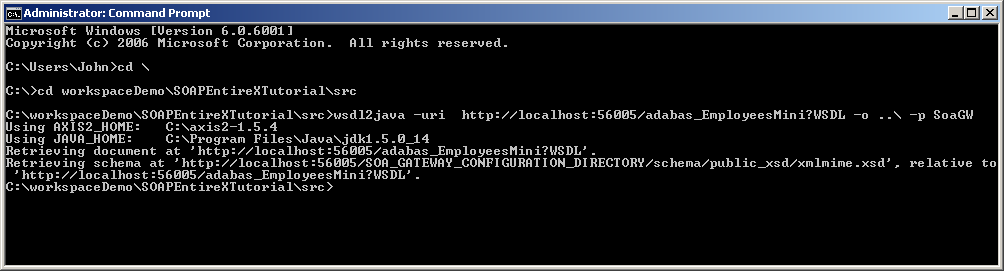
The following items are generated from the SOA Gateway WSDL:
A "Stub" class implementing all types and operations ( ports / bindings ).
A CallbackHandler - a stub class (not used in this tutorial) providing hooks for client-side extensions to the generated result- and error handlers.
A Fault class.
Get file SOAPEntireXTut.java and, when prompted, save in the ..\SOAPEntireXTutorial\src\SoaGW directory. Right-click on SOAPEntireXTutorial and select Refresh(F5). SOAPEntireXTut.java should appear in the explorer window.
Get file exxTransports-0.1.jar and, when prompted, save it in a local directory.
Right-click on SOAPEntireXTutorial and select Build Path -> Add External Archives...
Navigate to where exxTransports-0.1.jar was saved and select Open to add it the project.
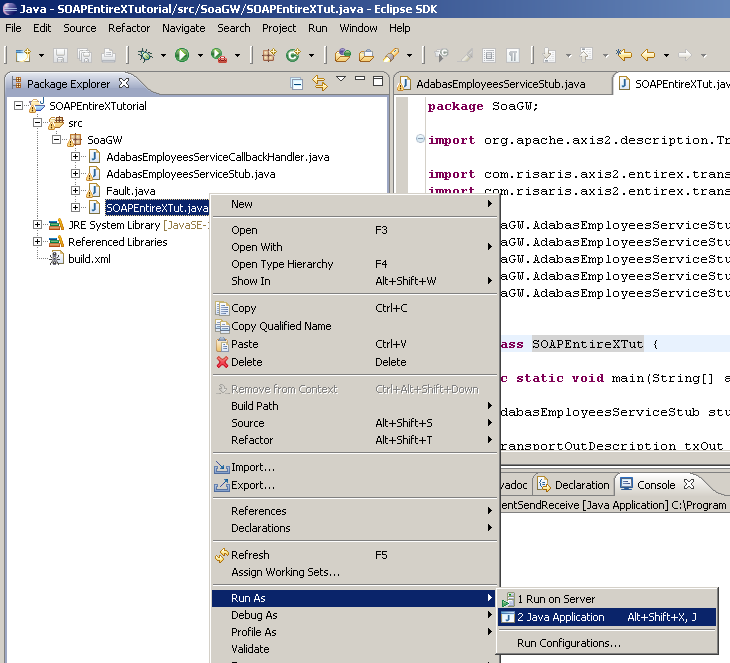
Right-click on the file and select Run As -> Java Application:
The output appears in the "Console" window:
