
This document explains the deactivation process for shutting down or uninstalling the Data Archiving for Adabas components.
![]() To shut down Data Archiving for Adabas
To shut down Data Archiving for Adabas
Start the shutdown deactivation process as follows:
Run the deactivation script ./deactivation.sh from the installation library $SAG/cor/ vvrs/INSTALL where vrs is the product version.
Note:
In Unix, if the deactivation detects that a User Interface is not
available, then it will automatically use the console mode. Refer to
Deactivating and Uninstalling from the
Console in Unix.
The Installer creates a Start Menu entry for deactivation (as it does for activation). Refer to the Activation section of the Installation Procedure for Windows and Unix for an example screenshot.
Select the Platform and Products.
Once started, the shutdown deactivation process will present a panel screen prompting you to select the platform and products; an example of the panel follows:
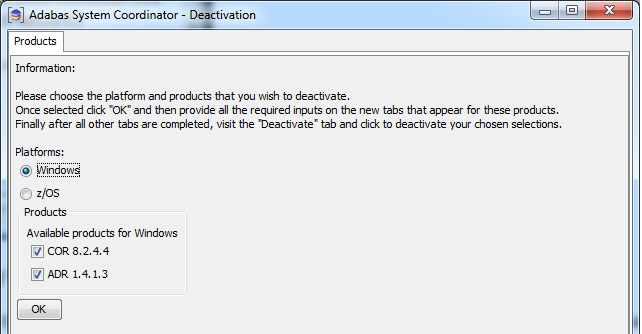
The above example indicates you wish to perform a deactivation process on your Windows platform for the Adabas System Coordinator (COR) and Data Archiving for Adabas (ADR) products (under normal situations both these products should be selected). Click OK to continue.
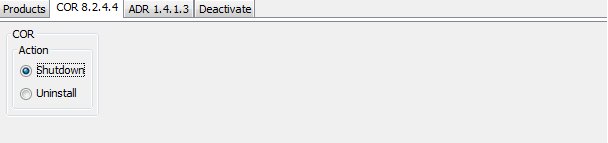
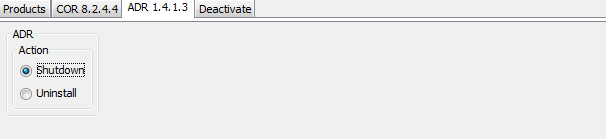
Progress through the shutdown deactivation panels.
Using the tabs at the top of each panel, you can progress through each panel. The following screens show the panel sequence for a shutdown deactivation process on a Windows platform for the Adabas System Coordinator (COR) and Data Archiving for Adabas (ADR) products.
Note:
When progressing through the panels for a shutdown deactivation
process on a z/OS platform, additional panels (and corresponding tabs) may be
presented requesting additional information (for example, JCL and FTP
parameters). This same information would have been requested at product
Activation time, refer to the
Activation section of the
Installation Procedure for
z/OS for an explanation regarding such information.
Confirm shutdown deactivation.
The final ‘Deactivate’ panel (not shown) allows you to confirm your deactivation request (by clicking on the Deactivation button) and then follow its progress in the panel window.
Note:
Any archived data written to Vault(s) within your installation
directory will not be deleted during this uninstall process and will be
preserved even if you subsequently reinstall into the same directory. However,
we do recommend that your archived data should be maintained in Vaults outside
of the installation directory.
![]() To uninstall Data Archiving for Adabas
To uninstall Data Archiving for Adabas
Start the uninstall deactivation process as follows:
Run the deactivation script ./deactivation.sh from the installation library $SAG/cor/vvrs/INSTALL where vrs is the product version.
Note:
In Unix, if the deactivation detects that a User Interface is not
available then it will automatically use the console mode. Refer to
Deactivating and Uninstalling from the
Console in Unix and then continue to complete the
uninstall using the Software AG Uninstaller (see below).
The Installer creates a Start Menu entry for deactivation (as it does for activation). Refer to the Activation section of the Installation Procedure for Windows and Unix for an example screenshot.
Select the Platform and Products.
Once started, the uninstall deactivation process will present a panel screen prompting you to select the platform and products; an example of the panel follows:
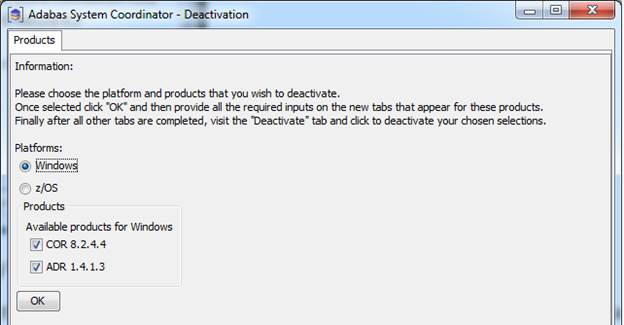
The above example indicates you wish to perform a deactivation process on your Windows platform for the Adabas System Coordinator (COR) and Data Archiving for Adabas (ADR) products (under normal situations both these products should be selected). Click OK to continue.
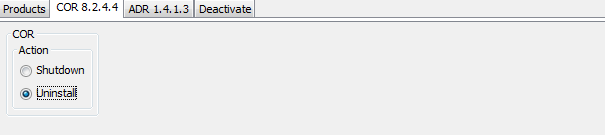
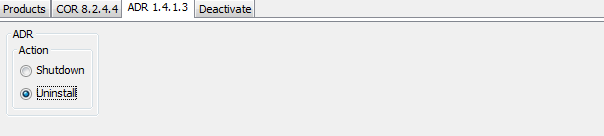
Progress through the uninstall deactivation panels.
Using the tabs at the top of each panel, you can progress through each panel. The following screens show the panel sequence for an uninstall deactivation process on a Windows platform for the Adabas System Coordinator (COR) and Data Archiving for Adabas (ADR) products.
Note:
When progressing through the panels for an uninstall deactivation
process on a z/OS platform, additional panels (and corresponding tabs) may be
presented requesting additional information (for example, JCL and FTP
parameters). This same information would have been requested at product
Activation time, refer to the
Activation
section of the Installation
Procedure for z/OS for an explanation regarding such
information.
Confirm uninstall deactivation.
The final ‘Deactivate’ panel (not shown) allows you to confirm your deactivation request (by clicking on the Deactivation button) and then follow its progress in the panel window.
Complete the uninstall using the Software AG Uninstaller.
For information on how to complete the uninstall of Data Archiving for Adabas (and its components) using the Software AG Uninstaller refer to the Uninstalling chapter of the document Using the Software AG Installer on the Software AG documentation web site.
| Warning: The Software AG Uninstaller does not delete files that were created after the installation (for example, archived data), nor does it delete the directory structure that contains the files. However, it does suggest that if you are going to reinstall into the same directory, the product directories should be manually deleted or such files moved. Do not delete the product directories if you wish any archived data maintained in Vaults within the installation directories to be preserved. |
In Unix, if the deactivation detects that a User Interface is not available then it will automatically use the console mode.
Extracts of the console output for an example uninstall deactivation process are shown below.


