This commands described in this section may be used within Adabas Review. Some may be entered on the command line of any Adabas Review screen; others are specific to a particular function. Refer to the description of the particular command for more information.
Terms enclosed in (square) brackets (e.g., [report-name]) are optional. "Curly" brackets called braces ({ }) enclose possible (mutually exclusive) options. Unless qualified by (square) brackets ([ ]), one of the terms listed within the braces must be chosen.
Please note that some of the commands listed in the following table may
be used throught Adabas Review; they are:
COLOR
EXIT
FIN
HELP
LOGO
MENU
MSG
QUIT
These commands are also described in section Using Review Commands in Getting Started.
| Command | Action |
|---|---|
| AA | list target objects for a particular SVC |
| ACCPT | accept (temporarily save) selections or changes to selections |
| AOS or AO | access Adabas Online System |
| CD | change DBID |
| CH | compress history data |
| CL | close (suspend) report |
| COLOR {[ON]|OFF} | display color attributes or turn color off |
| CP [report-name] | change display program |
| CR | copy report definition |
| DBID=dbid | change the database |
| DD | display report information |
| DL [report-name] | download report output or history data |
| EB | access and edit Buffer Pool Report |
| EP [report-name] | access and edit display program |
| ER [report-name] | access and edit report definition |
| ET [target-number] | access and edit target object definitions |
| EU [{DEFAULT | userid}] | access and edit user profile |
| EX | expand list of history reports |
| EXIT | return to previous screen |
| FIELD [field-type1 field-type2 ...] | list database fields |
| FIN | terminate Adabas Review session |
| FLDS [field-type1 field-type2 ...] | list database fields |
| GENAUTO or GA | force regeneration of control statements for all autostarted reports |
| GENCARD or GC | generate report parameter cards for user-specified reports |
| HC [report-name] | print report output or history data (hard copy) |
| HELP | display help for screen or field |
| HUB=hubid | change the hub database |
| IN | display storage and processing information for active reports |
| LF [field-type1 field-type2 ...] | list database fields |
| LH | list history reports |
| LOG | in local mode only, reset selected parameters dynamically |
| LOGO | display Adabas Review logo screen |
| LOGON library-name | logon to the specified library |
| LR | list report definitions |
| LS | list started reports |
| LT | list target object definitions |
| LU | list user profiles |
| MENU | access the Adabas Review main menu |
| MSG [message-number] | display detailed explanation of the specified Adabas Review message |
| NAT | exit Adabas Review and return to Natural |
| NUCID and NUC LIST | monitor specific nucleus IDs separately when running in local mode |
| OPTNS | access and edit report options |
| PH | purge history data from expanded list |
| PR | purge report definition |
| PRINT [report-name] | print report output or history data |
| PS | purge (started) report output |
| PT | purge target object definition |
| PU | purge user profile |
| QUIT | terminate Adabas Review session |
| RA [report-name] | reactivate suspended report |
| REFRESH [report-name] | refresh report |
| REGEN [report-name] | regenerate display program |
| RESET HISTORY FILE | unlock history file locked as a result of the abnormal termination of the history compression program |
| RF [report-name] | refresh report |
| RG [report-name] | regenerate display program |
| RULES | access and edit report processing rules |
| SAVE | save report definition; write to Adabas Review repository |
| SETFILE or SET | access different Adabas Review repositories |
| SORT | dynamically change sort options from view (VW) of started report results |
| ST [report-name] | start report |
| START [report-name] | start report |
| SU [report-name] | suspend a started report |
| SW [report-name] | switch CLOG datasets |
| SWITCH [report-name] | switch CLOG datasets |
| TECH | displays environmental and maintenance information about the installed Adabas Review system |
| VIEW [report-name] | view started report, report output, or history data |
| VW [report-name] | view started report, report output, or history data |
| ? | display help for a field |
Target objects are databases that may be monitored by Adabas Review. The AA (available Adabas nuclei) command is used to list the Adabas target objects for a particular supervisor call number (SVC) and provides a "snapshot" of processing activity as seen through Adabas Review.
For more information, see the section Using the Adabas Availability Function in Displaying Statistics.
The ACCPT command is used within the Edit Report (ER) function to save changes temporarily while you are working on another portion of the report. The ACCPT command does not save changes to disk.
Enter the ACCPT command on the command line of the Report Options screen in the Edit Report function.
For more information, see various subsections of the section Using the Edit Report (ER) Function in Maintaining Report Definitions.
Adabas Online System (AOS) is a selectable unit of Adabas that enables database administrators to monitor and change aspects of an Adabas database interactively. For more information, refer to the Adabas DBA Reference Documentation .
If Adabas Online System is installed on your system and you have access privileges to it, you can access it by entering the AOS command on the command line of any Adabas Review screen. For more information, see the section Accessing Adabas Online System in Displaying Statistics.
Each report collects data from a particular database. The CD command is used within the List Report Definitions (LR) function to change that database; that is, to change the DBID. The CD command is issued from the Report Definitions screen.
For more information, see the section Changing the DBID in Maintaining Report Definitions.
The CH (compress history) command summarizes all history report occurrences within a date range into a single report occurrence. The original report occurrences are then purged. Although this command can dramatically reduce the number of records used to represent the report, it also denies you the possibility of thereafter viewing the data by different data ranges.
If the CH command terminates abnormally for any reason, the original history data could be lost; therefore, Software AG recommends backing up your data before executing this command. If an abnormal termination occurs, the history file is locked against further compression attempts for any report by any used. See the RESET HISTORY FILE command for information about unlocking the history file.
For more information, see the section Compressing Accumulated History Report Data in Managing History Data.
The CL command is used within the List Started Reports (LS) function to close a report. Closing a report means that the report is suspended, and the accumulated data is written to the output locations defined to the report. Data accumulated by the report before the command was issued may not be viewed online after the command completes.
If the report option RESTART=Y is specified, the report is restarted automatically after the CL command has been issued.
On the Started Reports screen, enter the CL command on the selection line preceding the name of the report you are closing.
For more information, refer to the section Closing Reports in Saved and Started Reports.

If you use a color terminal, the COLOR command may be used throughout Adabas Review to change the display from color to monochrome. COLOR OFF turns off the color display, and COLOR ON (the default) turns on the color display.

The CP command is used within the List Report Definitions (LR) function to change the display program used by the report.
The CP command is entered on the selection line preceding the report name on the Report Definitions screen. The cursor is automatically placed on the display program name so that you may enter the name of the new display program.
The CP command may also be entered on the command line of any Adabas Review screen as follows:
CP report-name
A window appears giving the report name, the name of the current display program, and an input line for the name of the new display program.
For more information, see the section Changing to a Different Display Program in Maintaining Display Programs.
One way to create new reports is to use the Copy Report Definition (CR) command within the List Report Definitions (LR) function. The CR command is issued from the Report Definitions screen.
The CR command allows you to copy a report definition either to another Adabas Review repository, or to the current Adabas Review repository under a new name.
For more information, see the section Copying a Report Definition in Maintaining Report Definitions.
The DBID command is used to change to another local Adabas Review or to another Adabas Review hub database. DBID functions as a synonym for the HUB command. The command may be entered on the command line of any screen . Specify the database ID number of the new local Adabas Review or the new hub database for dbid.
The message "DBID has been changed" indicates that the connection between the Review Natural code and the indicated Review hub has been successfully established.
If Adabas Review is unable to change to the database specified, or if the database specified is running an earlier version of Review, an error message is displayed describing the condition.
The DD command is used to display selected information about a report including the identity of the user who saved it, its format (summary or detail), whether history data is collected for it; what control breaks are specified; what totals and what averages are specified.
For more information, see the section Displaying Report Information in Maintaining Report Definitions.
Note:
To use this command, Entire Connection is required.
The DL command is used to download to a personal computer the data accumulated by a started report. It may also be used to download history data.
The DL command may be issued from either the Started Reports (LS function) screen or the History Reports (LH function) screen by entering the command on the selection line preceding the report name.
The DL command may also be entered on the command line of any screen within Adabas Review as follows:
DL report-name
If the DL command is entered on the command line without a report name, the command applies to the report you last accessed.
After the command has been issued, Entire Connection prompts you for file and directory information. Entire Connection proceeds to download the report output to the file and directory specified.
For more information, see the section Downloading Report Output in Managing Report Output.
A sample report called "Buffer Pool Report" is created when Adabas Review is installed. The EB command is used to create, edit, and start buffer pool reports for specific databases being monitored based on the provided sample report.
For more information, see the section Editing the Buffer Pool Report in Maintaining Report Definitions.

The EP command is used to edit the Natural program that displays the report results online when the VIEW command is issued.
The EP command may be issued from any of the three list report function screens (Report Definitions, Started Reports, and Adabas History Reports) by entering the command on the selection line preceding the report name.
The command may also be issued on the command line of any screen in Adabas Review as follows:
EP report-name
For more information, refer to the section Editing the Display Program in Maintaining Display Programs.
The ER command is used to create and modify reports. It may be issued from any of the list report function screens (Report Definitions, Started Reports, and Adabas History Reports) on the selection line preceding the report name.
The ER command may also be issued on the command line of any screen within Adabas Review. To edit an existing report, or to create a new report, enter the command as follows:
ER report-name
For more information, see the section Using the Edit Report (ER) Function in Maintaining Report Definitions.

The ET command is used by Adabas Review administrators to edit target definitions. This command is issued by from the Target Definitions screen (LT function) by entering the command on the selection line preceding the target's DBID.
The ET command may also be issued on the command line of any screen within Adabas Review. To edit an existing target, or to add a new target, enter the command as follows:
ET target-number
For more information, see the sections Accessing the Edit Target Screen, Defining a Target Object and Editing an Existing Target in Administrative Functions.

The EU command is used by Adabas Review administrators to create and edit user profiles, either the DEFAULT profile or the profile for a particular user ID.
For more information, see the sections Customizing the Default Profile, Creating a User Profile, Editing a User Profile or Copying a User Profile in Administrative Functions.
The EX command is used within the List History Reports (LH) function. It "expands" the Adabas History Reports screen to list the dates when history data was accumulated by the report. For more information, see the section Expanding the List of History Reports in Managing History Data.
The command is issued by entering the EX code on the selection line preceding the report name.
The EX command must be issued before attempting to purge history data.

The EXIT command is used to terminate a function and return to the menu from which the function was called. This command is not to be confused with the MENU command, which terminates the function and returns to the Adabas Review main menu.
The EXIT command may be issued from any screen within Adabas Review. The command may be issued either by entering EXIT on the command line or by pressing PF3.

The FIELD, FLDS, or LF command is used within the Edit Report (ER) function to display the data fields that may be used in reports:
The list of field categories is displayed by entering the FIELD, FLDS, or LF on the command line of any screen within the Edit Report (ER) function.
The list of fields for a particular category is displayed by entering the FIELD, FLDS, or LF command followed by one or more of the following category codes:
| AC | Adabas control block fields |
| BU | Adabas buffer fields |
| IN | Interval and time fields |
| IO | Adabas I/O fields |
| NA | Natural fields |
| NU | Adabas nucleus fields |
| OP | Operating system fields |
| TP | Fields used to monitor transaction processing |
For more information, refer to the section Entering the Field Names in Maintaining Report Definitions.

The FIN or QUIT command is used to exit from Adabas Review. It may be issued from any screen in Adabas Review. If exiting from the Adabas Review main menu, you may also press PF12 or PF3 .

Note:
This command is not available to users of Adabas Review under
z/VM.
The GENAUTO command is used to regenerate the control statements used by Adabas Review for autostarted reports. See the section Autostarted Reports in the Introduction.
Ordinarily, Adabas Review maintenance procedures eliminate the need for users to regenerate these statements. In exceptional circumstances (e.g., the PDS becomes too full and requires compressing), you may either use the GENAUTO command or code the parameters manually.
You can issue the command by entering GENAUTO or GA on the command line of any screen within Adabas Review. A message confirms that the parameter statements have been regenerated.

Note:
This command is not available to users of Adabas Review under
z/VM.
The GENCARD command is used to generate batch parameter statements from Adabas Review online reports. The GENCARD command obtains target database information from the List Target Definitions (LT) function.
You can enter either GENCARD or GC on the command line of any screen within Adabas Review. A window appears, prompting you for the DD name of the output file and the report name. See the section Generating Batch Report Parameters in Using Batch Facilities. The batch report parameters generated by GENCARD can be copied to the RVUPARM dataset and used as input to a Review batch job.
Note:
The hard copy facility of Natural must be installed for this
command.
The HC or PRINT command is used to send report results to a hard copy printer. The command may be issued from the list of history reports or the list of started reports (LH or LS functions) by entering the command HC on the selection line preceding the report name.
The command may also be entered on the command line of any Adabas Review screen as:
HC report-name
If the HC or PRINT command is entered on the command line without a report name, the command is applied to the report you last accessed.
For more information, see the section Printing Report Results in Managing Report Output.
The HELP command may be issued from any screen within Adabas Review to obtain online help for that screen. The command provides general information regarding systems and/or functions within Adabas Review.
You can obtain help for a particular screen by either entering the HELP command on the command line or pressing PF1.
You can obtain help for a particular input field on a screen by entering a ? on that field. If specific help for that field is not available, the general information supplied for the screen is displayed.
Refer to the section Using the Online Help System in Getting Started.

The HUB command is used to change the hub database for Adabas Review. It may be entered on the command line of any screen. Specify the database identification number of the new hub database for hubid.
The message "HUB has been changed" indicates that the connection between the Review Natural code and the indicated Review hub has been successfully established.
If Adabas Review is unable to change to the hub database specified, or if the hub database specified has a version of Review prior to the current version installed, an error message is displayed describing the condition.
The IN command is used to display storage and processing information for active Adabas Review reports. It is not available in batch mode.
For more information, see the section Displaying Active Report Information in Saved and Started Reports.
The LH command is used to list reports that have written history data to the Adabas Review repository. From this list, you can use commands to view, download to a PC, print, or purge history data. In addition, you can edit a report definition and its corresponding display program.
For more information, see the section Listing History Reports in Managing History Data.
See the FIELD command.
The LOG command is used in local mode only to dynamically determine (that is, without cycling the system) whether
Review commands are processed in Review; that is, whether the Review command processor includes commands issued by the Review online system in its reports.
Adabas commands are processed by Review; that is, whether the Review command processor includes commands issued by Adabas in its reports.
Note:
Changes made by the LOG command are only
valid as long as Adabas is running, and are not stored in a file; therefore,
the changes remain in effect until Adabas and Review are restarted.
![]() To switch the value of one or more of these parameters
dynamically
To switch the value of one or more of these parameters
dynamically
After the Review DB menu, type the LOG command on the command line and press ENTER.
The following window appears:
+--------------------------------------+ | | | Review Dynamic Parms | | | | | | Process Review Commands.. Y | | Process Adabas Commands.. Y | | | | | | Enter-PF1---PF2---PF3---PF4---PF5--- | | Exit Updat | | | +--------------------------------------+ |
Overtype the current value of one or both parameters with the opposite value.
Press PF5 to implement the change; press PF3 to close the window. The change remains in effect until Adabas and Review are restarted.
![]()
The LOGO command displays the Adabas Review Logo screen. The LOGO command may be issued on the command line of any Adabas Review screen.

The LOGON command is used to exit Adabas Review and log on to the Natural library specified. Note that under Natural Security, your user ID must be defined to the library specified in order to log on to that library. It is not available in batch mode.
The LR command is used to list all report definitions. From the list, you can use commands to maintain a report. Such commands are entered on the selection line preceding the name of the report in the list.
For more information, see the section Listing Report Definitions in Maintaining Report Definitions.
The LS command is used to list all reports that have been started. From the list, you can use commands to suspend, reactivate, close, and refresh a report. You can view, download to a PC, print, or purge report output. Additionally, you can edit a report definition or its corresponding display program.
For more information, see the section Listing Started Reports in Saved and Started Reports.
The LT command is used to list the existing target definitions. From the resulting list, the Adabas Review administrator can use commands to edit or purge a target definition.
For more information, see the section Listing Target Definitions (LT) in Displaying Statistics for non-administrators or Listing Target Definitions in Administrative Functions for Adabas Review administrators.
The LU command is used by Adabas Review administrators to list the user profiles that have been defined. For more information, see the section Listing User Profiles in Administrative Functions.

The MENU command returns you to the Adabas Review main menu. It may be issued either by entering the command on the command line of any Adabas Review screen, or by pressing PF12.
The MSG command displays detailed explanations of Adabas Review messages. It may be issued on the command line of any Adabas Review screen.
The MSG command may be entered with or without specifying a message number. If a message number is not specified, Adabas Review provides information about the last message displayed.
The NAT command is used to exit Adabas Review and return the user to the Natural NEXT prompt, or the Natural main menu, depending on how the system is configured. The NAT command is not available in batch mode.


Adabas Review can monitor specific nucleus IDs separately when running in local mode through the NUCID command. The monitored Adabas nucleus must be a cluster nucleus (for example, you are running Adabas Cluster Services 7.4 or Adabas Parallel Services 7.4).
You can start the same report on each nucleus and then view them separately. To combine the data from a report that runs on multiple nuclei, you must create the report as a history report. The data from each nucleus will be combined only when viewing the history report.
To access a specific nucleus, you must set the target NUCID in a similar manner as setting the target DBID. The target DBID is shown at the top right of each Review screen and the NUCID is shown at the top left of each screen. If you work in local mode on a cluster database without specifying a NUCID, you access one NUCID at random.
To set a specific NUCID, you may choose the NUCID from a list of available NUCIDs or enter it directly. To enter a NUCID directly, enter NUCID nnnnn in the Review command line, where nnnnn is the nucleus ID.
You can also set the NUCID to zero by entering NUCID in the Review command line. In this case, the NUCID indicator will be removed from the top left portion of the screen and all Review transactions will be to the NUCID selected by the Adabas command dispatcher.
To set the NUCID by choosing one from a list of active NUCIDs, enter NUC LIST on the Review command line. Select a NUCID from the list by placing an X in the Sel column next the NUCID and press PF5 to accept the selection.
Report options describe additional processing aspects of the report such as whether it is a detail or summary report; whether it will perform physical command logging; or whether the data it collects will be written to the Adabas Review repository and stored as history data.
The OPTNS command is used within the Edit Report Definitions (ER) function to set these report options, logging options, and history options.
For more information, see the section Using the Report Options Screen in Maintaining Report Definitions.
The PH command is used within the List History Report (LH) function to purge accumulated history data. This command is issued from the "expanded" Adabas History Reports screen; the EX command must be issued first.
The PH command is entered on the selection line preceding the report name on the expanded History Reports screen.
For more information, see the section Purging Accumulated History Data in Managing History Data.
The PR command is used within the List Report Definitions (LR) function to purge reports. It is entered from the Report Definitions screen on the selection line preceding the report name.
For more information, see the section Purging a Report Definition in Maintaining Report Definitions.
The PS command is used within the List Started Reports (LS) function to purge the data accumulated by a started report. The command is entered from the Started Reports screen on the selection line preceding the report name.
For more information, see the section Purging Accumulated Data in Managing Report Output.
The PT command is used by Adabas Review administrators within the List Target Definitions (LT) function to purge target definitions. The command is issued from the Target Definitions screen on the selection line preceding the target's DBID.
For more information, refer to the section Deleting a Target in Administrative Functions.
The PU command is used by the Adabas Review administrator to delete a user profile. The command is issued from the list of user profiles on the selection line preceding the profile name.
For more information, refer to the section Purging a User Profile in Administrative Functions.
When you reactivate a suspended report, it resumes collecting data. The RA command is used to reactivate a suspended report. The command may be issued from the Started Reports (LS function) screen, and is entered on the selection line preceding the report name.
The command may also be entered on the command line of any screen within Adabas Review. If it is entered on the command line without a report name, Adabas Review attempts to reactivate the report you last accessed.
For more information, refer to the section Reactivating Reports in Saved and Started Reports.
The REFRESH or RF command is used to refresh a started report. The REFRESH command purges the accumulated data and restarts the report.
When making changes to a started report, you are prompted to refresh the report when you attempt to start the report again. This is because the name of a report currently accumulating data matches the name of the report you are attempting to start; Adabas Review does not permit reports with duplicate names.
The RF command may be issued from the Started Reports (LS function) screen, and is entered on the selection line preceding the report name.
The RF or REFRESH command may also be entered on the command line of any screen within Adabas Review. If it is entered on the command line without a report name, the command is applied to the report you last accessed.
Because the REFRESH command executes a purge of the accumulated data, a window is displayed, prompting you to confirm the purge request.
For more information refer to the section Refreshing Reports in Saved and Started Reports.
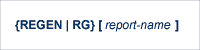
The REGEN or RG command is used to regenerate the display program that Adabas Review creates when a report is saved.
The RG command may be issued from the Report Definitions (LR function) screen, and is entered on the selection line preceding the report name.
The REGEN or RG command may also be entered on the command line of any screen in Adabas Review. If it is entered on the command line without a report name, the command is applied to the report you last accessed.
For more information, refer to the section Regenerating a Display Program in Maintaining Display Programs.
If you have used the CH command to compress accumulated history report data and the command processing terminates abnormally for any reason, the history file will be locked against further compression attempts for any report by any user.
To remove this lock, and to clean up any unusable compressed data, enter the following on the command line of the Adabas Review main menu:
RESET HISTORY FILE
If history records were lost as a result of the abnormal termination, the reset program will inform you of this. For more information, see the section Compressing Accumulated History Report Data in Managing History Data.
Report processing rules determine how field values are selected for your report. These rules restrict the accumulated data to certain values or conditions.
The RULES command is used within the Edit Report Definitions (ER) function to specify and modify processing rules for a report.
For more information, see the section Using the Report Processing Rules Screen in Maintaining Report Definitions.
When a report definition is saved, it is written to the Adabas Review repository and a Natural display program is generated.
The SAVE command is used within the Edit Report Definitions (ER) function to write the report to the Adabas Review repository. To save a report, either enter the SAVE command on the command line of the Edit Report screen or press PF5.
For more information, see the section Saved and Started Reports.

The SETFILE or SET command allows you to access a Adabas Review repository that is different from the one you are currently accessing.
The Adabas Review repository contains user profiles, report definitions, and history data. Depending on how Adabas Review is configured, you may have more than one Adabas Review repository.
The SETFILE or SET command may be issued from any Adabas Review screen, by entering the command on the command line.
A window is displayed, showing the DBID and FNR of the Adabas Review repository you are currently accessing. To change Adabas Review repositories, type the new DBID and FNR over the existing information and press ENTER.
If you enter the information correctly, you receive a message that the Adabas Review file was set successfully.
If you enter an incorrect DBID or FNR, you receive a message indicating the error, and the change is not made.
The SORT command is used after the VIEW command is issued to dynamically change the setting of the "Display By" report option. The following settings are available within the SORT command:
| Setting | Sorts the data in . . . | Equivalent to "Display by ..." |
|---|---|---|
| Account (Ascend) | ascending order by control break; | SORTED |
| Number of commands | descending order by the "Number of Commands" column; | USAGE |
| First summary field | descending order by the first summary field in the report; | SUMFIELD |
| Account (Descend) | descending order by control break; | SORTEDDE |
| Date and Time | ascending order by the start date and time of the control break interval; | DATETIME |
| Physical Sequence | the physical sequence in which it was collected. | LINEAR |
You may issue the SORT command by first issuing the VIEW or VW command to display the results of a started report.
On the command line, enter the SORT command or press PF2. A window is displayed, listing the settings. The current setting is indicated by an arrow (>).
You may change the sort setting by placing the cursor on the setting you want to use and pressing ENTER. The display of the report results changes according to the sort setting you select.
For more information, refer to the section Using the SORT Command in Managing Report Output.
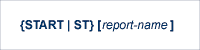
A report must be started so that it can accumulate data. The ST or START command is used to start a report. It first executes the SAVE command to save the report definition and generate the display program. A started report can be suspended, reactivated, closed, or refreshed from the Started Reports screen (LS function).
The ST command may be issued from the Report Definitions (LR function) screen, by entering the command on the selection line preceding the report name.
The ST or START command may also be issued from any screen of Adabas Review. If it is issued without a report name, Adabas Review attempts to start the report you last accessed.
For more information, refer to the section Saved and Started Reports.
Note:
If you are trying to start a report in hub mode using batch Natural
, you must issued the MENU HUB=hubid command prior
to issuing the START command for the report.

By suspending a started report, you stop it from accumulating any further data; however, the data already accumulated is retained. The RA (reactivate) command is used to reactivate a suspended report.
The SU command is used to suspend a started report. It may be issued from the Started Reports screen (LS function) by entering the command on the selection line preceding the report name.
The SU command may also be issued from any screen within Adabas Review. If it is issued without a report name, Adabas Review attempts to suspend the report you last accessed.
For more information, refer to the section Suspending Reports in Saved and Started Reports.
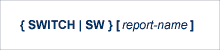
The SW or SWITCH command is used to switch to the next command log file defined for a specific report before the current log file is filled. This command is only valid for reports that have Adabas Review command logging turned on.
If the maximum number of command log files designated for that report is exceeded by this request, Adabas Review will begin writing over the file that contains the oldest data.
Note:
This command does not negate normal command file switching, nor does
it switch the command log file for any report other than the one
selected.
The SW command may be issued from the Started Reports (LS function) screen by entering the command on the selection line preceding the report name.
The SW or SWITCH command may also be issued from any screen of Adabas Review. If it is issued without a report name, Adabas Review attempts to switch to the next command log file for the report you accessed last.
For more information, see the section Switching Command Log Files in Saved and Started Reports.
The TECH command is used to display Adabas Review environmental and maintenance information. This function is useful in determining the environment in which Adabas Review is executing, and in determining which ZAPs have been applied.
For more information, see the section Accessing Technical System Information in Getting Started.
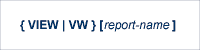
The VIEW or VW command allows you to view results of a started report or the data accumulated by a history report. The VW command may be issued from any list function screen (Report Definitions, Started Reports, or Adabas History Reports) on the selection line preceding the report name.
The VW or VIEW command may also be issued from any screen within Adabas Review. If it is issued without a report name, the command is applied to the report you last accessed.
For more information, refer to the section Viewing Report Results in Managing Report Output.