Universal Messaging Scheduling: Editor
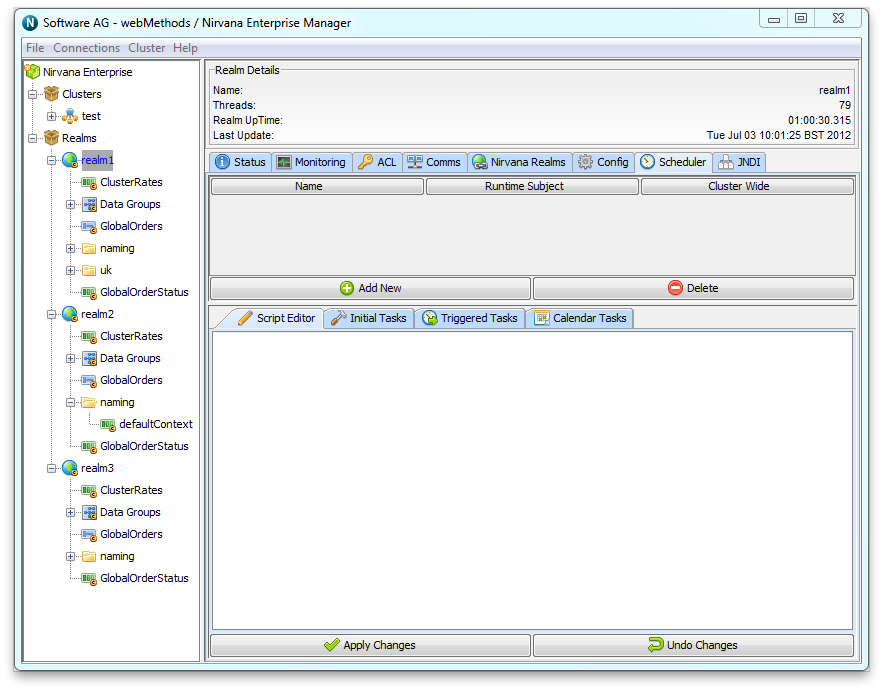
The Universal Messaging Enterprise Manager provides a scheduler panel that enables the user to view, add, delete and edit scheduler scripts. To view the scheduler panel, select the realm from the namespace and click on the 'Scheduler' tab.
The scheduler panel displays all scripts that have been deployed to the server within a table. This table shows the name of the schedule, as defined within the script, the user name of the person the script will be executed using (i.e. the user name of the Enterprise Manager user who deployed the script, as well as whether the script is to be deployed cluster wide (i.e. to all realms within the cluster node).
The image below shows the scheduler panel with no scheduling entries.
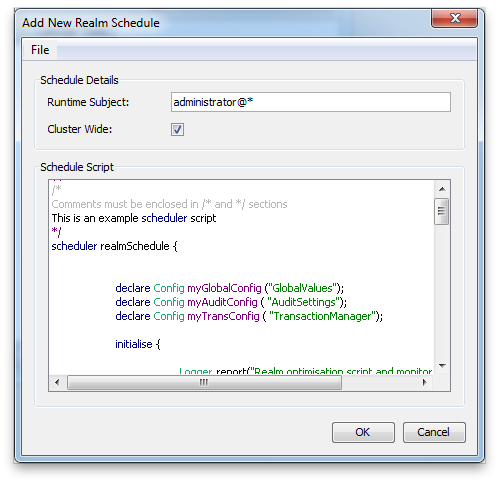
The button labelled 'Add New' when clicked will display a dialog containing a script editing panel that has been designed to assist with the creation of scheduling scripts. The scheduling grammar is discussed in more detail in the writing scripts section (see
Universal Messaging Scheduling : Writing Schedule Scripts), as well as the calendar, triggers and tasks sections (see
Universal Messaging Scheduling : Calendar Triggers Schedules,
Universal Messaging Scheduling : Conditional Triggers and
Universal Messaging Scheduling : Tasks). The image below shows the script editor panel.
Once your script is complete, in order to deploy the schedule to the server, you need to click on the 'OK' button. Once clicked, if there are any errors or problems with the script, you will be presented with a dialog similar to the image below.
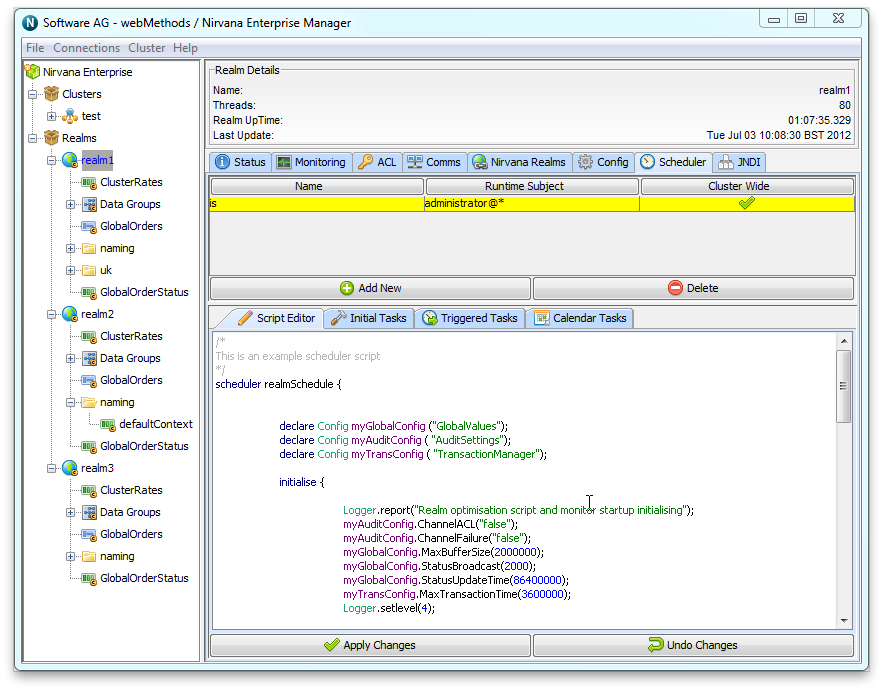
If the script does not contain any errors, the script editor panel will close and the new scheduler script will then appear within the scheduler table. Clicking on the newly created scheduler within the table will enable you to delete, vew and edit the schedule. The image below shows the newly created scheduler script once selected. There are 4 scheduler panels available for each scheduler selected from the table. Each panel is represented by a tab on the bottom half of the main scheduler panel. Each of these panels is discussed below.
Script Editor Panel
The script editor panel is denoted by the tab labelled 'Script Editor' and provides the same editor view found when you first add a new script. This panel is a simple editor pane that enables you to modify the scheduler triggers and tasks. The image below shows this panel selected from the available tabs.
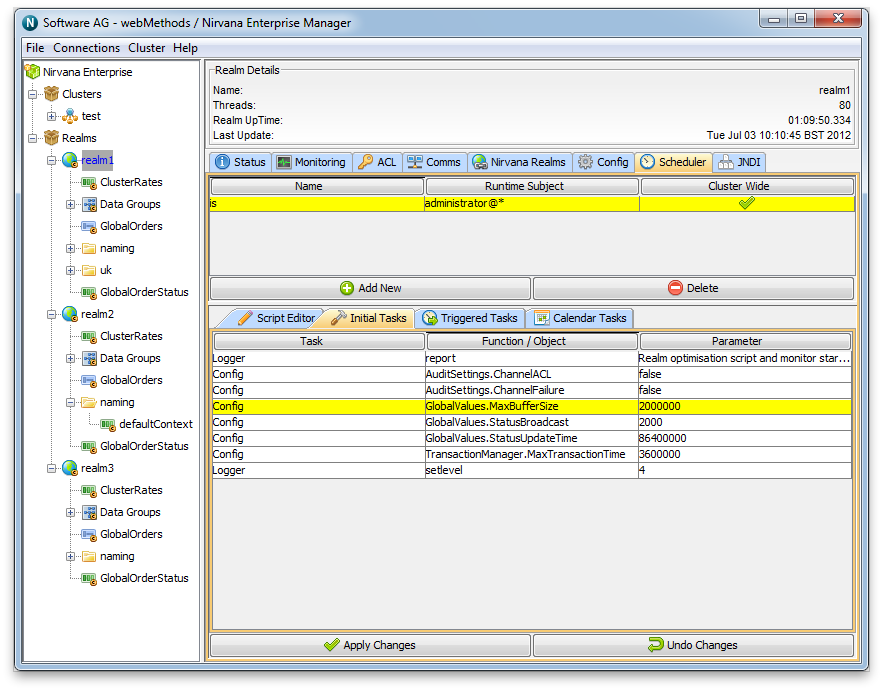
Initial Tasks Panel
The initial tasks panel is denoted by the tab labelled 'Initial Tasks' and represents those tasks defined within the initialisation section of the scheduler script. Each initial task is represented as a row in a table with 3 columns. Column 1 labelled 'Task' is the task object (see
Universal Messaging Scheduling : Tasks). Column 2 labelled 'Function / Object' represents the details of the task, fo example, if the task was to purge a channel, column 2 would show 'purge'. Column 3 labelled 'Parameter' shows any parameters listed in the scheduler script for the given task. The image below shows an example of the Initial Tasks tab being selected.
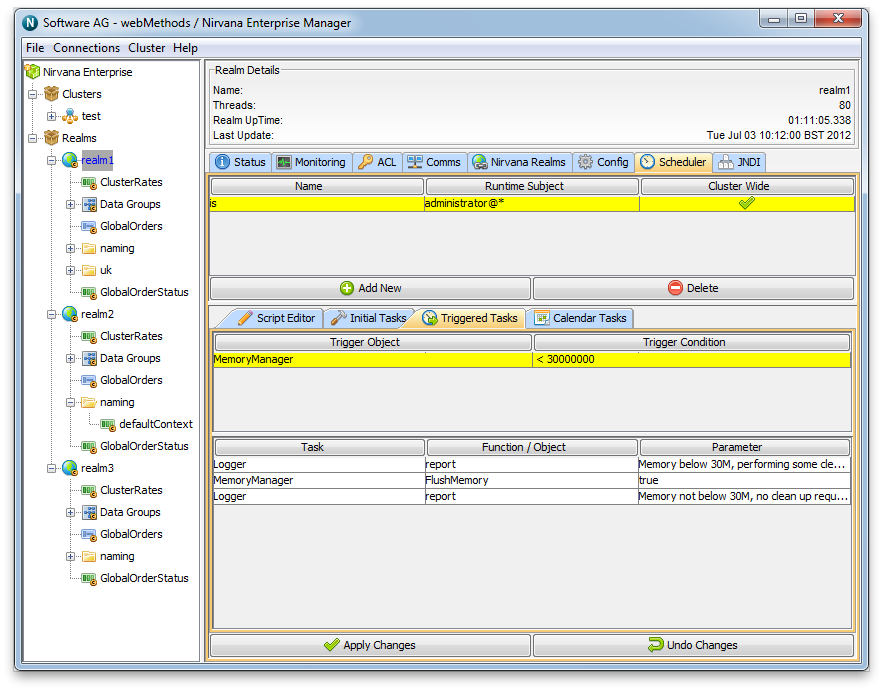
Triggered Tasks
The triggered tasks panel is denoted by the 'Triggered Tasks' tab. This panel displays those tasks that are triggered based on some conditional triggers. Each conditional trigger is shown as a row in the table within this panel. Selecting a trigger from this table will then display the tasks to be executed when this trigger is fired. Each task is shown in a table similar to that found in the Initial Tasks panel. The image below shows the triggered tasks panel being selected.
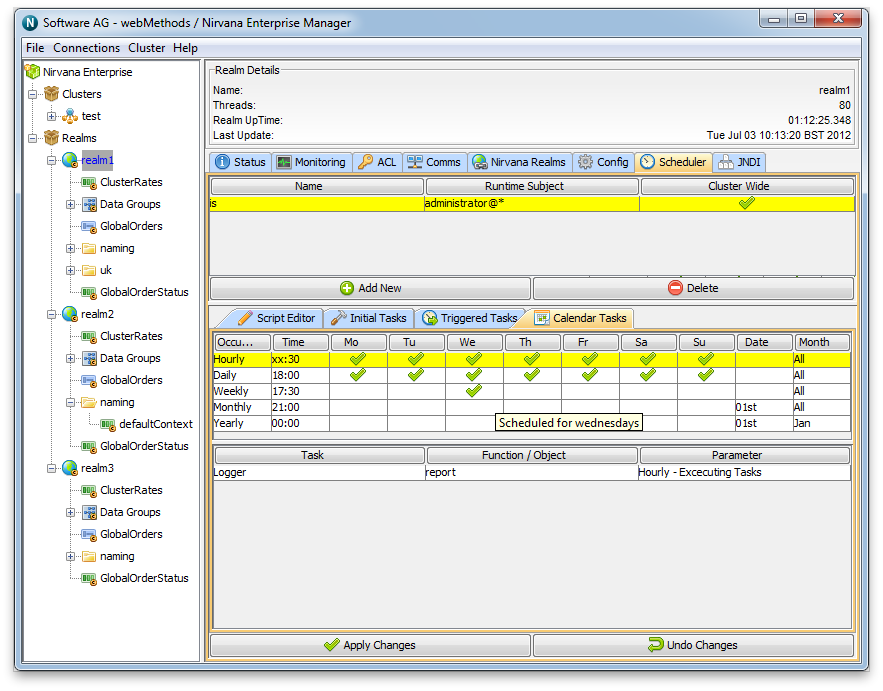
Calendar Tasks
The final panel is the calendar tasks panel and is denoted by the 'Calendar Tasks' tab. This panel shows the tasks that are scheduled to run at specific times. Each calendar task is shown as a row within a table. This table has a total of 11 columns. The first 2 columns show the frequency and time. The frequency is either 'Hourly', 'Daily', 'Weekly', 'Monthly' or 'Yearly' and the time is specified as HH:MM. For hourly schedules, the HH (hours) will be displayed as XX which denotes every hour.
Columns 3 to 9 represent which days of the week the task will run, starting from Monday ('Mo'). A green circle means the task will run on that day. The last 2 columns represent the Day and Month the task will run.
Selecting one of the rows in the table will display the actual tasks that will be executed in a similar table to that found in the triggered tasks panel. The image below shows the calendar tasks panel with a task selected.
Any changes made to the schedule within the script editor panel can either be deployed to the realm server by clicking on the 'Apply Changes' button or discarded by clicking on the 'Undo Changes' button.
Schedule entries can be deleted from the server by selecting them from the main scheduler table and clicking on the 'Delete' button.