Integration with JNDI
Universal Messaging supports integration with JNDI through its own provider for JNDI. Universal Messaging's provider for JNDI enables clients using Universal Messaging Provider for JMS to locate references to JMS administered objects.
As with all Java APIs that interface with host systems, JNDI is independent of the system's underlying implementation. In the case of the Universal Messaging product, the JNDI provider stores object references in the Universal Messaging channel /naming/defaultContext, which is the channel representing the Universal Messaging Initial Context for JNDI, and locates the references to the objects using a channel iterator. Note that if a realm is part of a cluster, the channel will be created on all cluster realm servers. This ensures that any object references bound into the context are available on each realm server in the cluster. See the section “Creating The Initial Context” for information about how and when the channel for the Initial Context is created.
Setting Up the Context and Connection Factories for JNDI
The provider for JNDI can be managed using the Enterprise Manager tool, by selecting any realm node from the namespace tree, and then clicking on the JNDI tab in the right hand panel. The JNDI panel enables the creation of the provider and Initial Context for JNDI, and of TopicConnectionFactory and QueueConnectionFactory references for JMS, as well as references to Topics and Queues.
Creating The Initial Context
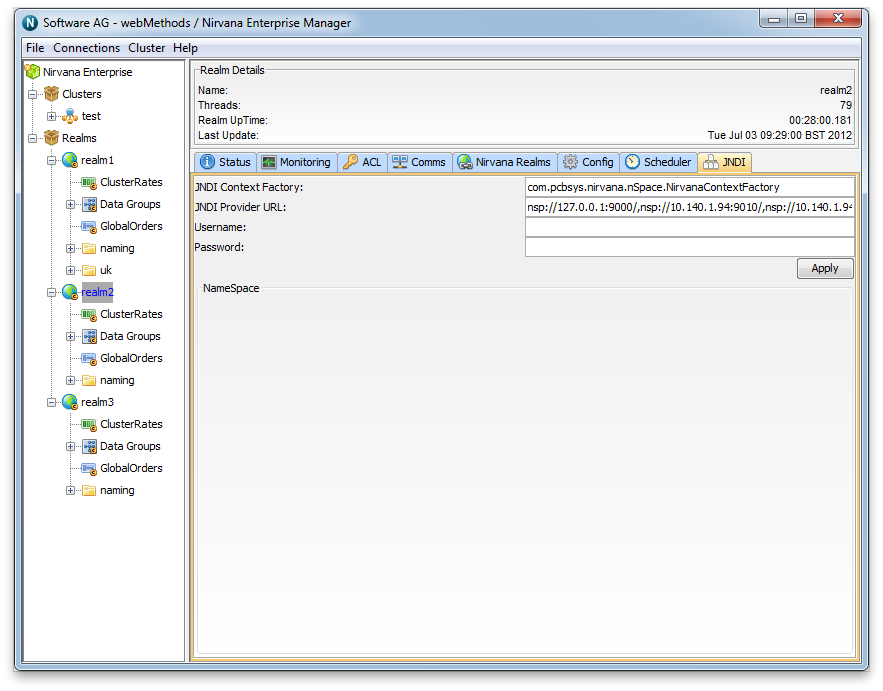
When you select a realm node from the namespace tree, one of the tabs on the right hand side of the Enterprise Manager will be labelled 'JNDI'. Selecting this tab will display the default JNDI panel for a realm. At this point there will be nothing drawn within the JNDI NameSpace tree.
The image below shows the default JNDI panel:
The JNDI panel at this point does not contain any JNDI context information (as can be seen by the empty Namespace section of the panel).
By default, the 2 text fields labelled JNDI Context Factory and JNDI Provider URL will already contain information:

The JNDI Context Factory will default to
com.pcbsys.nirvana.nSpace.NirvanaContextFactory, which is the class that provides the Universal Messaging context factory functionality for JNDI.
The JNDI provider URL is the RNAME used when creating each JNDI connection reference. Note that for a realm server that is part of a cluster, the Provider URL for JNDI will be a comma separated list of the RNAMEs for each realm server that is a member of the cluster. This ensures that not only will the JNDI context be the same within all cluster realms, but also that any JMS client using this Universal Messaging Context Factory will be able to use any of the realm servers specified in the Provider URL.
To actually create the Initial Context, you must click the Apply button.
The Initial Context uses the (potentially clustered) Universal Messaging context channel to store all JNDI references. This channel is called /naming/defaultContext. The channel is not created when the Initial Context is created; instead, the channel is created when the first client attempts to perform a JNDI bind using the Initial Context. Full permissions are assigned to this first client and to all other users and clients who wish to use the channel.
Removing/destroying the Initial Context is as simple as deleting the /naming/defaultContext channel. This will of course result in the loss of all existing JNDI references (so make sure you don't accidentally delete this channel).
If the Initial Context no longer exists, then clicking Apply on this screen will recreate it (though it will not contain any of its previous JNDI entries/references). Subsequently, the /naming/defaultContext channel must also be recreated, as described above.
Viewing the JNDI Namespace
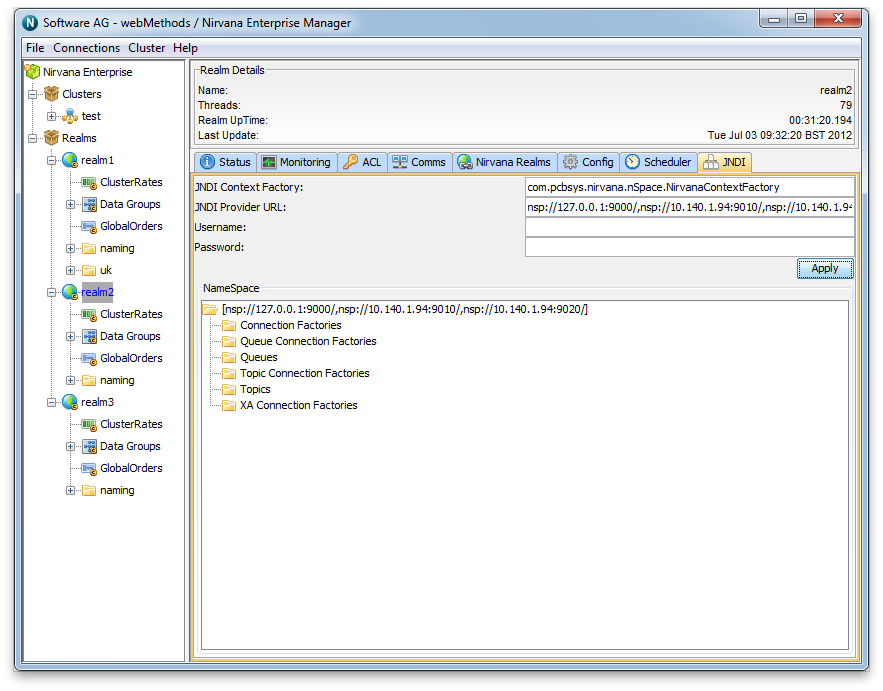
Whenever you click Apply on the JNDI Panel, Enterprise Manager will enable display of the JNDI Namespace. The JNDI Namespace is displayed as a tree structure within the Namespace section of the panel. The root of this tree will be the JNDI Provider URL (in the case of a cluster, the comma-separated list of RNAME values for each server in the cluster). Double clicking on the root node in the JNDI namespace will render 6 "folders":
Connection Factories
Queue Connection Factories
Queues
Topic Connection Factories
Topics
XA Connection Factories
The image below shows this view after the Apply button has been clicked and the JNDI namespace tree has been double-clicked to expand it:
Creating Topic and Queue Connection Factories
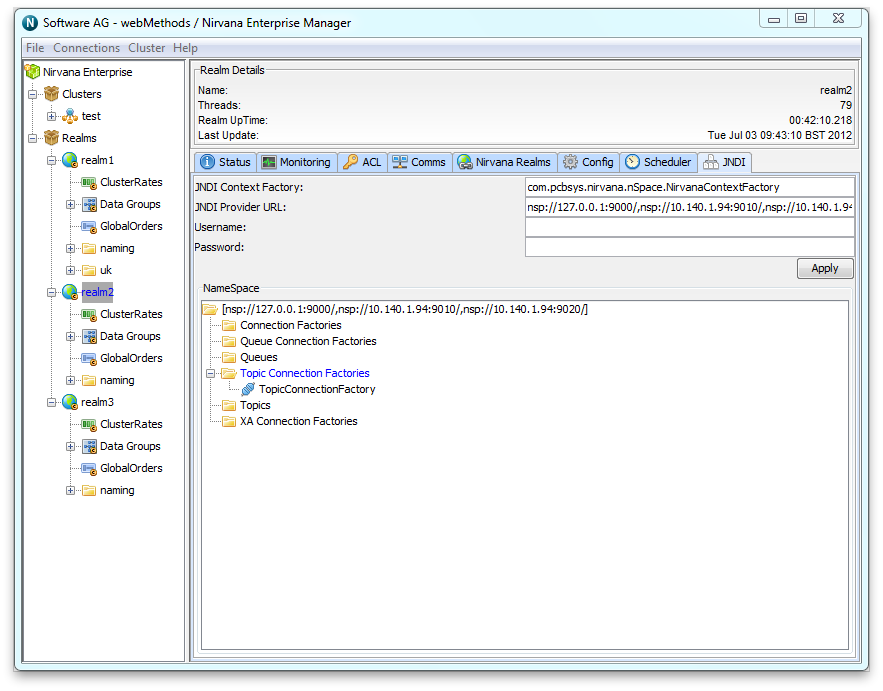
In order to allow JMS clients to use the Universal Messaging Context Factory to reference objects via JNDI, we first of all need to create Topic and Queue connection factories. To do this, right click on the tree node labelled Topic Connection Factories and select the menu option New Topic Connection Factory. This will display a dialog box allowing you to enter the name for the connection factory. Enter any name (in this example, we will use the name TopicConnectionFactory). Click on OK when you've entered the name, and you will see that a new node will have been created under the Topic Connection Factories folder with the same name as you entered. The image below shows the JNDI namespace with a newly created topic connection factory:
The Topic Connection Factory object you just created is actually stored as an event, published onto the /naming/defaultContext channel. This event is what will be referenced by JMS clients when they attempt to find the details for the connection factory.
When JMS clients use the Universal Messaging Initial Context for JNDI, they also reference the topics and queues from the same Initial Context. In order for these clients to access these objects we need to create references to each topic and queue. Creating such references will also create the underlying channel or queue if it does not already exist; note that channels or queues created in this way will have the same default permissions as channels or queues created manually.
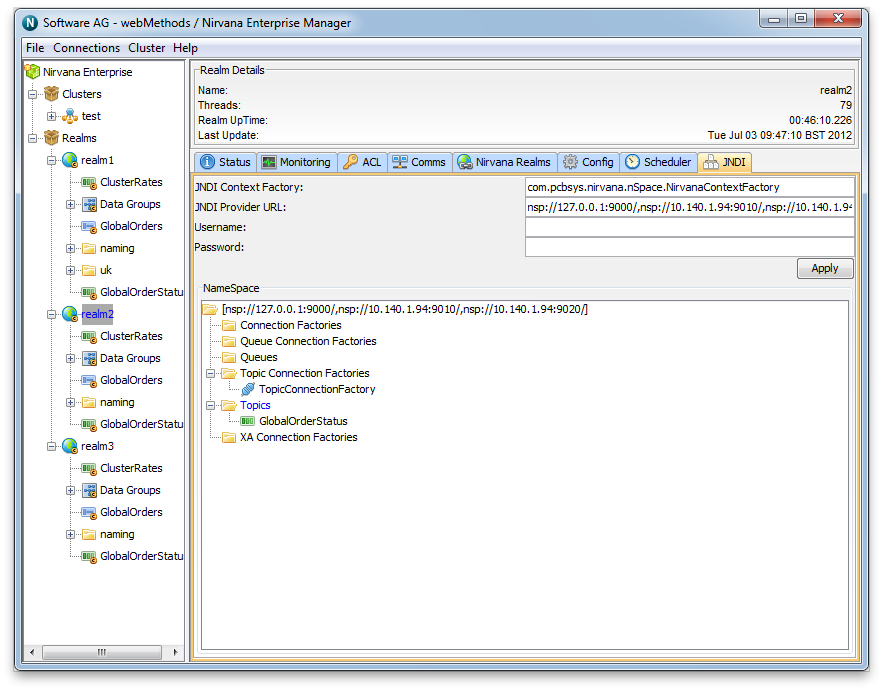
In this example, we will add a new topic into the JNDI namespace that corresponds to a Universal Messaging channel that already exists as a cluster channel. To do this, first, right-click on the folder called Topics within the JNDI namespace, and select the menu option New Topic. If we enter the name /customer/sales, then a new object will be created under the Topics folder called /customer/sales. This is because, under the covers, a corresponding event was published to the/naming/defaultContext channel. JMS clients can thus look up the reference to this topic (channel) and begin using it within their application. The following image shows the newly created Topic within the JNDI namespace for the existing topic /customer/sales:
Once we have created both the topic connection factory and the topic, we can snoop (see
Channel Snoop) the
/naming/defaultContext channel to view the individual events that represent these references. If you click the
/naming/defaultContext channel within the Enterprise Manager namespace, then the
Snoop panel, and click
Start, you will see the events representing the JNDI entries that have been created. By selecting any of the events you will see the content of each event on the channel and the corresponding JNDI context information given to the JMS applications that will require it.
The image below shows an example of the Topic Connection Factory created earlier using the JNDI panel: