Multicast Configuration
Setting Up Multicast for Data Group Delivery
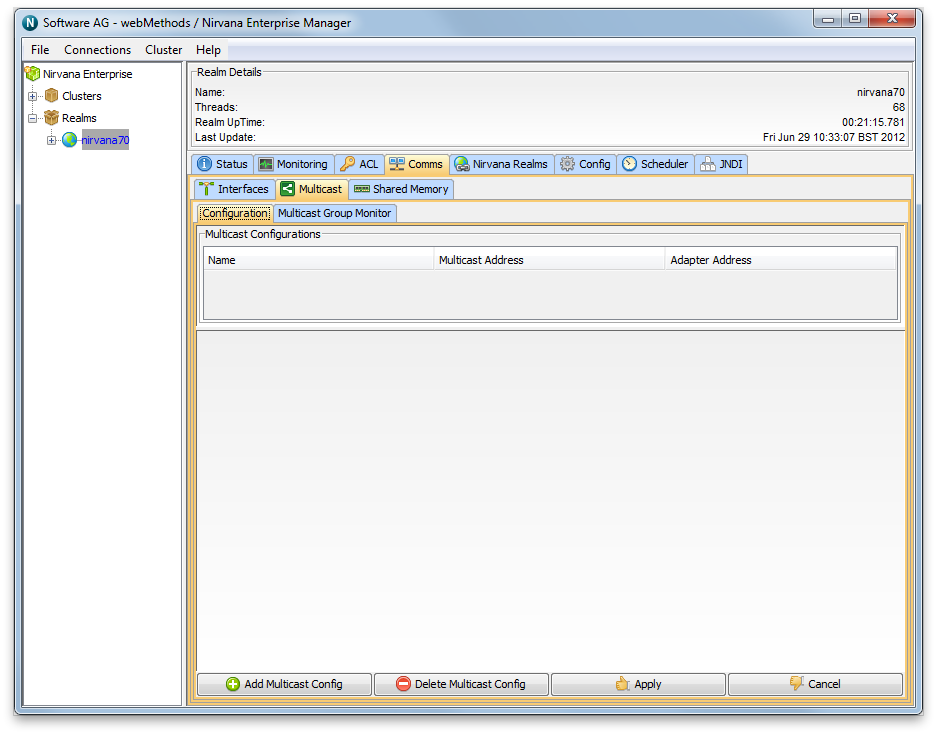
The first step in configuring a Universal Messaging Realm for Multicast Data Group delivery is to create the Multicast adapter configuration. Once you have the information described in the previous section, and your Universal Messaging realm is running, start the Enterprise Manager and connect to your realm. Once connected, select the realm node from the tree, and choose the Multicast tab in the right hand panel, as shown below.
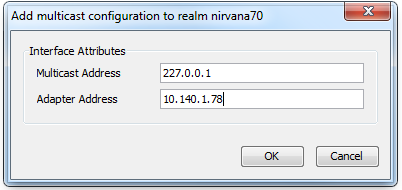
Clicking on the "Add Multicast Config" button opens a dialog that enables you to enter the Multicast IP Address, as well as the Network Adapter Address of your multicast configuration, as shown below.
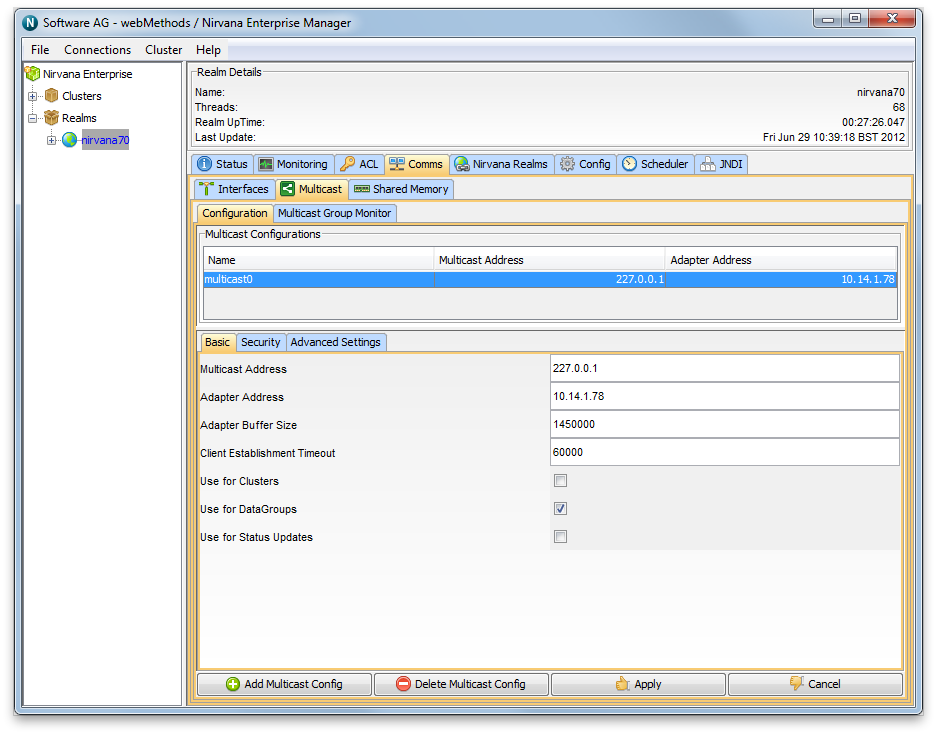
When you click on ok in the dialog, the new Multicast configuration will appear in the table. You then need to select that the multicast configuration is to be used for Data Groups by clicking on the "Use for DataGroups" check box. Then click the "Apply" button and the configuration will be sent to the server. The completed multicast Configuration is shown in the table as seen in the image below.
Now you have created the Multicast configuration, you need to create your Multicast enabled Data Groups. To do this, simply click on the Data Groups node in the tree, and right click "Create Data Group". This will open up the standard create Data Group dialog but with an additional check box for enabling Multicast. This is shown in the image below.
Now your data group is ready to be used for Multicast Delivery. If you are familiar with Universal Messaging Data Groups, you will be familiar with our example Data Group programs which you can use to test this out, or you may have your own Data Group setup that you can use. If your Data Groups are created programmatically, then the key thing to remember is that when you call the nSession.createDataGroup, you now need to also pass in an additional boolean that marks the Data Group as Multicast enabled.
Setting Up Multicast for Cluster Inter Realm Communication
If you have a clustered setup, and you wish to setup Multicast between your realms for the inter realm communication, the setup is the same, however on each realm that you create a Multicast Configuration, the configuration itself needs to set the "Use for Clusters" checkbox. The Multicast address can be the same for all realms, or you can choose a different Multicast Address per realm. With this feature enabled, each realm will know the Multicast address for each of the other realms in the cluster and will listen on these addresses for inter realm cluster communication.
Advanced Multicast Settings
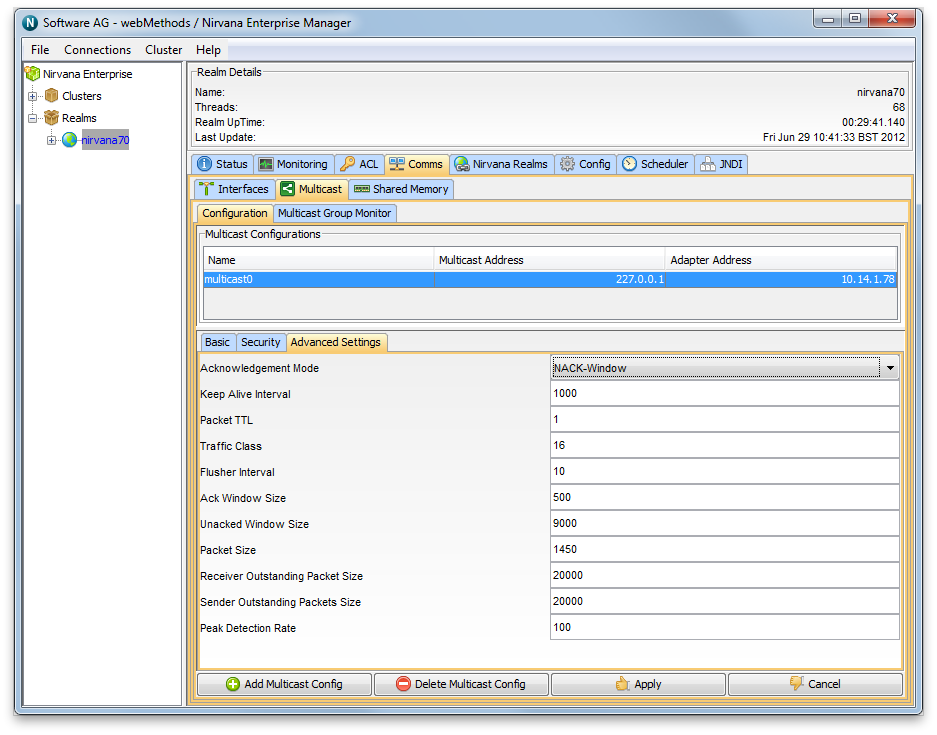
The default settings for the Multicast configurations you create are aimed at providing the lowest possible latency. With this in mind, the configuration is such that the multicast client will ack every 1 second, and the server will maintain a list of un-acked events (default 9000). Should the publish rate exceed 9000 per second, you may notice that the delivery rates might be quite irregular. This is down to the fact that the client will only acknowledge every 1 second, and so the server will automatically back off the delivery until it receives an acknowledgement from the client and can therefore clear its unacknowledged queue. If this happens, you can change both the Unacked Window Size to be > 9000 and the Keep Alive Interval (ack interval) to be less than 1 second (see image of the Advanced Settings tab below). In future releases of Universal Messaging 7.0 we will be changing this configuration so that there can be different modes of delivery where you have a choice of either no acks, therefore the publisher is free to move as fast as it can regardless of any loss, as well as a more guaranteed level of service where events are acknowledged.


