This document covers the following topics:
Using the XML Tester you can send an XML document to the EntireX XML/SOAP Listener.
The XML Tester supports drag-and-drop editing, and you can restore the last used session within a workspace. If the mapping file has changed, the views for request and response are cleared.
The XML Tester is provided by the EntireX Workbench as an Eclipse View and can be opened from the XML Mapping Editor or XML/SOAP Wrapper. It is also accessible from . The following test modes are available:
Quick Test (Using the Java Interface)
HTTP Test (Using the EntireX XML/SOAP Listener)
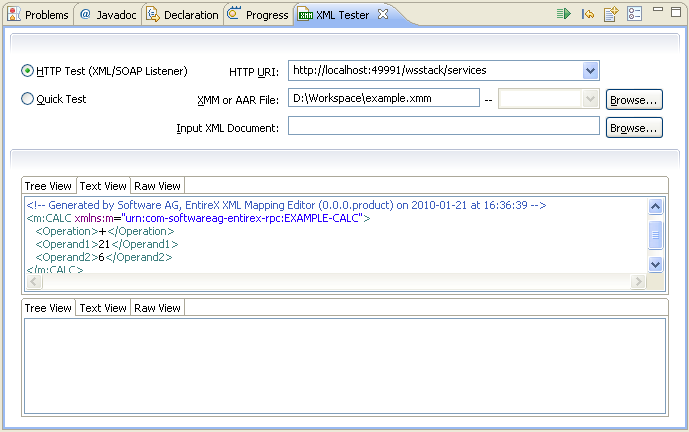
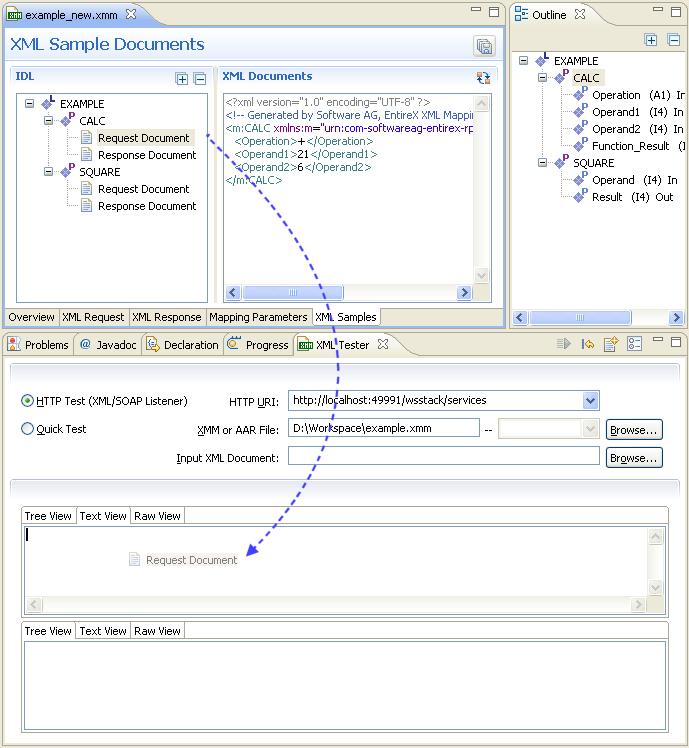
See sample screen and description of options below.
| Name | Type | Description |
|---|---|---|
| Quick Test | Check box | Check this box to test the Java interface of the XML/SOAP Runtime. If checked, the Settings action will open the Quick Test Details dialog. |
| XMM or AAR File | Text field | The AAR file, which contains one or more mapping files (XMM files), or the XMM file, which contains the mapping information. Accept absolute path. If the file does not exist, the action Create Sample XML... is disabled. When the file is found, the Broker ID and Server Address are read and the corresponding fields in the Quick Test Details dialog are filled. |
| Combo box |
Behavior depends on content of field XMM or AAR File:
|
|
| Browse... | Button | Open a File open dialog to select the XMM or AAR file from the file system. |
| HTTP Test | Check box | Check this box to test the HTTP interface (EntireX XML/SOAP Listener) of the XML/SOAP Runtime. If checked, the Settings action will open the dialog. |
| HTTP URI to contact | Combo box | URI of the EntireX XML/SOAP Listener. Will store the last ten called URLs. |
| Input XML Document to send | Text field | File name of the XML Document to be sent. |
| Browse... | Button | Open a File open dialog to select the XML Document file from the file system. |
| Create Sample XML... | Action
 |
Open the dialog, see below. If the text file for the XMM file does not contain a valid file path, the button is disabled. |
| input - area | Tree/Text/Raw view | Input field for the XML data to be sent to the Broker, this area is filled with the text/tree representation of the selected file, see Input XML Document to send. If empty, the Play action is disabled. |
| output - area | Tree/Text/Raw view | Output field for the XML data response from the Broker. By default, the response will be displayed in platform encoding. But if the XML data request contains a valid encoding in the XML declaration, this encoding will be used and a tooltip text will inform you of this. This view will also display the status and errors. |
| Settings | Action
 |
Open either Quick Test Details or HTTP/HTTPS Parameters dialog. See Quick Test and HTTP Test above. |
| Play/Stop | Action
 / /
 |
Start the test. This action is disabled if there is no text in the input - area. |
| Reset | Action
 |
Reset the input and output areas. |
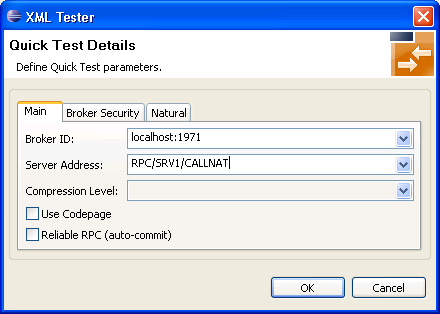
Use the Quick Test Details dialog to change the Quick Test parameters. The Broker ID, Server Address, the Security Settings, the Natural Settings can be modified for this XML Tester session. Compression Level is a non-editable box that contains all possible values. Broker ID and Server Address are editable dialog boxes and hold the last five used values. Use the Reliable RPC check box to turn reliable messaging on or off (mode is AUTO-COMMIT). See Reliable RPC.
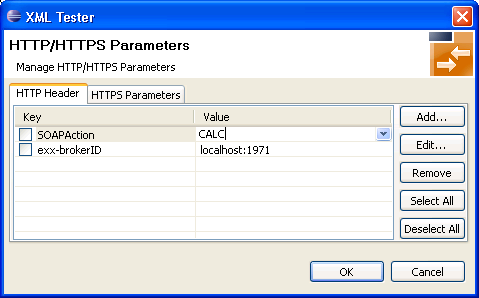
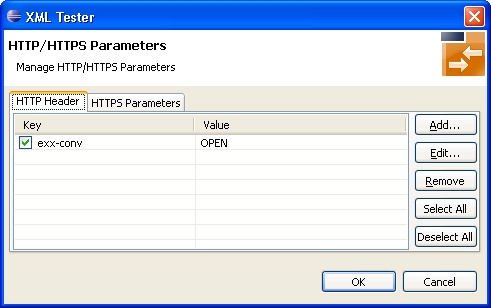
With the HTTP Header tab you can add more information for the call and set the SOAPAction. An entry must be selected to be active. The Value box holds the last five used values for the corresponding property. It is editable, which means you can change a value by clicking directly in the table.
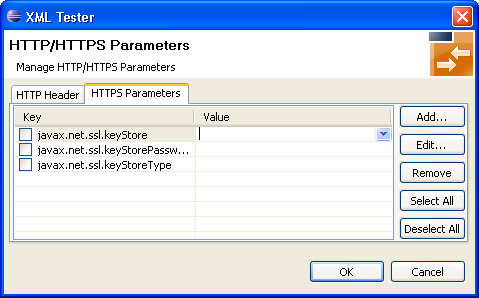
With the HTTPS Parameters tab you can set parameters required for an HTTPS connection. An entry must be selected to be active. The Value box holds the last five used values for the corresponding property. It is editable, which means you can change a value by clicking directly in the table.
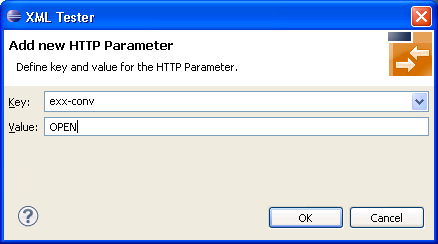
With the Add new HTTP(S) Parameter dialog you can add a new HTTP or HTTPS parameter. All Software AG's predefined HTTP parameters are listed in the Key box. For HTTPS, the Key box contains predefined properties for HTTPS communication.
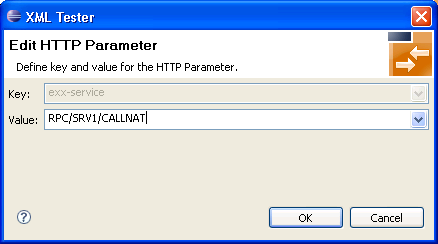
With the Edit HTTP(S) Parameter dialog you can change the value of a property. The Value box is editable and holds the last five used values. The Key value for all predefined properties cannot be modified.
Using the XML Tester you can send an XML document to the EntireX XML/SOAP Listener.
 To open the XML Tester
In perspectives other than EntireX, choose , in other perspectives, choose .
Or:
Choose Window > Open Perspective > Other...
and select EntireX Perspective. The XML Tester
view is part of this perspective.
Or:
In the XML Mapping Editor, switch to the
Overview page, choose Quick Test or
HTTP Test in the testing section.
Or:
In the XML Mapping Editor, switch to page XML
Samples, select one document, choose
XML Tester in the context menu.
To run a test
Load the mapping information. In field XMM or AAR File, enter the absolute path to the AAR or XMM file that is being tested (you can use the button or a drag-and-drop operation). If you enter an AAR file, all mappings contained in the archive are listed in the combo box next to the XMM or AAR File field.

Select the testing interface (Java or HTTP):
Java interface: the XMM or AAR File field must contain the full path and name of an XMM or AAR archive. Choose the Quick Test option to use this interface.
HTTP interface: enter the name of the URI of the running EntireX XML/SOAP Listener. Choose the HTTP Test option to use this interface.
Complete the input area:
Type your XML document.
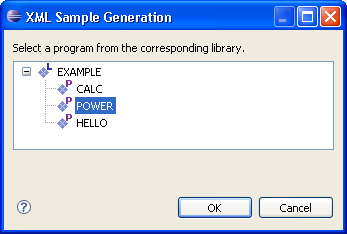
Use the button and follow the dialog.
Note:
If the IDL file contains only one library with one program, this
is used for the sample generation without opening the dialog.
Example dialog:
Load sample document, using drag-and-drop operation on the sample page of XML Mapping Editor or file browser.
The following tabs are available:
The Text View tab will try to color the request syntactically, making the XML easier to read.
The Raw View tab is initially empty. When the first request is sent, it is filled with the exact message sent together with information on the request method and the used HTTP headers with their values.
From then on the Raw View is displayed and is updated with the last sent request.
Select an existing XML document (you can use the button) and enter it in the field Input XML file to send.
If the testing interface is Java, the action will open the Quick Test Details dialog.
The dialog contains the three tabs with the following settings:
Main
Broker Security
Natural Security
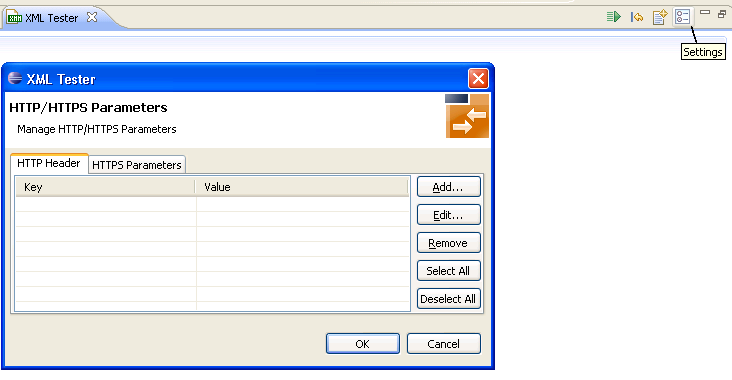
If using option HTTP Test, the action will open the HTTP/HTTPS Parameters dialog. The dialog contains two tabs with settings for the HTTP call:
HTTP Header
HTTPS Parameters
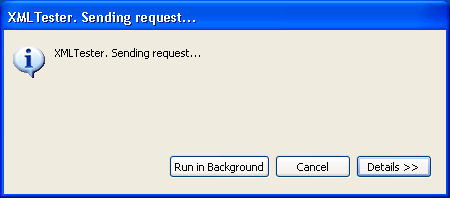
Send the request by choosing action Play. If the testing interface is HTTP, the Sending request dialog appears. Here you have several options:
hide the dialog by pressing Run in Background button
cancel the request. This will terminate the session with the server
show details about all running Eclipse jobs
A progress bar on the Eclipse status bar shows to indicate that the request is being sent.
If you used the Quick Test option, you cannot cancel the request.
When a response is received, it is displayed in the output area. Errors are also displayed in the output area.
The Text View tab displays the XML response as formatted and syntactically colored text. The Raw View tab displays the response "as is". Information on the used request method, response code and HTTP headers with their values is displayed for the XML response.
To use the XML Tester with conversational RPC
Open Settings.
Add key exx-conv and set value to "OPEN".
Press .

Select exx-conv.
Press .
Send the request.
The response contains the exx-xml-sessionID used for conversational communication. This parameter is also added to HTTP/HTTPS parameters for the next call(s) automatically.
The parameter exx-conv is deactivated simultaneously.
<!-- snippet with exx-xml-sessionID in response document -->
     <axis2ns1:EntireX xmlns:axis2ns1="urn:com.softwareag.entirex.xml.rt">
        <exx-xml-sessionID>XML610C044029044C05</exx-xml-sessionID>
     </axis2ns1:EntireX>
<!-- snippet -->
To finish the conversation, open the settings again, activate the exx-conv and set its value to "COMMIT" or "BACKOUT".
The conversation is closed with the next sent call.