This document describes how to use the Integration Server Wrapper.
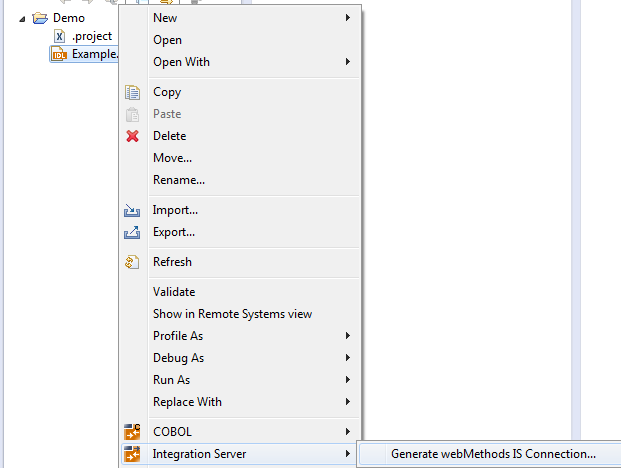
 To start the Integration Server Wrapper wizard
In the context menu of a Software AG IDL file, choose .
This starts the wizard with a list of existing Integration Server Wrapper connections.
Note:
If the selected IDL file is not valid because of a syntax error,
an error dialog comes up and the wizard does not start.
If you are using the wizard for the first time without any predefined Integration Server connections, continue with Step 2a: Create a New Integration Server Connection.
Or:
If Integration Server Connections are already defined, or if you want to communicate with
an additional Integration Server, continue with
Step 2b: Use an Existing Integration Server Connection.
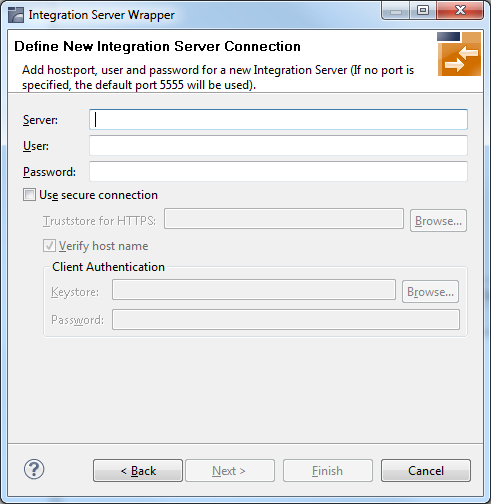
To create a new Integration Server connection
Define the new Integration Server connection on the wizard page.
Notes:
Choose and continue with Step 3: Select the Connection Type.
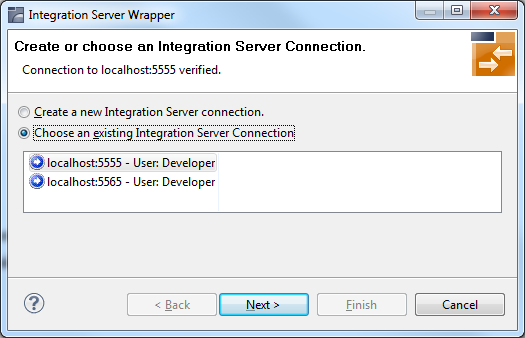
To use an existing Integration Server connection
Select Choose an existing Integration Server Connection and an Integration Server connection from the list.
The selected connection is verified by a
ping command. If the response is valid, the
button is enabled. If invalid, an error message
is displayed.
Continue with Step 3: Select the Connection Type.
To create an additional Integration Server connection
Select Create a new Integration Server Connection and continue with Step 2a: Create a New Integration Server Connection.
Note:
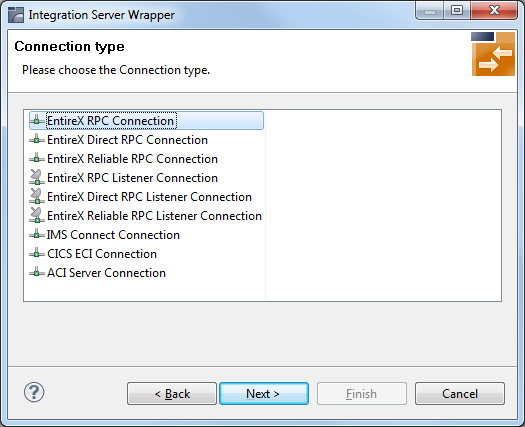
This section describes how to select the connection type for EntireX Adapter version 9.0 or above. For earlier versions, see Select the Connection Type for EntireX Adapter 8.2 or Below.
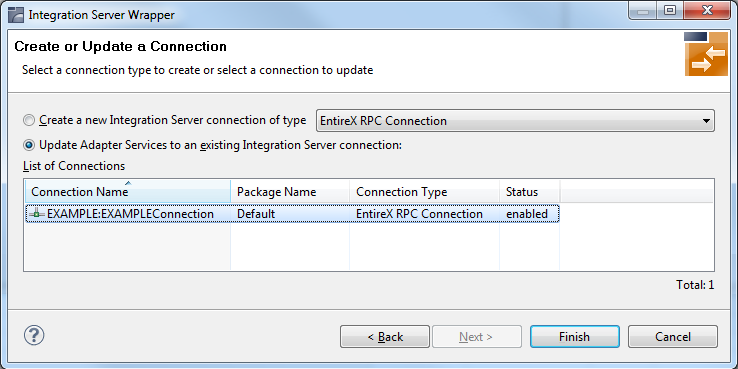
In this step you can either create a new Integration Server connection or update adapter services to an existing Integration Server connection.
To create a new connection
Select a connection type from the drop down list.
Click and continue with Step 4a: Define Adapter Services for an RPC Connection.
Or:
Step 4b: Define Adapter Services for an RPC Listener or a Reliable RPC Listener, depending on the selected connection type.
To update an existing connection
Select a connection from List of Connections.
As a result, you are informed on how many adapter services will be created, modified or left unchanged.
The update process can be characterized as follows:
The metadata is updated for each IDL program.
An adapter service is created for each new IDL program.
An existing adapter service is updated if it is contained in the IDL file for the update.
A connection remains unchanged with respect to its type and settings (broker ID, server address, user ID, etc.).
Click Finish.
A connection is created with IDL programs A and B.
Later, the update operation uses IDL programs A and C.
After the update, the service for A is modified, the service for B is unchanged, and the service for C is new.
To select a connection type forEntireX Adapter 8.2 or below
Select a Connection type from the list of available types.
Notes:
IN parameters only.
If the selected IDL file contains OUT parameters, the connection types for Reliable RPC
are not available.
Click and continue with Step 4a: Define Adapter Services for an RPC Connection.
Or:
Step 4b: Define Adapter Services for an RPC Listener or a Reliable RPC Listener, depending on the selected connection type.

To create a connection and related adapter services
Select a package for the created objects.
Define a folder name. If the folder does not exist, it will be created.
Define a connection name.
Define the parameters of the connection type. For details, see the EntireX Adapter documentation under http://documentation.softwareag.com > webMethods Product Line.
As a result, the folder will contain the connection and the adapter services (one for each IDL program). The name of a service is the same as the respective IDL program.
The default settings for new RPC adapter services are:
the Default package; if not available, the first package
the IDL library name for the Folder Name
the IDL library name with the suffix "Connection" for the Connection Name
Notes:
WmEntireX) with the version currently used.
To finish the Wizard
Choose .
As a result, the folder contains multiple objects as listed under the corresponding step.
Note:
See Mapping Software AG IDL to Integration Server Data Types.