From ApplinX version 8.1, the installation process has changed and now uses the Software AG Installer. For detailed information, refer to the Using the Software AG Installer guide. The installer enables downloading all the products which you have acquired. The information detailed here provides simple step-by-step instructions for the installation of a typical development environment of ApplinX. This section does not provide a comprehensive guide for customized ApplinX installation or for the installation of other products. For detailed information regarding the installation process, refer to the Installing webMethods Products documentation.
Note:
It is now possible to install more than one ApplinX instance on the
same machine.
Download the Software AG Installer for Windows from the Software AG Empower website at https://empower.softwareag.com.
If you cannot download software, Customer Operations can provide the products for which you have purchased licenses on a CD or through a private FTP site. Contact Customer Operations at keymaster@softwareag.com.
Review the Hardware Requirements and Software Requirements sections.
Close all webMethods and Software AG products that are running on the machine.
Copy the ApplinX license file provided by Software AG to the machine.
For web enablement applications: If you are installing ApplinX and want to develop .NET ApplinX web applications in Visual Basic or C#, you must install Microsoft Visual Studio 2008 or 2010 (When using Visual Studio 2008 or 2010, you need to install Microsoft Visual J# .NET Version 2.0 Redistributable Package Second edition).
Important:
If you do not install Microsoft Visual Studio, you will not
be able to install the ApplinX Visual Studio Add-in component, and the ApplinX
.NET Framework component will have limited functionality; you will not be able
to develop composite web applications.
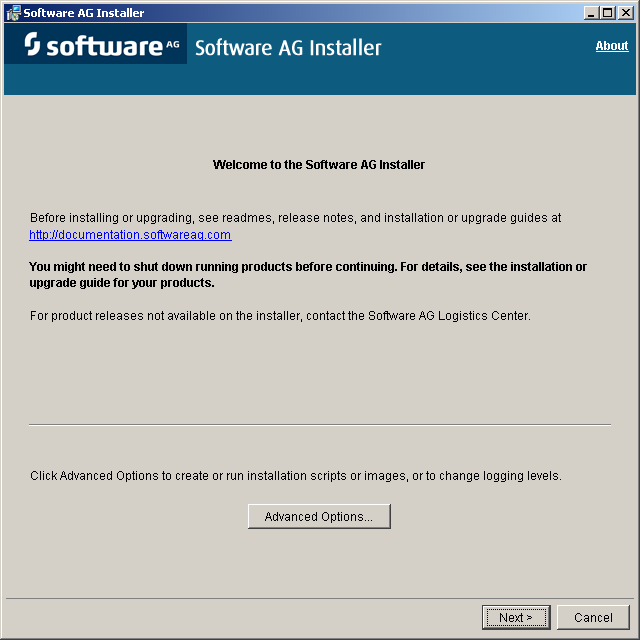
![]() To run the installer
To run the installer
To run the installer on a Windows system, you must have Windows system administrator privileges. The user under which you log on to your machine will own all files you install.
Open Windows Explorer, go to the directory that contains the installer, and double-click the SoftwareAGInstaller<version number>.exe file. The Software AG Installer takes several seconds to unzip and launch its JVM. The Welcome screen is then displayed.
Note:
If the progress bar on the installer launcher (called Zipfusion)
stops showing progress, your anti-virus software might be interfering. Start
the installer using the jar file instead (refer to the Using the Software AG Installer guide).
Click to display the following screen.
In the Release list field, select 9.x.
Enter your Software AG Empower user name and password. The installer uses the user name and password to connect to the installer server and download the products for which you have purchased licenses.
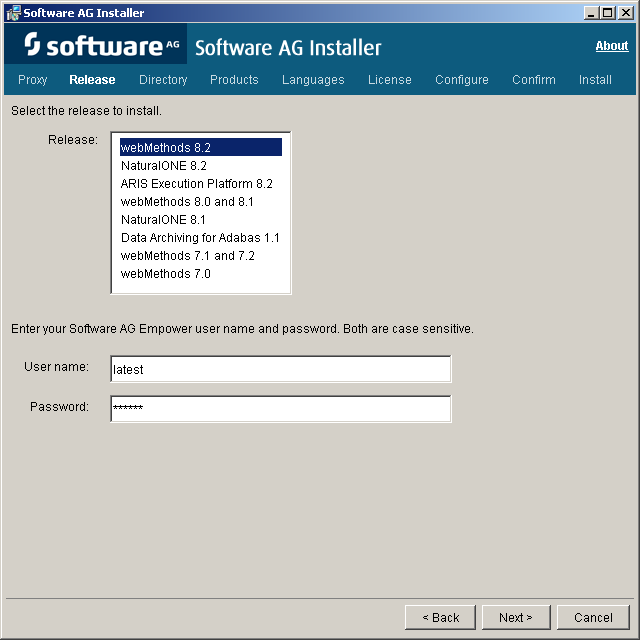
Click .
Browse and select the directory where you want to install ApplinX. The user name under which you are running the installer must have full read and write permissions to the installation directory you specify.
Important:
Do not install products from the Software AG 9.x release
into a directory that contains products from any other release.
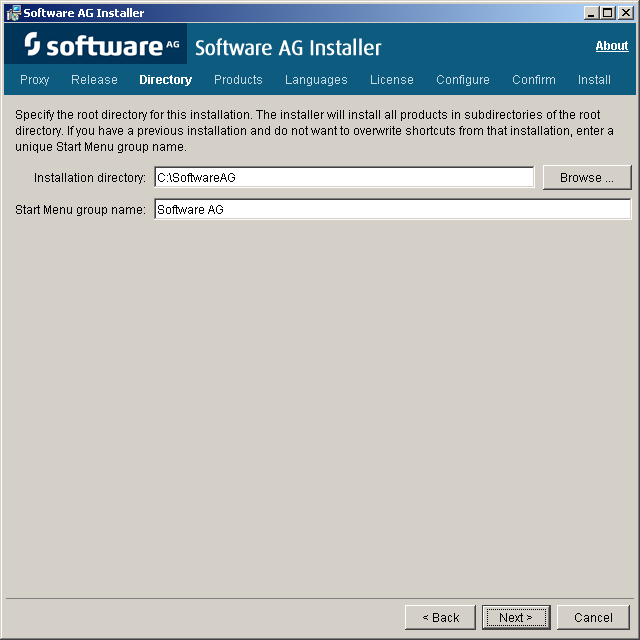
Click
Click on the button.

Select ApplinX. Click .
Notes:
You can review the components that will be installed.
Click
The license agreement is displayed. Read the license agreement. To read third-party license agreements, you require internet access. If you do not have internet access, you can go to a machine that has internet access and enter http://documentation.softwareag.com/legal in a browser. Select to consent to the terms of the license agreement and click to display the ApplinX specific parameters.
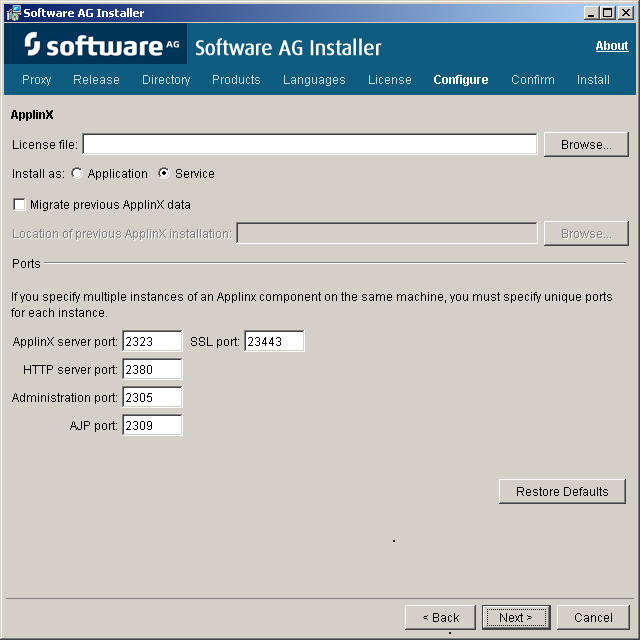
Browse and select the ApplinX license file.
Select whether to run ApplinX as an application (batch file with a shortcut from the Start menu) or as a Windows service. Refer to ApplinX Server for further information.
If a previous version of ApplinX is installed on the local machine, you can migrate the data from that installation to the new installation by selecting the Migrate previous ApplinX data check box and specifying the existing installation location. Refer to the section Migrating for details.
Select the ApplinX folder where the previous installation resides.
You can choose to install ApplinX with the default port numbers or change them. When you have multiple installations of ApplinX, and want to run them in parallel, you need to define different ports for each installation:
ApplinX server and SSL ports (2323, 23443) are ports used to connect to ApplinX server in not secure/secure mode.
HTTP server port (2380) is used for HTTP communication between ApplinX server and the clients.
Administration and AJP ports (2305 and 2309) are used for internal communication.
Click .
The Review screen is displayed. Click to start the installation. When the process finishes, click .