This document covers the following topics:
Open an Internet browser and specify the URL of the Command Central Server as follows: http://<Command_Central_host>:<Command_Central_port>. This takes you to the Command Central Login page.
On Windows you can also get to the Login page from the Command Central Start Menu entry.
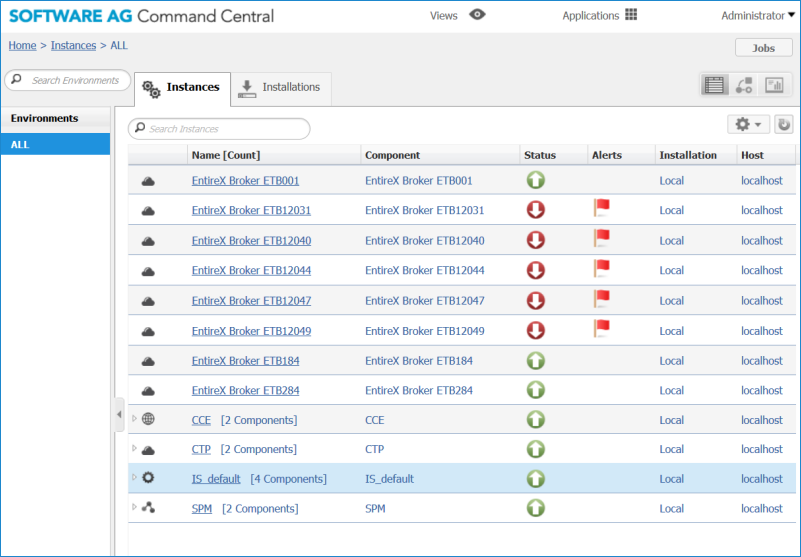
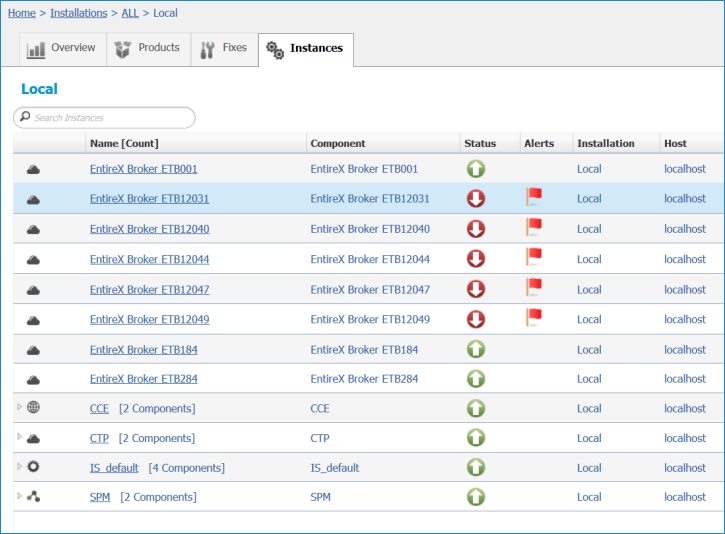
Provide your user credentials in the Login page and click . This takes you to the page Home > Instances:
 To add a Broker
In the Command Central Home page, click the Installations tab.
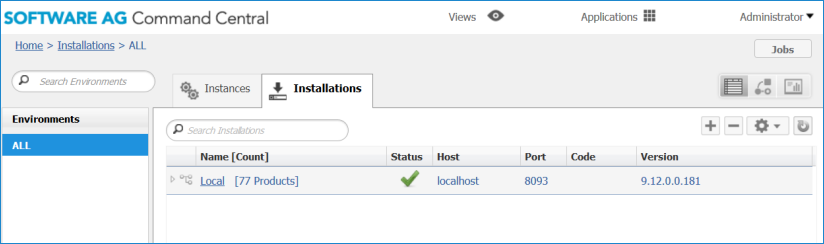
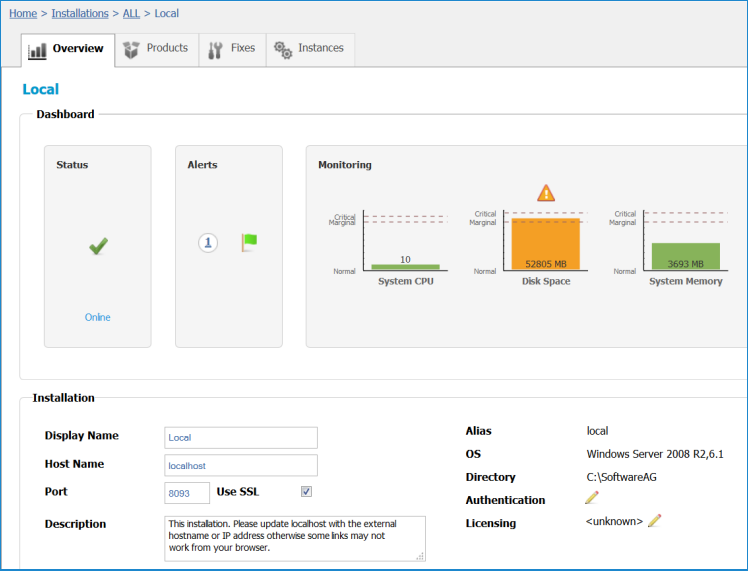
Click on the desired installation, for example Local, for which you want to add a Broker instance:
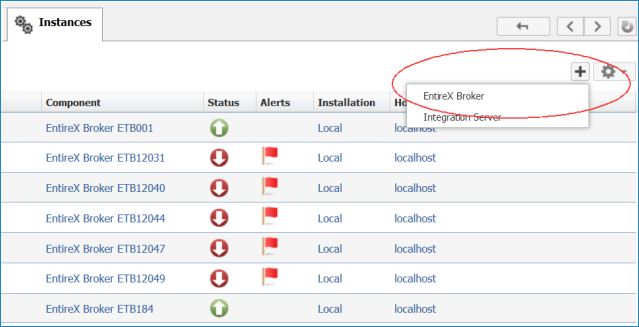
Click the Instances tab.
Click the  button in the upper right corner above the list and choose EntireX Broker.
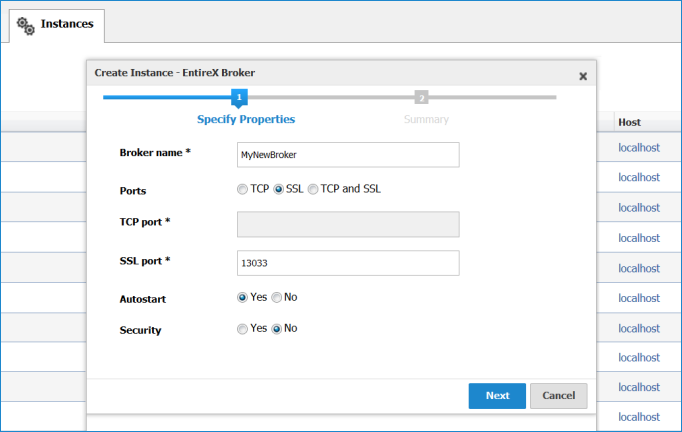
Specify the desired properties and press Next.
Press Finish.
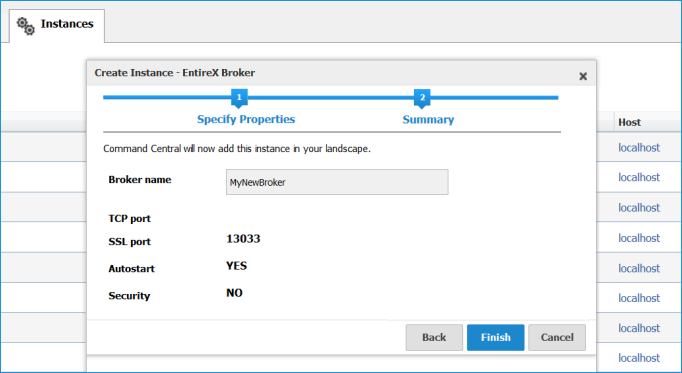
Press Finish.
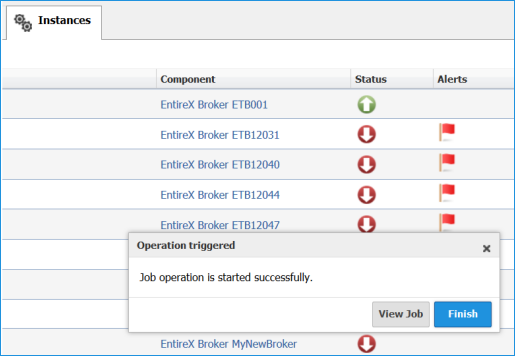
The new instance MyNewBroker appears in the list.
To delete a Broker instance
In the list of EntireX Broker instances for your selected installation (for example Local),
select the instance you want to delete and
click the  button in the upper right corner above the list:
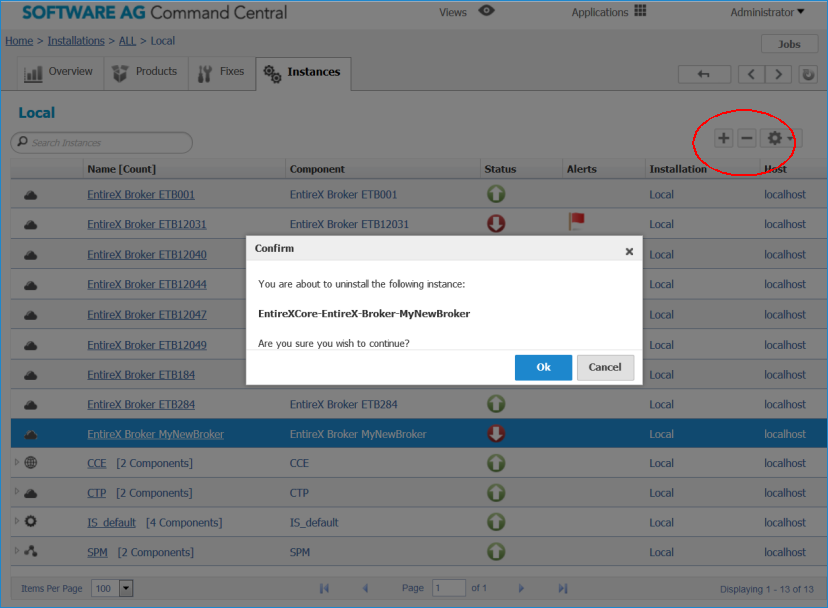
Click to confirm the uninstall of this Broker instance.
In the next window, click . The selected instance is removed from the list.
To view the runtime status of a Broker instance
In the Command Central Home page, click the Instances tab and select the Broker instance for which you want to see the runtime status:
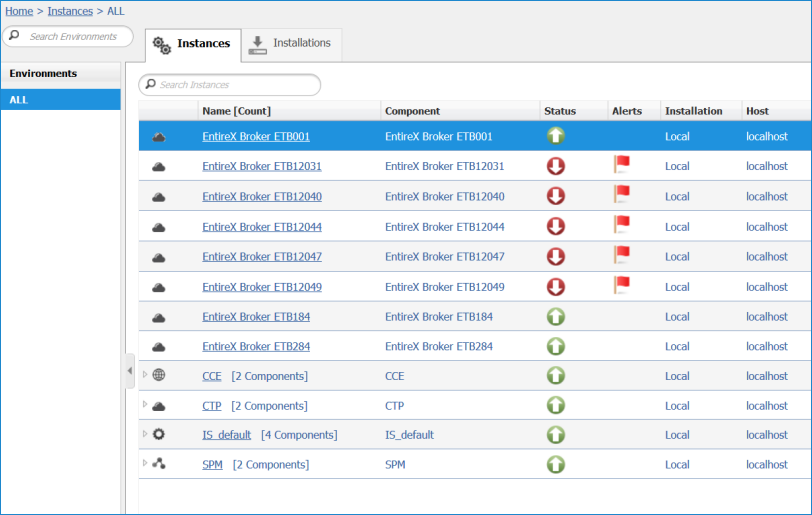
Click on the link associated with this instance:
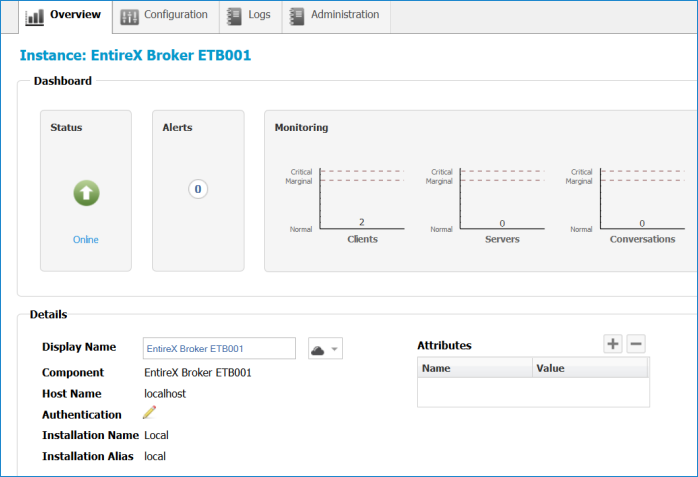
The visual key performance indicators (KPIs) and alerts enable you to monitor EntireX Broker's health. The following KPIs help you administer, troubleshoot, and resolve performance issues in EntireX Broker:
| KPI | Description |
|---|---|
| Clients | Number of active clients. |
| Servers | Number of active servers. |
| Conversations | Number of active conversations. |
To configure a Broker instance
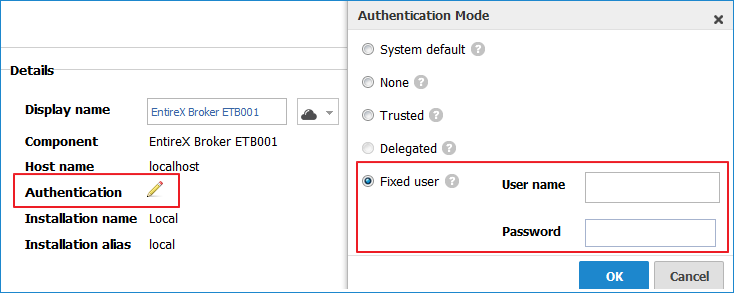
In the Command Central Home page, click the Instances tab then click the link associated with the Broker instance you want to configure. This takes you to the following page:

If you want to monitor a secure Broker, add user name and password under Authentication.
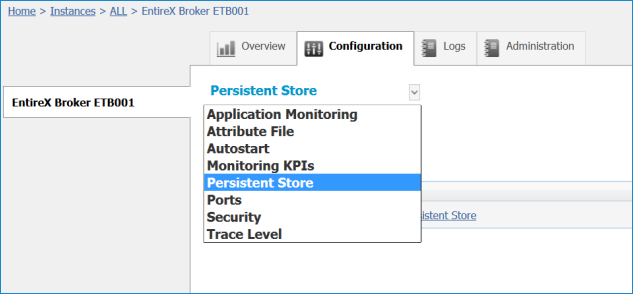
Click the Configuration tab. EntireX currently supports the following configuration types, which are presented in a drop-down box when you click the down arrow below the Configuration tab label:
Application Monitoring
Attribute File
Autostart
Monitoring KPIs
Persistent Store
Ports
Security
Trace Level
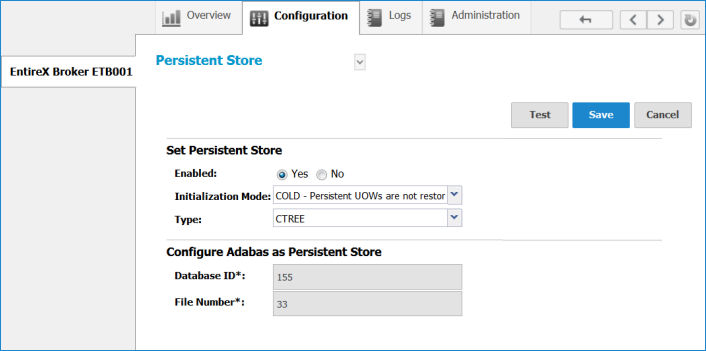
Select the configuration type for which you want to inspect or change the current values, for example Persistent Store:
With this example, the Persistent Store screen is called:
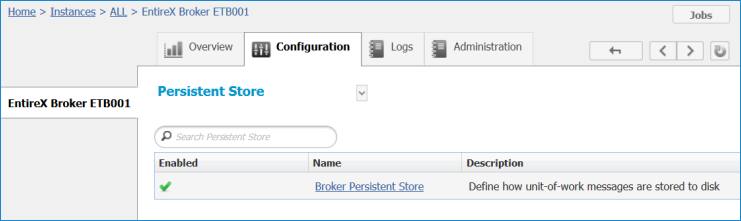
Click the respective hyperlink to open the Configuration page, where you can view or edit the parameters associated with the respective configuration type.
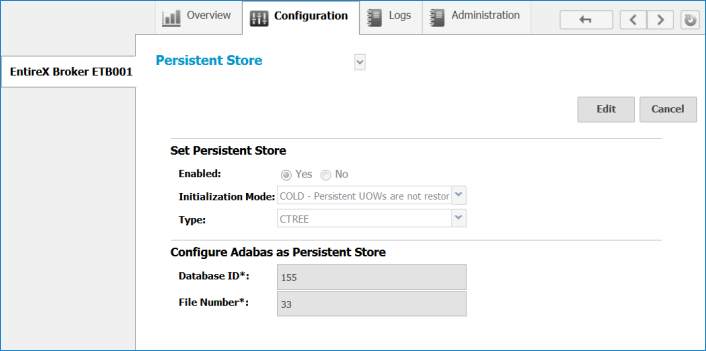
Click to modify the parameters.
Click to check the correctness of your input or to save your changes.
Note:
Configuration of all other entities is similar, but the screens are different depending on the configuration parameters.
To inspect the log files of a Broker instance
In the Command Central Home page, click the Instances tab then click the link associated with the Broker instance for which you want to inspect the log files. This takes you to the following page:
Click the Logs tab:
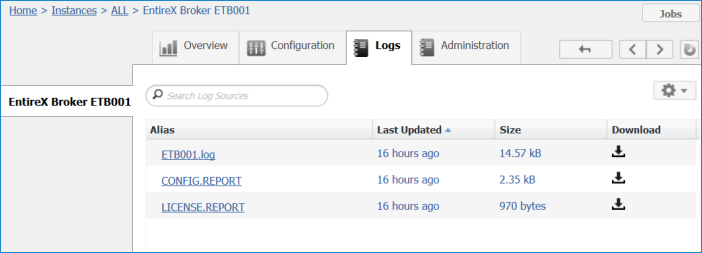
In the Alias column, click the link of the log file you want to inspect, for example ETB001.log:
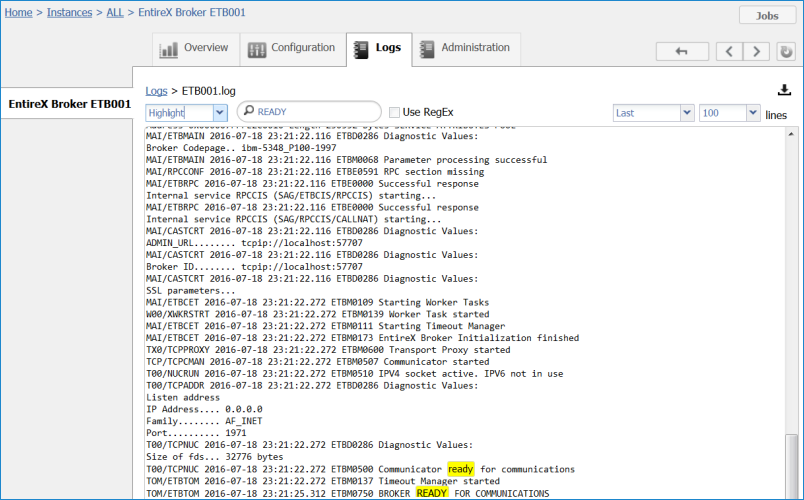
Here you can search for certain text and highlight or filter the matching lines, specify how many first or last lines of the log you would like to see. You can also download the whole file.
To display services registered with a Broker instance
In the Command Central Home page, click the Instances tab, then click the link associated with the Broker instance for which you want to see its registered services. This following page appears:
Click on the Administration tab:
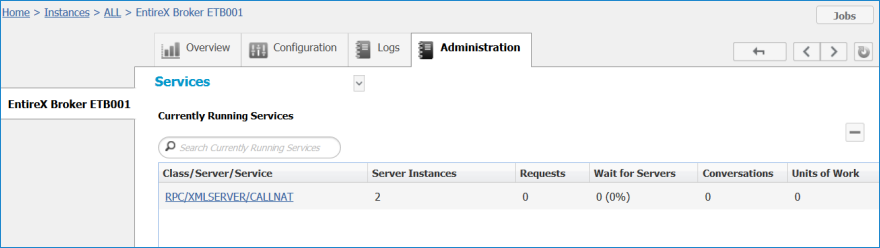
To stop a service
Select the service you want to stop and click the button in the upper right corner above the list:
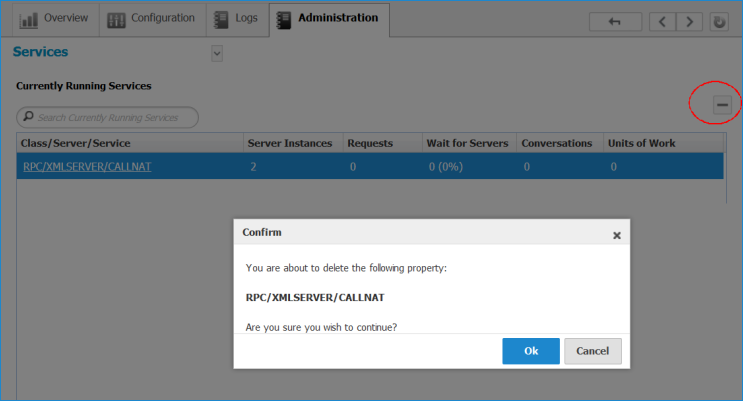
Press to confirm. The selected service is removed from the list of currently running services.
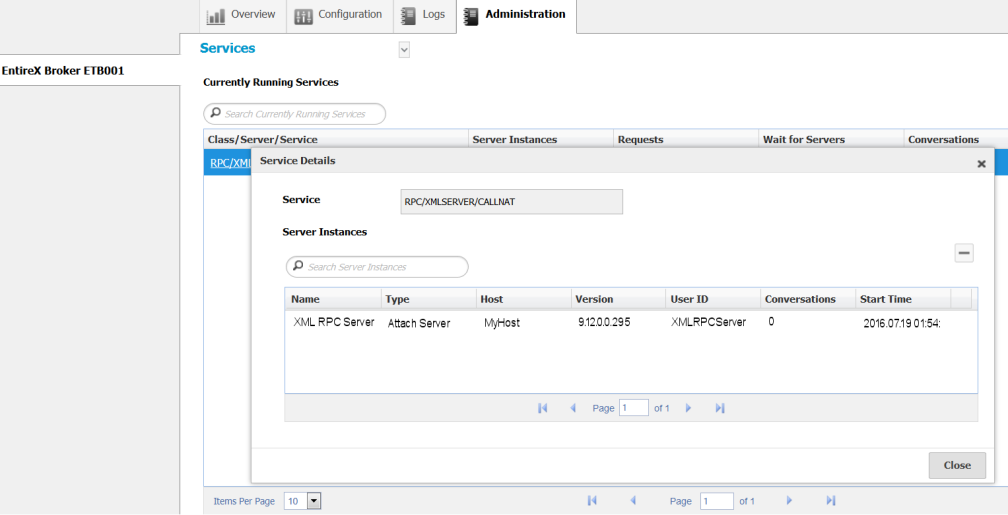
To display server instances of a service
In the Class/Server/Service column of the Services table, click the link of the service for which you want to see the associated server instances:

The Start Time is displayed in the time zone of the Broker instance in sortable ISO-format.
To stop a server instance
Select the server instance you want to stop and click the button in the upper right corner above the list:

Press OK to confirm. The selected server is removed from the list of server instances.