Create objects and object attributes
In this section, you will place objects in your model and edit object attributes.
Procedure
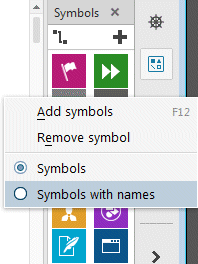
1. Right-click in the Symbols bar and select Symbols with names to display the symbol names in addition.
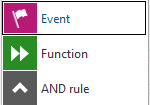
2. Click the Event symbol in the Symbols bar.
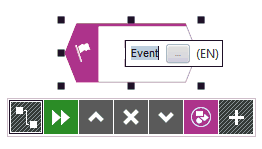
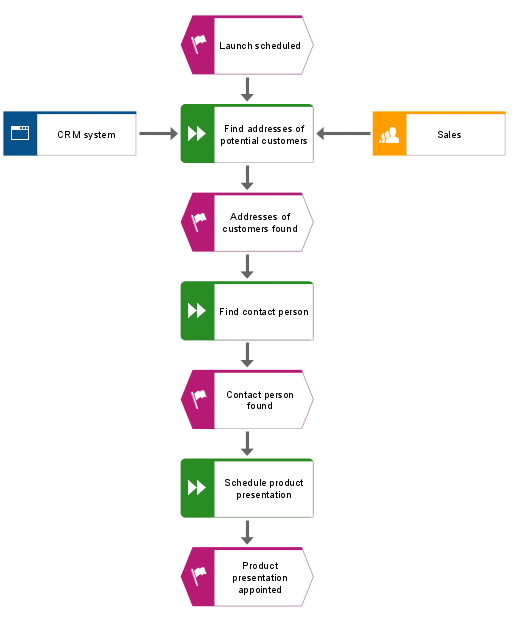
3. Move the mouse pointer to the modeling area and click again. The event is created and a text box opens automatically.
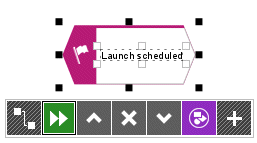
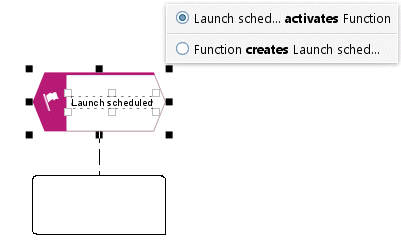
4. Enter a name for the event by overtyping the selection with Launch scheduled. To insert a line break between Launch and scheduled, press Enter.
5. Click in the model background and then on the Launch scheduled event. The mini toolbar is displayed under the event. It provides you with object symbols, connections and rules that you can link to the selected object. If you do not want the mini toolbar to be shown for a selected object, move the mouse pointer a few centimeters away from the selected object. It will then only be shown when you select it again.
6. Click the Function symbol in the mini toolbar.
7. The connections allowed by the method are displayed. Keep the Launch scheduled activates Function connection activated and click below the Launch scheduled event in the model window.
Overtype Function with Find addresses of potential customers.
8. Create the following objects one below the other using the mini toolbar, while keeping the respective connection default:
a. Event: Addresses of customers found
b. Function: Find contact person
c. Event: Contact person found
d. Function: Schedule product presentation
e. Event: Product presentation scheduled
For longer names in an object symbol to be properly broken down, you can insert conditional separators. To do so, press Ctrl + Hyphen (-). Conditional separators are displayed only if a name really needs to be broken down. As soon as you enlarge the object and the name fits within without a line break, the separator will be removed again.
9. If all objects are not displayed in the model window, decrease the representation of the model. Activate the View tab bar and click  Zoom out.
 Alternatively, click
 Zoom > Custom
 in the
View tab bar and enter the relevant zoom factor, e.g., 85.
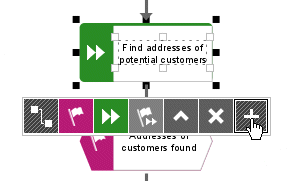
10. Click the Find addresses of potential customers function and then the Add symbols button in the mini toolbar.
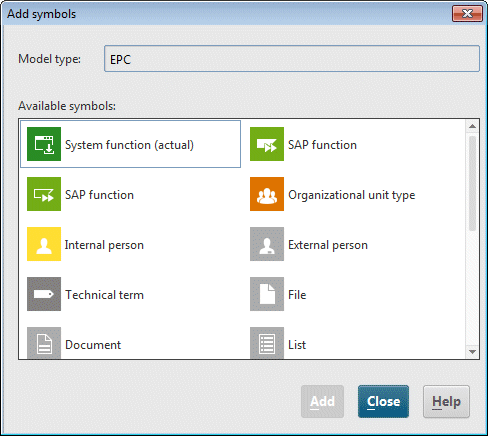
11. The Add symbols dialog opens. Double-click the Organizational unit symbol.
The symbol is inserted into the mini toolbar.
12. Double-click in the dialog on the Application system type symbol to insert it into the mini toolbar.
13. Finally, click Close to close the dialog.
14. You will create the next symbol to the left of the selected function Find addresses of potential customers. If there is not enough space, insert space to the left of the selected function:
a. Activate the Insert tab bar.
b. Click  Horizontal space.
 c. In the model window, click the position starting from which you want to insert space (from left to right), and hold down the mouse button.
d. Drag the visible line to the right and release the mouse button at the position where you want to stop inserting space.
The model items positioned within the area indicated by the start and end lines are placed to the right of the end line. The connections are adjusted.
15. Now click the Application system type symbol in the mini toolbar and then to the left of the selected function Find addresses of potential customers click in the model background.
16. Name the new object CRM system.
17. Click the Find addresses of potential customers function again and create an organizational unit to the right of the function. Name it Sales.
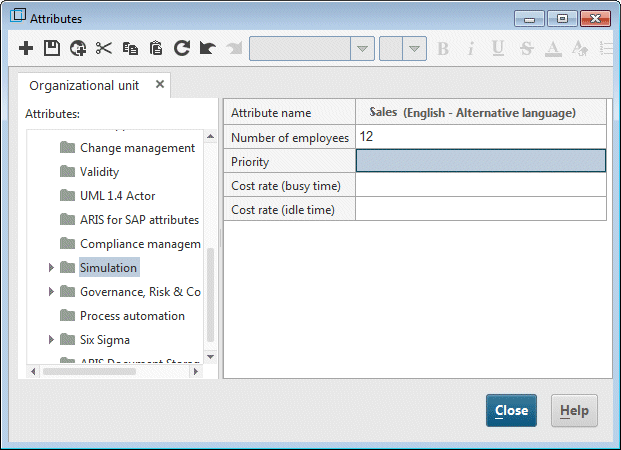
18. Click the Sales object and click  Attributes in the Start tab bar. Attribute Editing opens.
 19. In the tree view, click Simulation.
20. Finally, click in the table on the input box of the column Sales (English) and enter the value 12 as the Number of employees.
21. Click Close and confirm the query with Yes.
.
Your EPC should look like this now:
Tip: |  To change attributes for multiple objects, select the objects, right-click in the selection and select Attributes. The selected objects of each object type are summarized on individual tabs. To remove the symbol from the mini toolbar, right-click the symbol, and select Remove symbol. |