Setting up the Plug-in Project
Follow the steps below to set up the Java project for DemoPlugIn01:
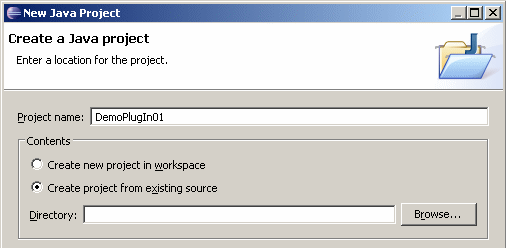
1. Create a new Java project in Eclipse using File > New > Project > Java Project.
2. Specify DemoPlugIn01 as the project name and check radio button labeled Create project from existing source.
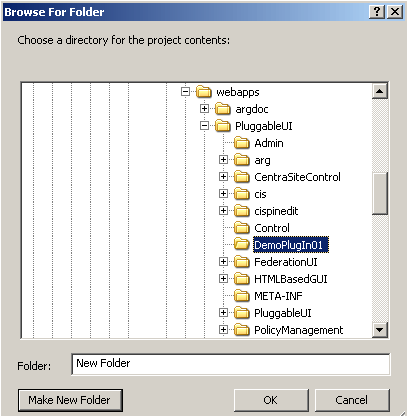
3. Click the Browse button that is located right to the input field labeled Directory. The Browse For Folder dialog is displayed.
4. Within the Browse For Folder dialog, navigate to and click on the PluggableUI web application folder of the Software AG Runtime application. In the remainder of this document, this folder is indicated by <PluggableUIFolder>.
5. Click Make New Folder. This causes an entry New Folder to be created under PluggableUI. Select the entry New Folder, then from its context menu choose Rename, then enter the name DemoPlugIn01.
6. Click OK.
7. In the New Java Project dialog that becomes visible again, click Finish.
A new Java project called DemoPlugIn01 has been created due to the previous actions. This project is now visible in the Package Explorer view in Eclipse.
This project needs to be adapted.
1. Create the following four subfolders of DemoPlugIn01:

accesspath
classes
images
xml
To create each of these subfolders, choose New > Folder from the context menu of DemoPlugIn01 in the package explorer, then type in the name in the New Folder dialog.
2. Create a source folder called src. You can create the source folder by choosing New > Source Folder from the context menu of DemoPlugIn01.
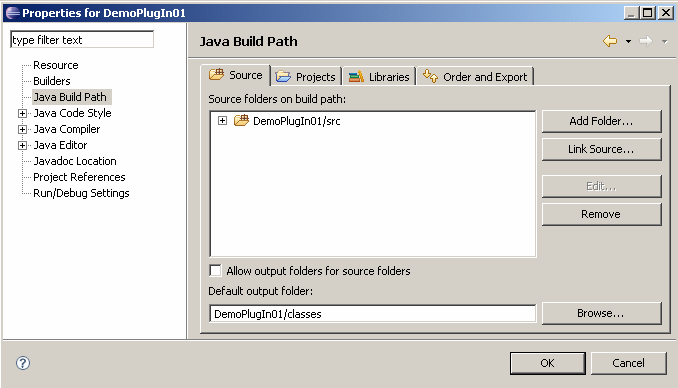
3. In the context menu of DemoPlugIn01, choose Properties.
4. Select Java Build Path from the tree on the left.
5. Select the Source tab and enter the value DemoPlugIn01/classes in the field Default output folder.
6. Switch to the Libraries tab.
An entry for the JRE library should be visible. If you do not see this entry, click Add Library and select the JRE system library from the displayed list, then click Finish.
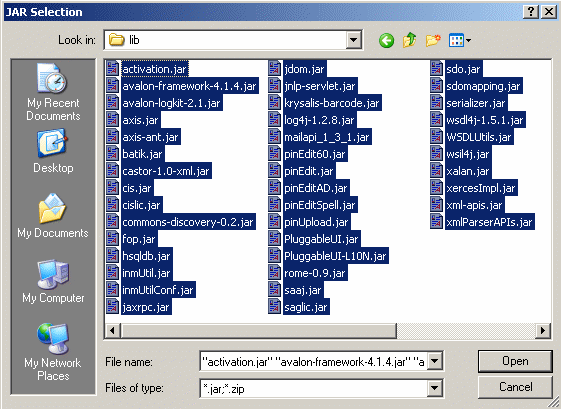
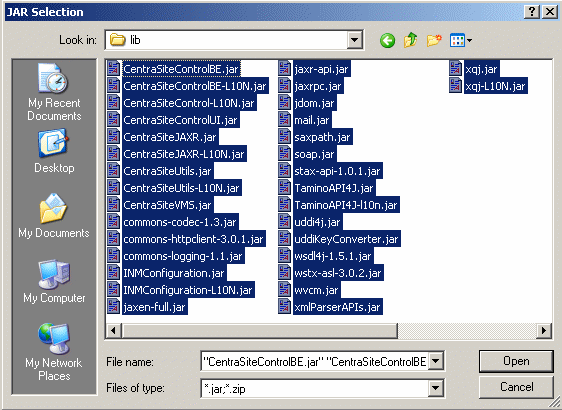
7. Click Add External JARs
In the resulting JAR Selection dialog, navigate to <PluggableUIFolder>/WEB-INF/lib and open this folder.
8. Select all files, using for example the key combination Control-A and click Open.
9. Click Add External JARs again.
10. In the JAR Selection dialog, navigate to <PluggableUIFolder>/CentraSiteControl/lib.
11. Again, select all files and click Open.
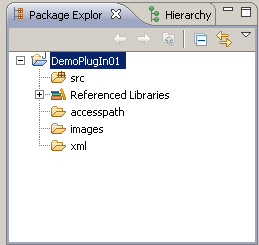
12. Click the OK button of the Properties for DemoPlugIn01 dialog.
Your project should now look like this:
Perhaps you have noticed that the classes subfolder of the project DemoPlugIn01 has disappeared from the display. This is normal because the Java Development Tools (JDT) of Eclipse suppress output folders from displaying by default (but they still exist on your hard disk).
Furthermore, the old output folder bin that has been created by the JDT when creating the Java project is not of any use for us, so you can delete it.
Later on we will need some icons for our plug-in. For now, let's just copy and rename some already existing icons from the CentraSite Control plug-in and use them instead:
1. Using the Windows Explorer, navigate to <PluggableUIFolder>/CentraSiteControl/images.
2. Copy the files myFavorites.gif and myFavorites24x24.gif to the images subfolder of our Java project DemoPlugIn01.
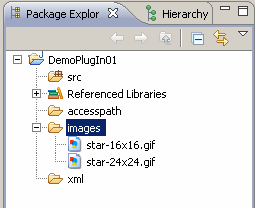
3. In DemoPlugIn01/images, rename the file myFavorites.gif to star-16x16.gif and rename myFavorites24x24.gif to star-24x24.gif. Use the command File > Rename in the Eclipse menu to do this.
4. In Eclipse, refresh the display of the package explorer. The names of the two images should now be visible.