Multicast Configuration
Universal Messaging delivers 'ultra-low latency' to a large number of connected clients by including IP Multicast functionality for both the delivery of events to Data Group consumers as well as between inter-connected realms within a Universal Messaging cluster.
This section assumes the reader has some knowledge of IP Multicast.
Universal Messaging Multicast Architecture
Each Universal Messaging interface that you configure on a Universal Messaging Realm binds to one or all of the available physical Network adapters present on the host machine. In order to successfully configure Multicast on a Universal Messaging Realm you must ensure that you know the IP addresses of each of these network adapters (including virtual addresses if running on a virtual host), and which physical network adapter and it's address is capable of supporting IP Multicast. This information allows the correct network adapter to be selected and bound to by the Multicast configuration. Once this information is known, you then need to ensure that the physical network infrastructure including switches and routers can support Multicast. Once validated, the next step is to select an available Multicast address which can be used.
Universal Messaging servers can use IP Multicast either to deliver Data Group events to its consumers or between Universal Messaging realms within a cluster. If you wish to enable IP Multicast delivery to Data Group consumers, you can create a Multicast configuration and select it for use with Data Groups. Once you have configured a Multicast adapter, when you create a Data Group with the enable Multicast flag set, the Universal Messaging realm will automatically begin delivering the events via Multicast when published to that Data Group. The client application requires no extra setup to begin receiving Multicast. When a client Data Stream is added to a Multicast enabled Data Group, the client will transparently receive the information it needs to begin consuming Multicast for that Data Group. The client will at first both consume the Unicast Data Group events, and if Multicast is possible, also consume the Multicast events. When both Unicast and Multicast are in sync after a period of time, the Universal Messaging Server will stop sending Unicast events for that Data Stream to the client. The Universal Messaging server will track whether each client is in fact able to process the Multicast packets and if any client does not successfully acknowledge safe receipt of the Multicast events, it will simply continue to consume the Unicast events.
With this model, the client is able to seamlessly interact with the Universal Messaging server and begin consuming Multicast events with no changes to the Client application required.
Setting Up Multicast for Data Group Delivery
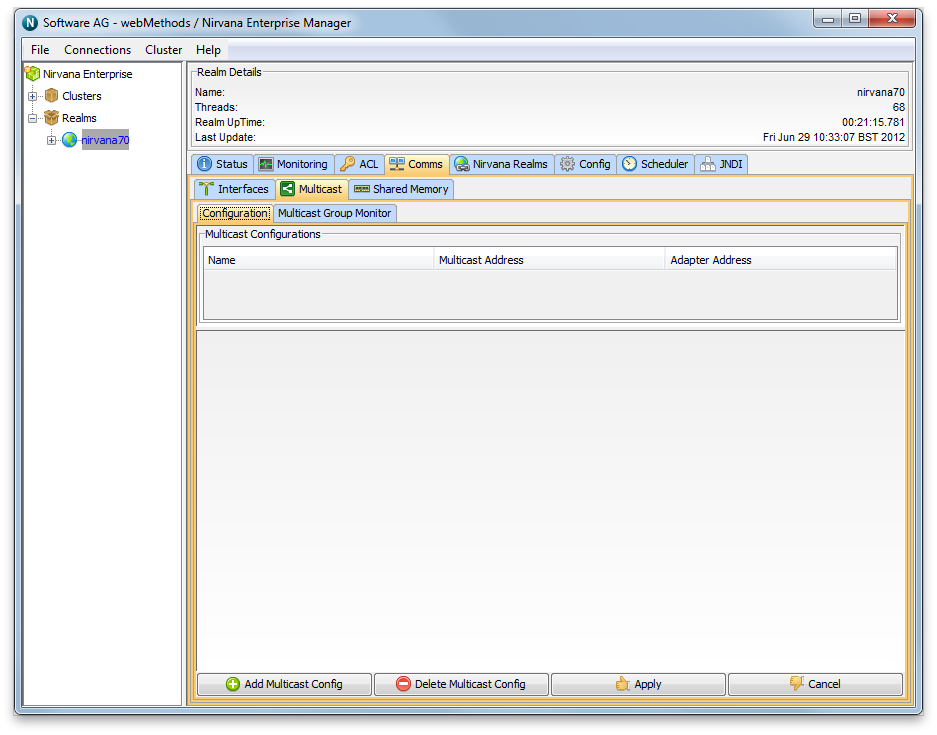
The first step in configuring a Universal Messaging Realm for Multicast Data Group delivery is to create the Multicast adapter configuration. Once you have the information described in the previous section, and your Universal Messaging realm is running, start the Enterprise Manager and connect to your realm. Once connected, select the realm node from the tree, and choose the Multicast tab in the right hand panel, as shown below.
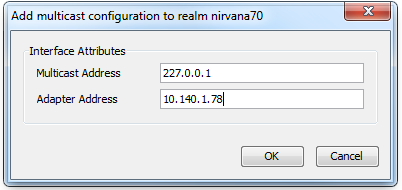
Clicking on the "Add Multicast Config" button opens a dialog that enables you to enter the Multicast IP Address, as well as the Network Adapter Address of your multicast configuration, as shown below.
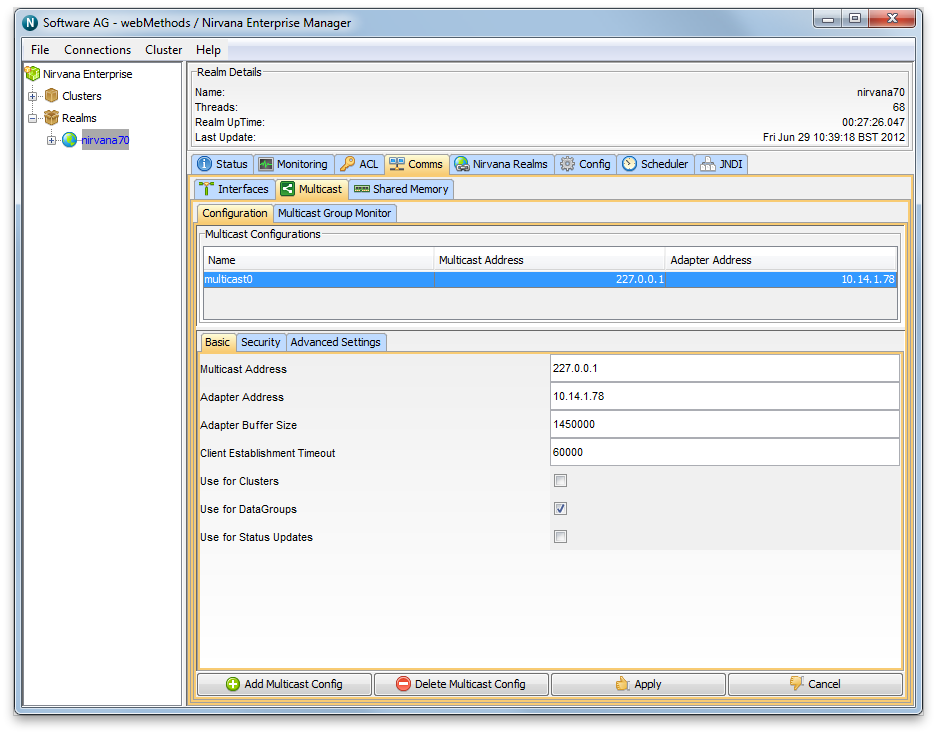
When you click on ok in the dialog, the new Multicast configuration will appear in the table. You then need to select that the multicast configuration is to be used for Data Groups by clicking on the "Use for DataGroups" check box. Then click the "Apply" button and the configuration will be sent to the server. The completed multicast Configuration is shown in the table as seen in the image below.
Now you have created the Multicast configuration, you need to create your Multicast enabled Data Groups. To do this, simply click on the Data Groups node in the tree, and right click "Create Data Group". This will open up the standard create Data Group dialog but with an additional check box for enabling Multicast. This is shown in the image below.
Now your data group is ready to be used for Multicast Delivery. If you are familiar with Universal Messaging Data Groups, you will be familiar with our example Data Group programs which you can use to test this out, or you may have your own Data Group setup that you can use. If your Data Groups are created programmatically, then the key thing to remember is that when you call the nSession.createDataGroup, you now need to also pass in an additional boolean that marks the Data Group as Multicast enabled.
Setting Up Multicast for Cluster Inter Realm Communication
If you have a clustered setup, and you wish to setup Multicast between your realms for the inter realm communication, the setup is the same, however on each realm that you create a Multicast Configuration, the configuration itself needs to set the "Use for Clusters" checkbox. The Multicast address can be the same for all realms, or you can choose a different Multicast Address per realm. With this feature enabled, each realm will know the Multicast address for each of the other realms in the cluster and will listen on these addresses for inter realm cluster communication.
Advanced Multicast Settings
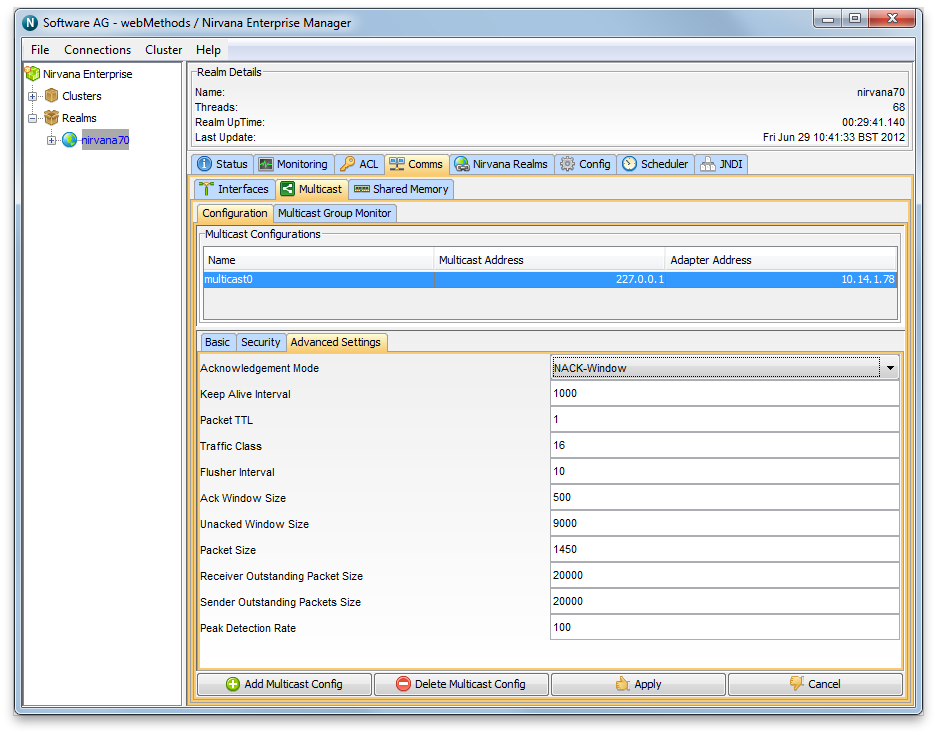
The default settings for the Multicast configurations you create are aimed at providing the lowest possible latency. With this in mind, the configuration is such that the multicast client will ack every 1 second, and the server will maintain a list of un-acked events (default 9000). Should the publish rate exceed 9000 per second, you may notice that the delivery rates might be quite irregular. This is down to the fact that the client will only acknowledge every 1 second, and so the server will automatically back off the delivery until it receives an acknowledgement from the client and can therefore clear its unacknowledged queue. If this happens, you can change both the Unacked Window Size to be > 9000 and the Keep Alive Interval (ack interval) to be less than 1 second (see image of the Advanced Settings tab below).


