
An application is a project which can contain an internal system within an organization, such as human resources, billing, customer services etc. In this task, you will create a new ApplinX application. Every ApplinX application is connected to a host and has a repository containing all the ApplinX entities. The steps detailed in this task include the basic steps required to create an application. Advanced configuration is explained in Application Configuration Parameters in the Reference Guide.
![]() To create an ApplinX application
To create an ApplinX application
Before creating a new application, ensure that ApplinX server is available and running, and start the Designer. Log in to the relevant server or add an additional server as required (refer to the sections Logging on and Adding a New Server Connection.
In the ApplinX Explorer, right-click on the ApplinX server and select .
Or:
Select the menu item . In the resulting window, expand the Software AG node, then the ApplinX node, select
Application, and then click .
The Create a New Application wizard is displayed.
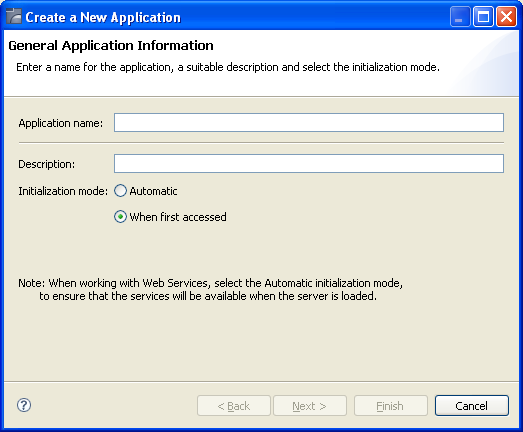
Enter a name for the application and a suitable description.
Select the initialization mode:
- Automatic
Automatically loaded when the server is started.
- When first accessed
Loaded when first accessed, in other words, when the code that initializes startup is first called (default).
Click .
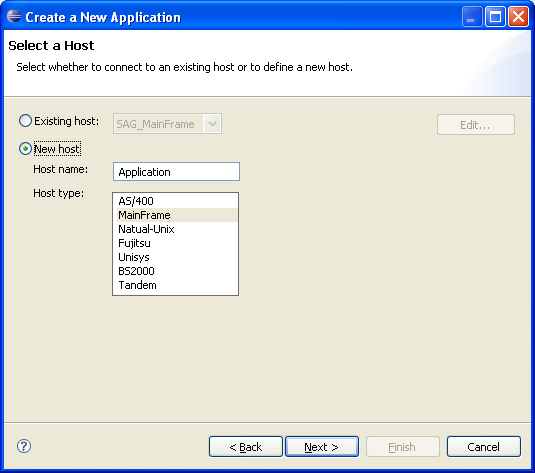
Select whether to use an existing host or to create a new host.
Note:
SAG_MainFrame is accessible only from within the Software AG
network. Therefore, this host can only be selected when working offline using a
trace file.
When selecting to define a new host, enter a name for the host and select the relevant type of host. Click .
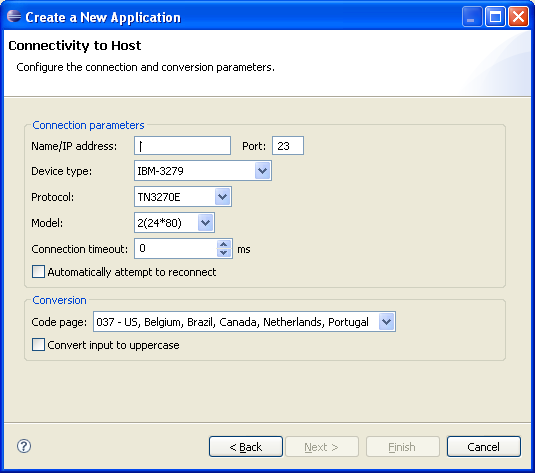
The host connection and conversion parameters are displayed. It is mandatory to enter the host's name/IP address (IPv4 and IPv6 address formats are supported). Configure the other parameters as required. Further details of these parameters are available in Host Configuration Parameters in the Reference Guide.
Click . The application is displayed in the ApplinX Explorer. It is possible to further configure the application properties by right-clicking on the application name and selecting . Refer to Application Configuration Parameters in the Reference Guide for details regarding the advanced configuration properties.
![]() To confirm connectivity to the host
To confirm connectivity to the host
In the ApplinX Explorer, expand the relevant application node.
Expand the Sessions node. Right-click on Default and select .
The first host screen is displayed and the icon of the default session changes
to ![]() . Navigate between
the screens to confirm connection and host functionality. If there is a
connection problem, check that the host is working and that the host
definitions are correct.
. Navigate between
the screens to confirm connection and host functionality. If there is a
connection problem, check that the host is working and that the host
definitions are correct.
Further information regarding application configuration can be found in Defining Applications in the Designing and Developing an Application documentation.