Adding a web server with the Assign/Delete command authorizes the web server in question to access the selected database. Before assigning a web server, you first have to define it with the help of the Web Server Management. If no web server is assigned, all web servers are allowed to access the database.
Please refer to the section Web Server Management for information about adding, modifying and deleting web servers that can be used by Tamino.
Note:
When you assign or delete a web server, the changes only become
effective after restarting the database to which these web servers
assigned.
![]() To assign/delete a web server
To assign/delete a web server
Expand the object. In the list of databases displayed, expand the database whose list of web servers you wish to modify.
Select the object and choose from the context menu. The Assign/Delete Web Server Settings page appears.
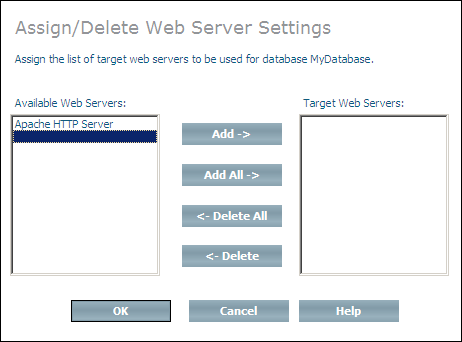
Select an available web server and choose to add it to the target list of web servers, or choose to add all available web servers to the target list of web servers. You can remove a web server from the target list by selecting it and choosing , or choose to remove all web servers from the target list (web servers that are deleted from the target list are returned to the list of available web servers). You can change the order of the web servers in the list by selecting a web server and using the and buttons.
When you have assigned/deleted all of the web servers that you want, choose to assign/delete the web server(s).
Please refer to the section Web Server Management for further information about adding, modifying and deleting web servers that can be used by Tamino.