Tweet the status on Twitter using the REST Application
Summary
In this tutorial, we will see how to create a REST Application using the Twitter REST API and use that REST Application to post a tweet on Twitter.
Before you begin

Permissions to create Operations and Integrations for a project in
Integration Cloud.
An email account ID, for example, twitapplication@gmail.com.
A Twitter account. You can create one using your email ID.
Steps
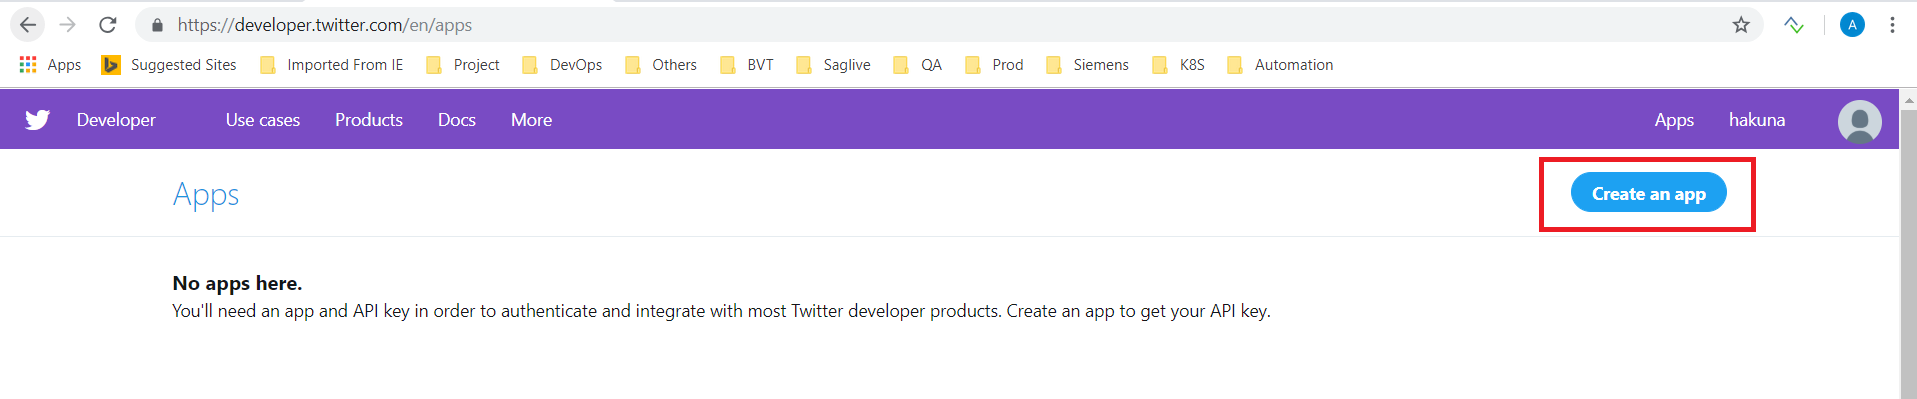
1. Log in to Twitter, go to https://developer.twitter.com/en/apps, and click Create an app to create a Twitter app.
2. Create an application by filling the form and click Create.
Note:
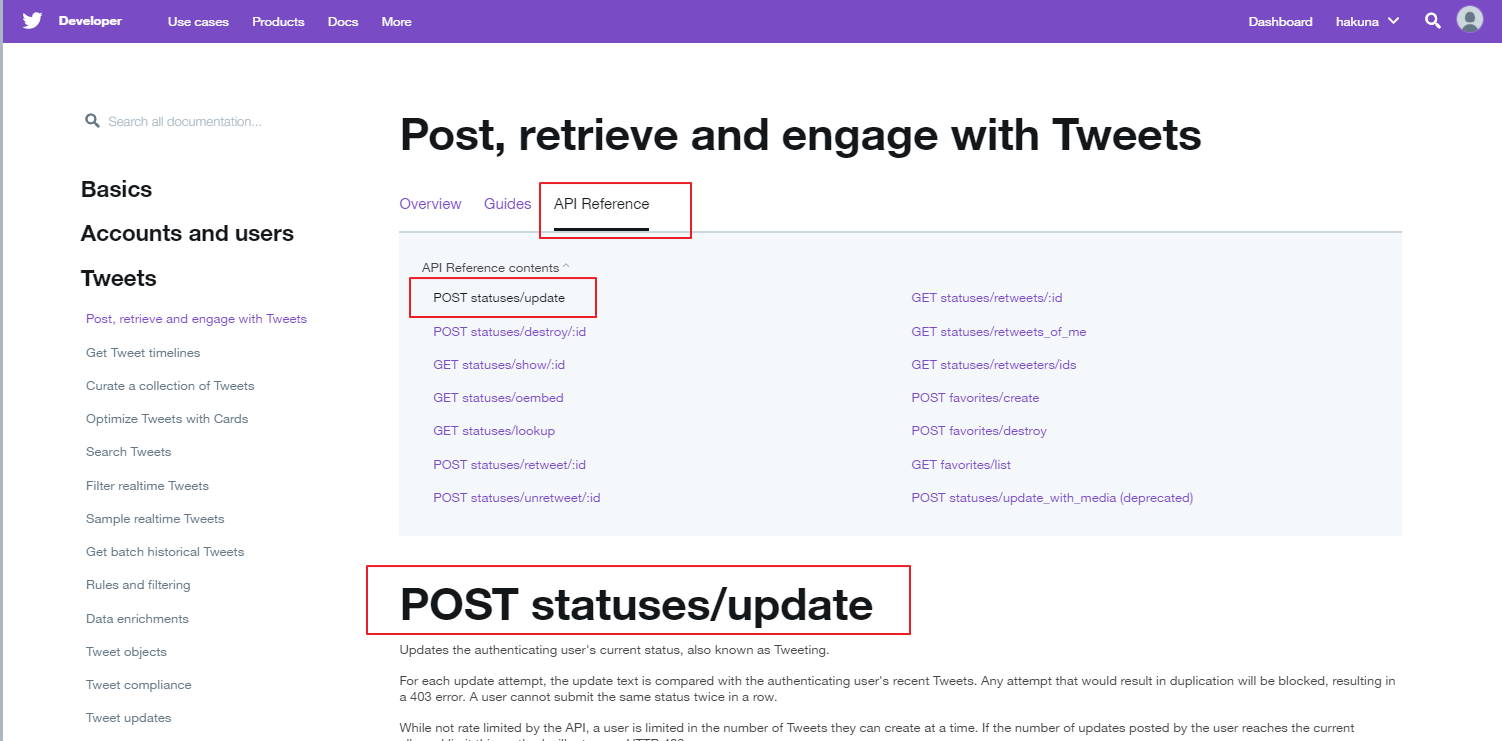
See https://developer.twitter.com/en/docs/tweets/post-and-engage/api-reference/post-statuses-update for information on POST statuses/update.
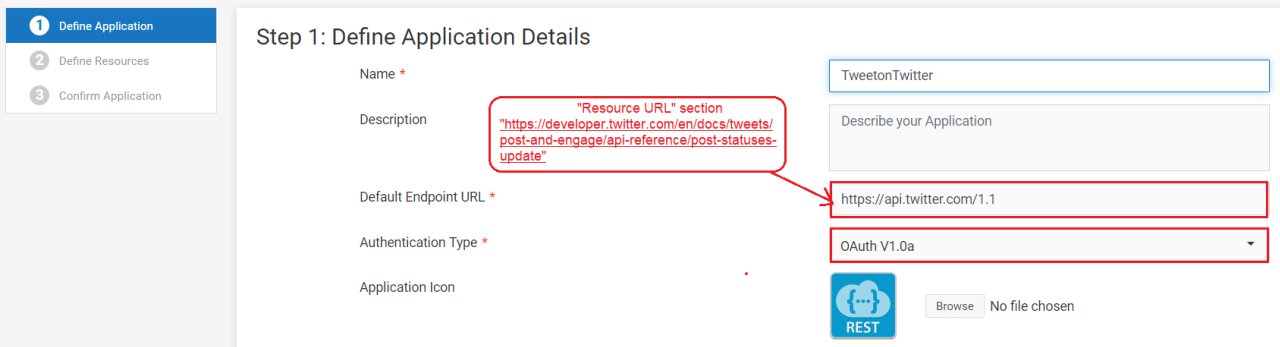
3. Log in to Integration Cloud and go to Projects > <Select a Project> > Applications > REST Applications > Add New Application. Fill in the details as shown below in the Define Application Details screen and then click Next.
Note:
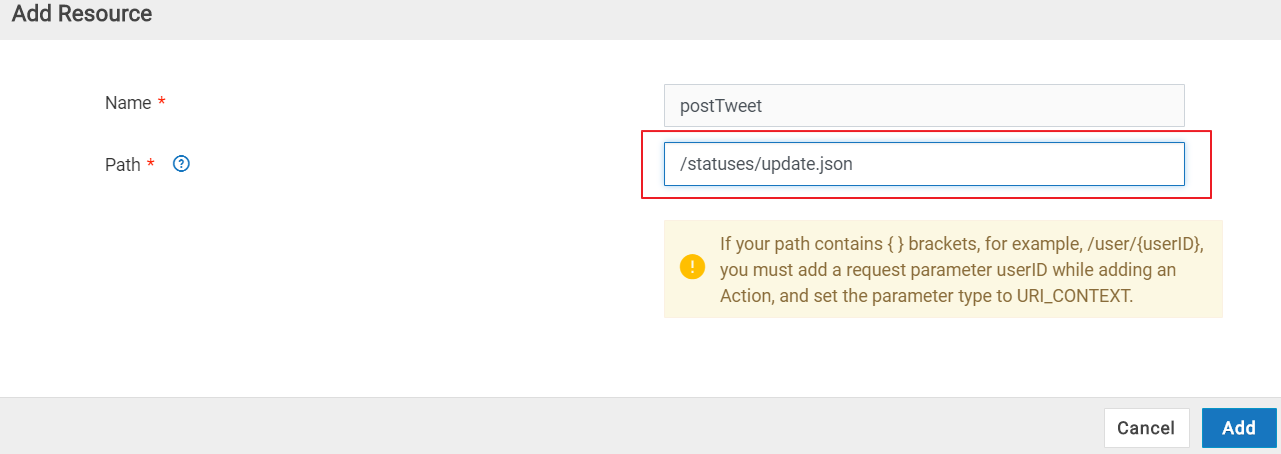
Default Endpoint URL should not contain the path of the endpoint. For example, if the complete endpoint URL is https://api.twitter.com/1.1/statuses/update.json, then https://api.twitter.com/1.1 is the Default Endpoint URL. Rest of the path /statuses/update.json will be used as the Resource Path while adding a Resource later.
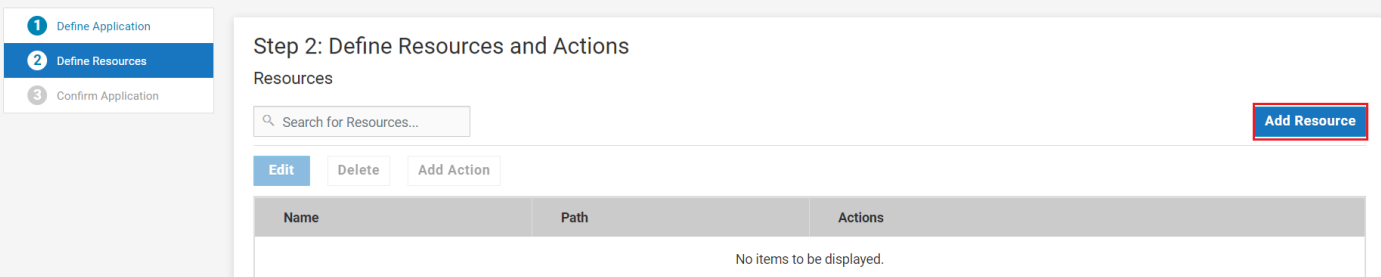
4. On the Define Resources and Actions page, click Add Resource.
5. Let us add the postTweet Resource. Click Add.
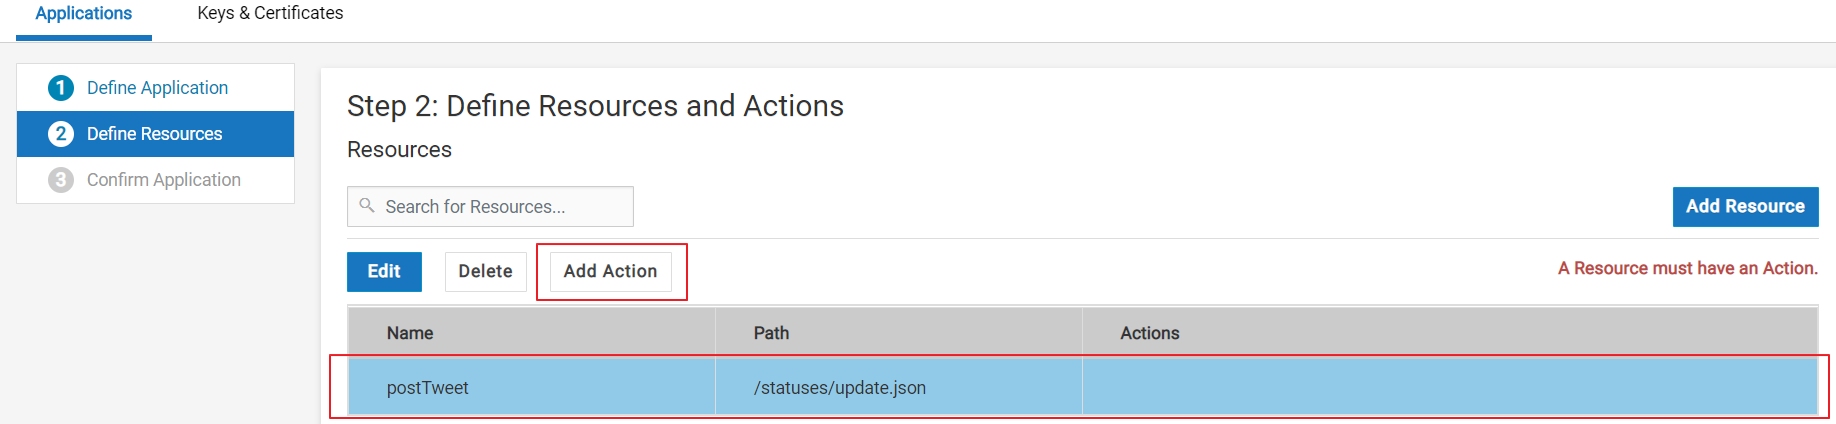
6. Select the postTweet Resource and click Add Action.
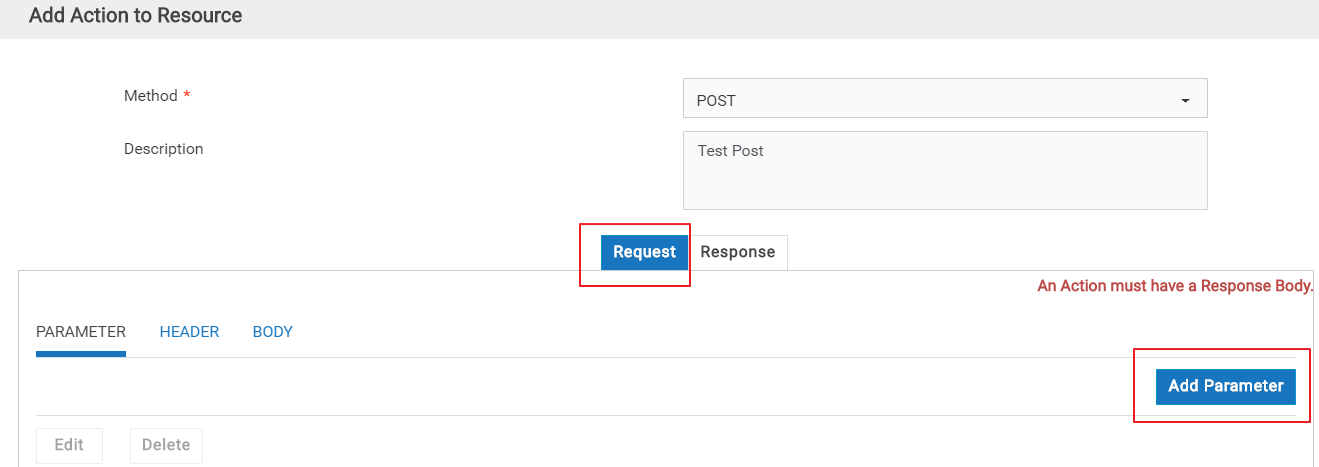
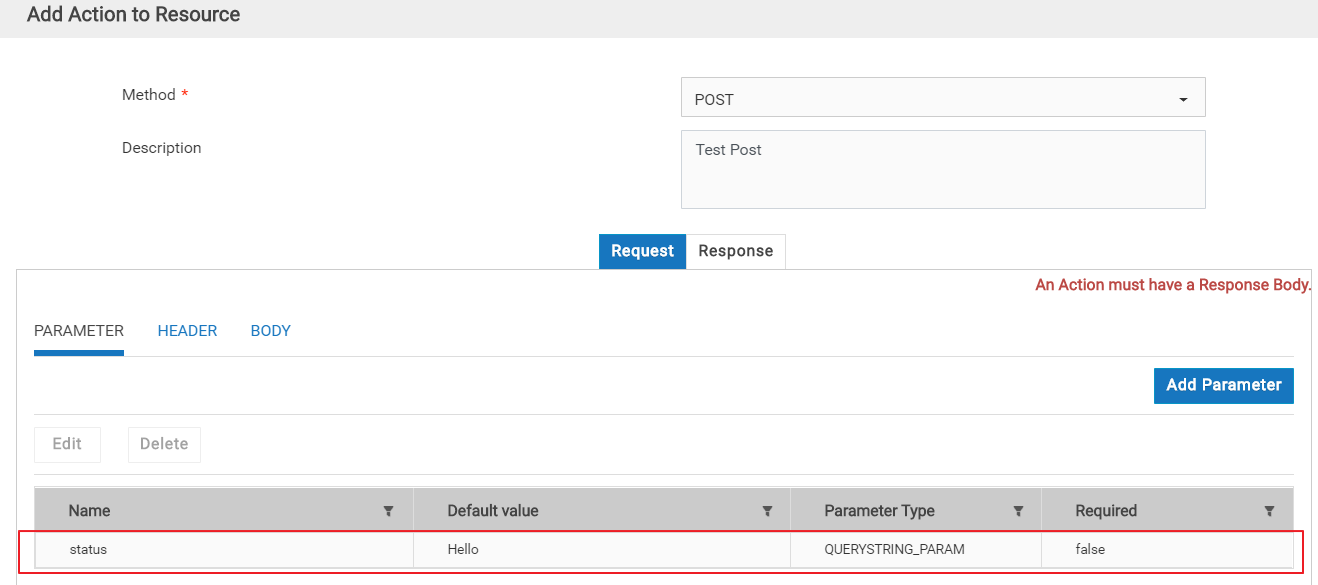
7. On the Add Action to Resource page, select POST as the Method. In our example, we are considering a POST request which needs a Request PARAMETER and a Response BODY. Click Add Parameter to add the Request PARAMETER.
8. Specify the PARAMETER name exactly as it is in the API documentation (https://developer.twitter.com/en/docs/tweets/post-and-engage/api-reference/post-statuses-update).
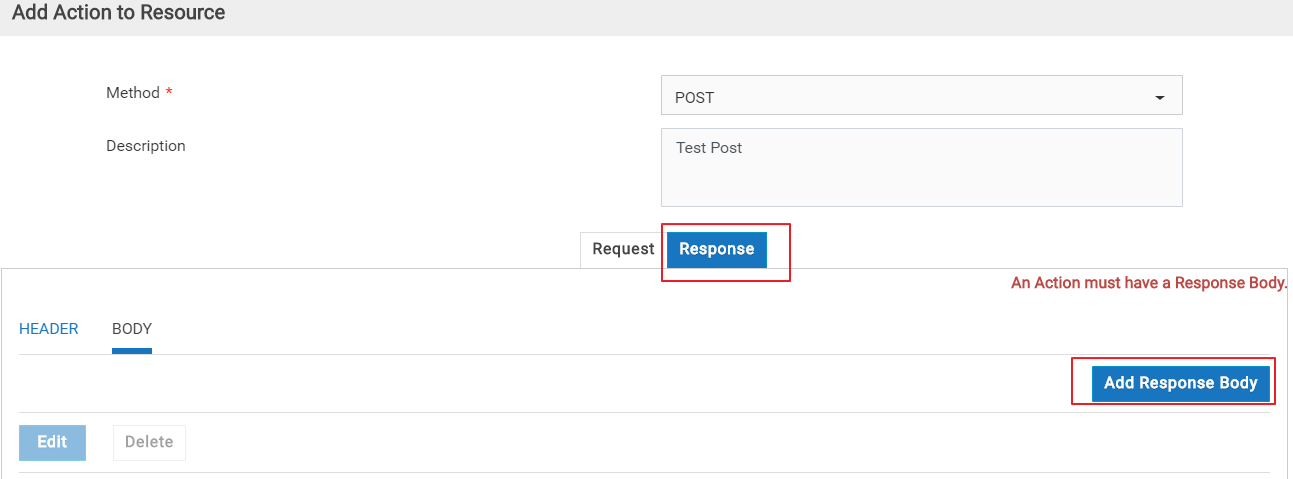
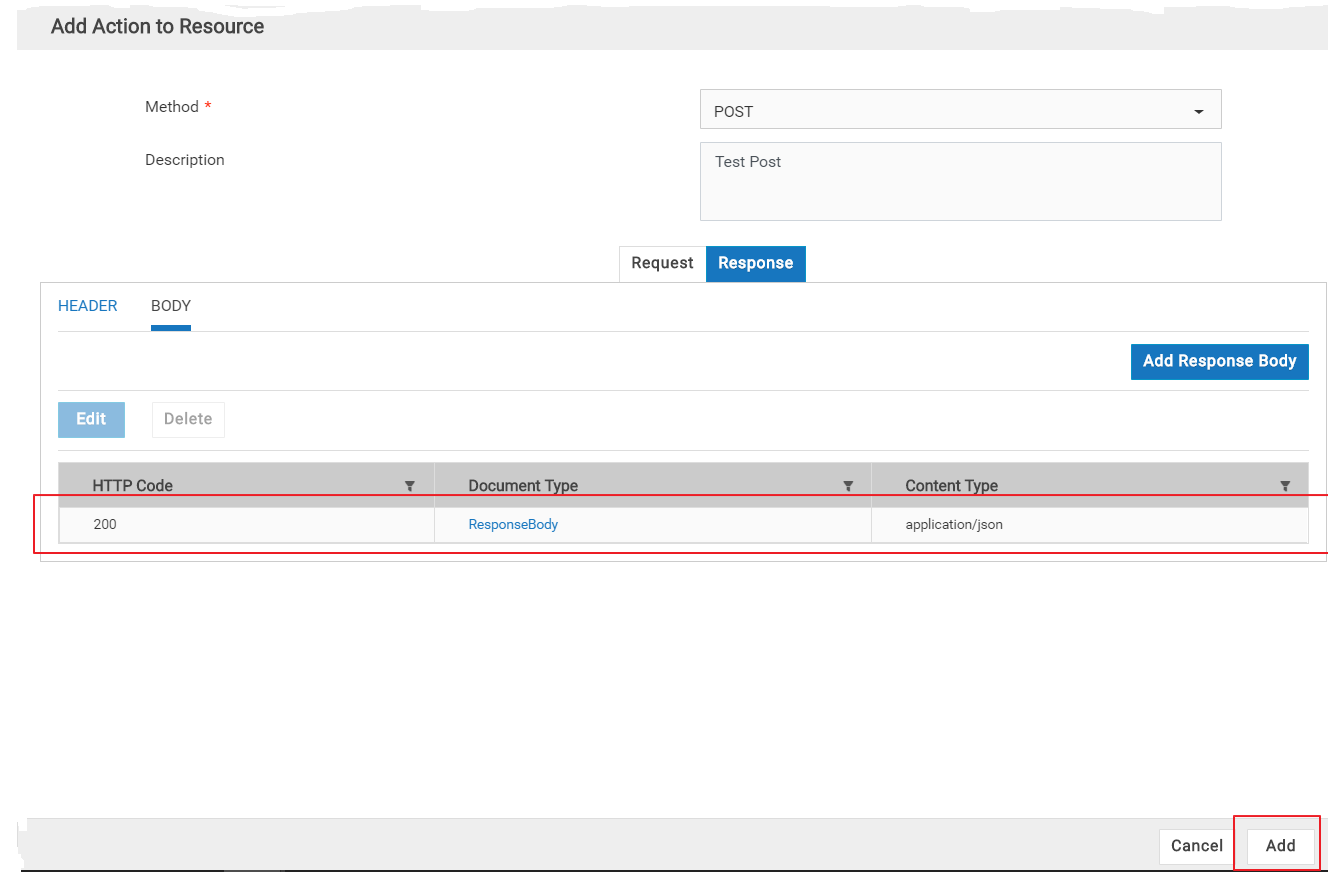
9. Now let us add the Response Body. Click Response > BODY > Add Response Body.
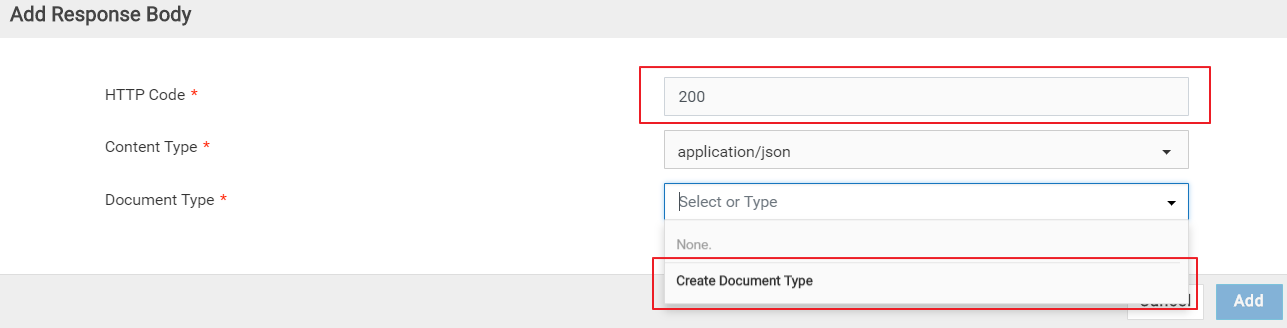
10. In the Document Type drop-down list, click Create Document Type and then click Load JSON in the Add New Document Type window.
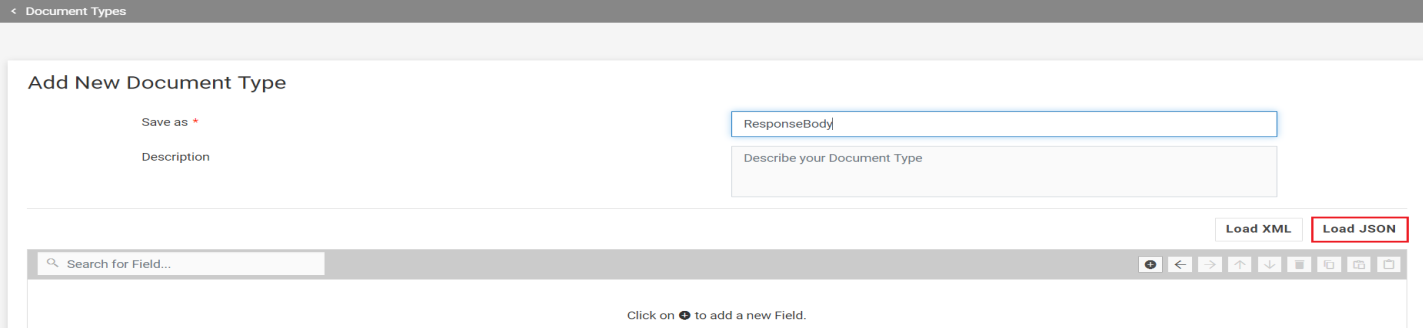
11. Copy the Example Response from the Twitter API Documentation page (https://developer.twitter.com/en/docs/tweets/post-and-engage/api-reference/post-statuses-update), paste it in the text area of the page as shown below, and click Load. Note that there is a known issue in the response section of the Twitter API Documentation. As a workaround, while pasting, omit the record starting with the string source. After loading, click Save and then Add to add the Response BODY.
12. Click Add to add the Action.
13. The Actions column displays the POST action.
14. Click Next and then click Finish to create the REST Application TweetOnTwitter. Then create a new Account by clicking Accounts as shown below.
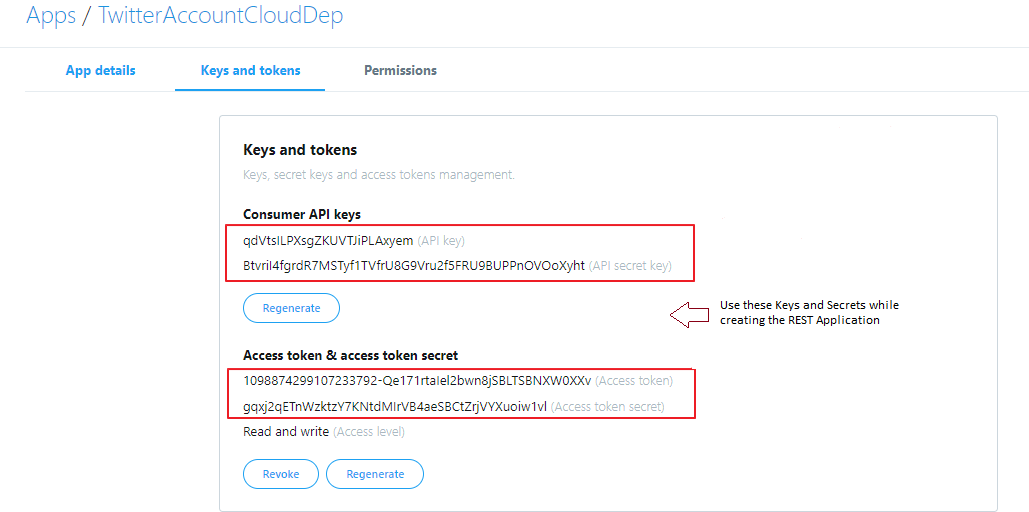
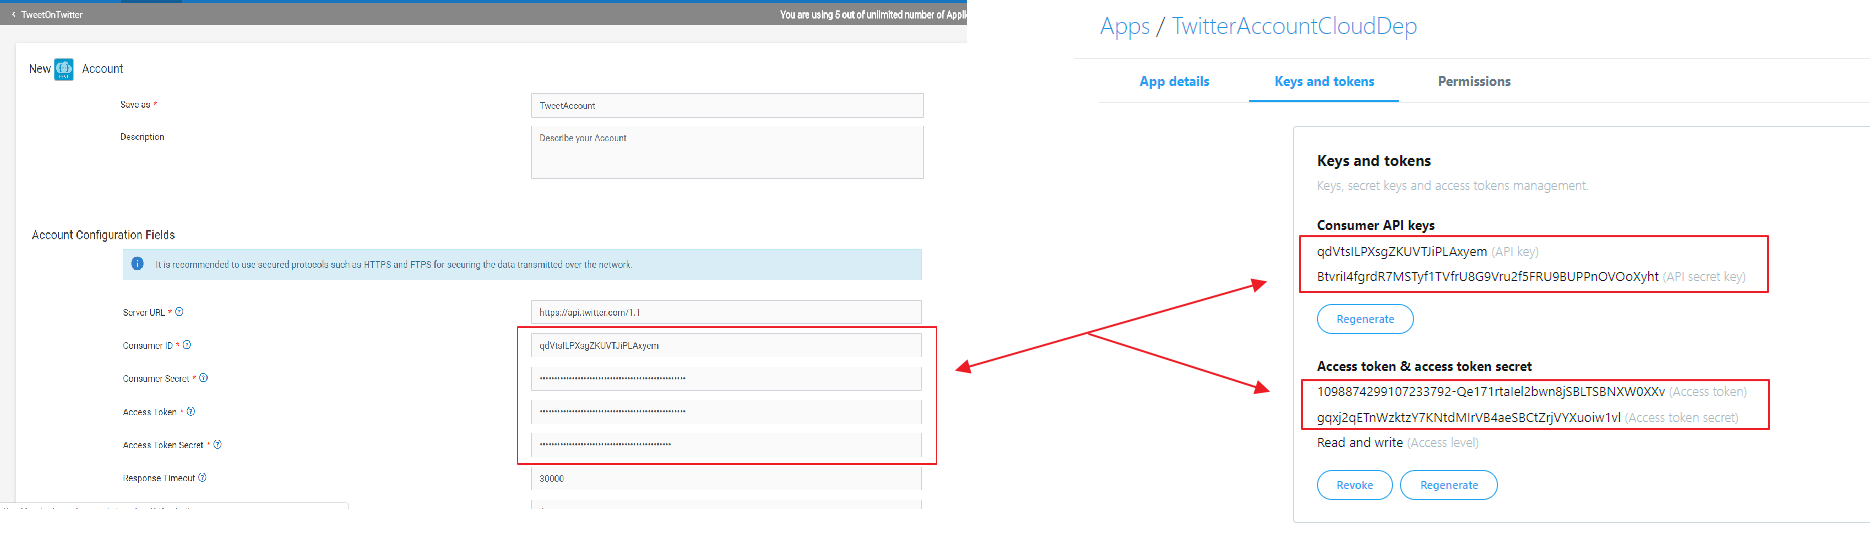
15. Then click Add New Account, fill in the Account configuration details obtained from the Twitter app (Consumer API Keys and Access Tokens) as shown below, and click Save.
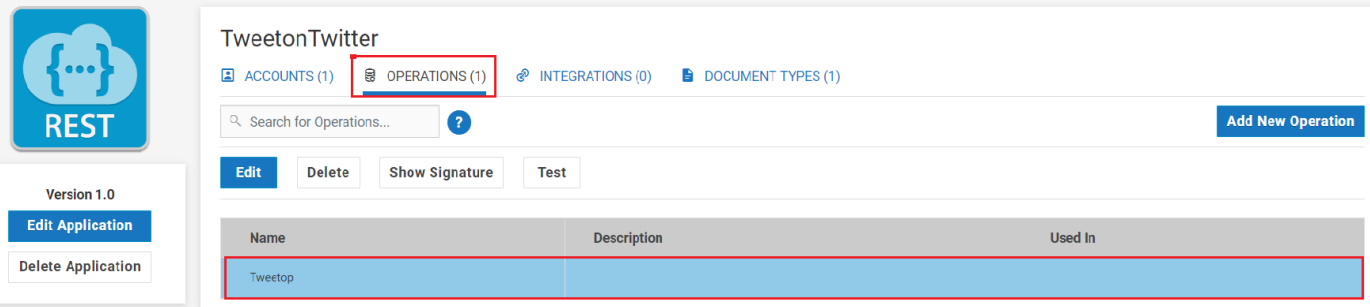
16. Now click OPERATIONS > Add New Operation. Provide all the details and create the Tweetop operation.
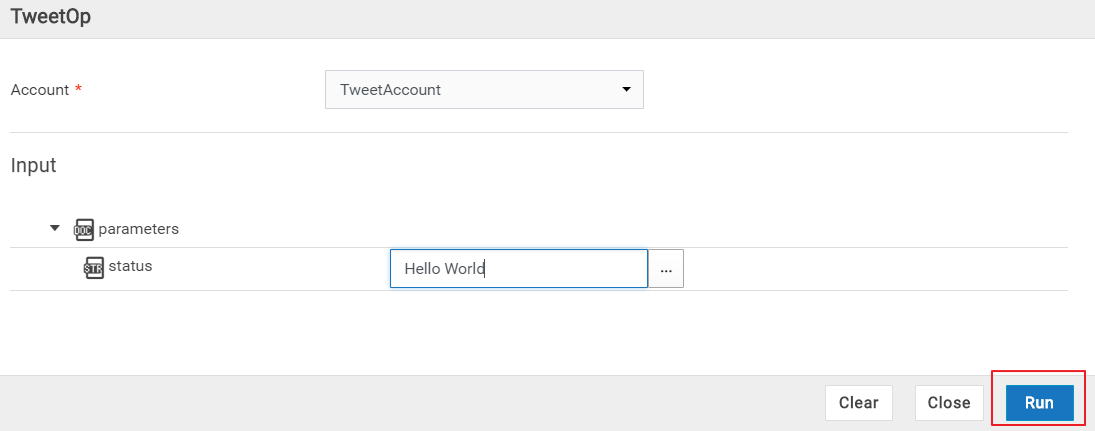
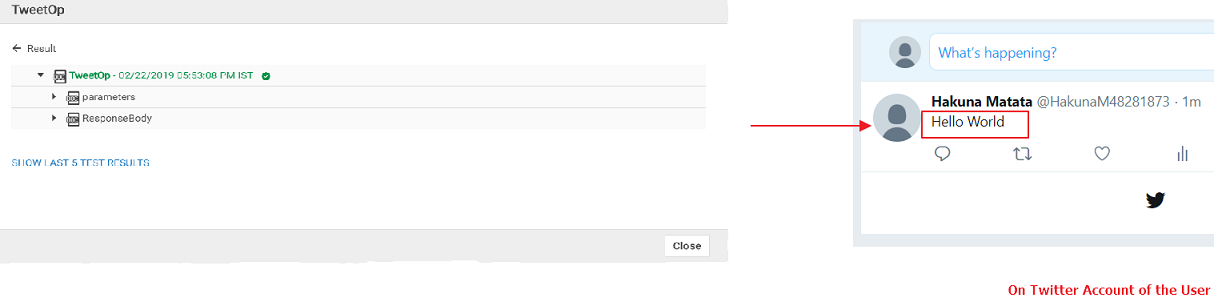
17. Select the operation, click Test, and then Run the operation.
18. You will see that running the operation has triggered a tweet on your Twitter account.
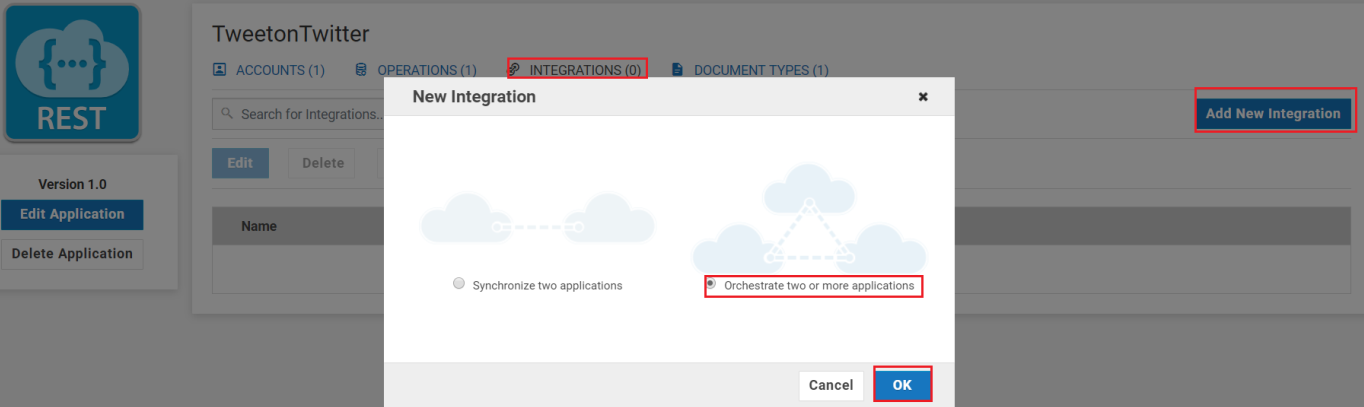
19. You can also trigger the REST Application from an integration. Click INTEGRATIONS > Add New Integration, and select the Orchestrate two or more applications option.
20. Setup the Integration as shown below using the REST Application, and then click Save.
21. Run and test the Integration. This will tweet as Hello World Once Again.
Next Steps
Whenever you execute the Integration, you will see a new tweet on the user's Twitter account with your message.