Managing Scopes
A scope defines the services the client can access on behalf of the resource owner. A scope consists of a name and one or more services. If access is granted for a scope, then access is granted for all the services in that scope. When a request is made, Integration Cloud verifies that the scope is defined for a client. The client is allowed to access only the service URLs that are specified for the scope. If the requested scope is not defined, Integration Cloud returns an error indicating that the scope is invalid.
Note:
You cannot delete a scope that is used by a client. Also, a scope cannot be deleted if it is associated with an existing token.
Note:
Users who have the
Access Control permission under
Settings  > Access Profiles > Administrative Permissions > User and Ownership Controls
 can create, edit, and delete scopes.
See
About OAuth 2.0 for information on the high-level steps for configuring OAuth 2.0.

To add a scope
1. From the Integration Cloud navigation bar, go to Settings > OAuth 2.0 > Scope Management > Add New Scope. 2. On the Add New Scope page, complete the following fields. Required fields are marked with an asterisk on the screen.
Field | Description |
Name | Type a unique name for the scope. You cannot modify the scope name after a scope is saved. Scope names are not case-sensitive. |
Description | Type a description of the scope. |
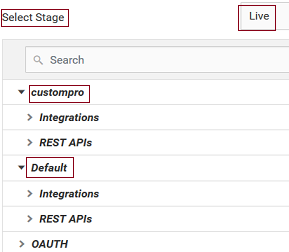
Services | Specify the list of services that the client can access on behalf of the resource owner for executing the integrations. Click Select Services and in the Services dialog box, select the exposed Integrations or REST Resources that you want to add as Service URLs from the listed projects in the selected stage. The Services dialog box displays the exposed integrations and REST Resources available in all projects, that is, in custom projects and in the Default project in the selected stage. Note:
You can search by the project name, integration name, or by the REST API name. The search function works for integrations and REST APIs only after you have expanded the integrations or REST API nodes in that project. It is recommended to first search for the project and then search for the integrations and REST APIs in that project. In the Services dialog box, select the exposed integrations and REST Resources that you want to add as Service URLs, and then click Add or Update to add or update the respective service URLs to that scope. |
Service URLs | This field appears once you have added the exposed Integrations and REST Resources and shows the selected services. Service URL is a relative URL and it must start with /integration. For example, if the absolute URL is https://<sub-domain>.webmethodscloud.com/integration/rest/external/integration/run/development/restintegration, then the Service URL is /integration/rest/external/integration/run/development/restintegration. |