This document describes following sections:
 To start the IDL Extractor for Integration Server
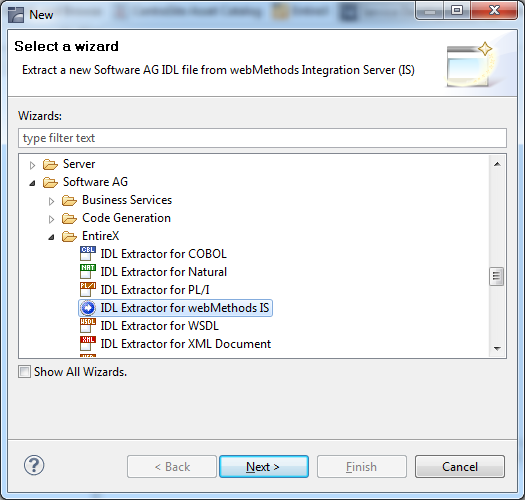
The IDL Extractor is a New Wizard in Eclipse. Choose New from the file menu, select IDL Extractor for webMethods IS in the following page and choose Next.
Note:
You can also choose New from the toolbar or
context menu of a view showing resources. Also Ctrl-N starts the
selection of the New Wizards.
If you are using the wizard for the first time without any predefined Integration Server connections, continue with Step 2a: Connect Designer with Integration Server.
Or:
If Integration Server connections are already defined (see Integration Server Connections), or you want to communicate with an
additional Integration Server, continue with
Step 2b: Connect Designer with Integration Server using an Existing Connection.
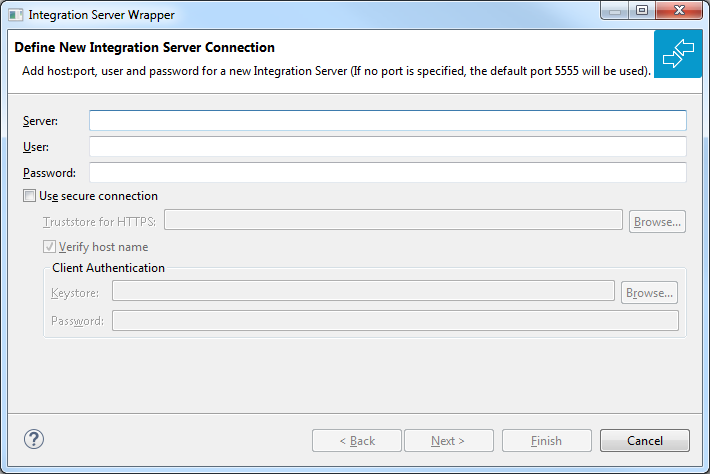
 To create a new Integration Server connection
Define the new Integration Server connection on the following wizard page.
Notes:
Choose and continue with Step 3: Select the Integration Server Package to Extract.
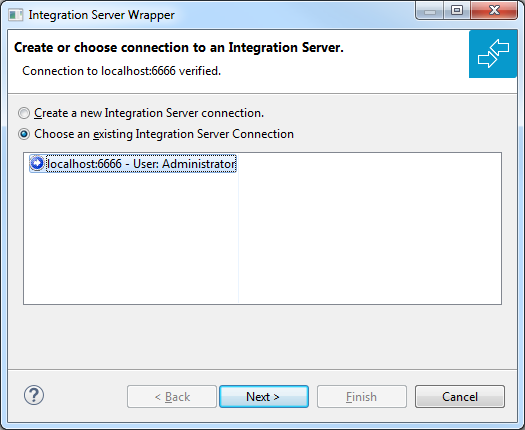
 To use an existing Integration Server connection
Select Choose an existing Integration Server Connection and an Integration Server connection from the list.
The selected connection is verified by a
ping command. If the response is valid, the
button is enabled. If invalid, an error message
is displayed.
Continue with Step 3: Select the Integration Server Package to Extract.
 To create an additional Integration Server connection
Select Create a new Integration Server Connection and continue with Step 2a: Connect Designer with Integration Server.
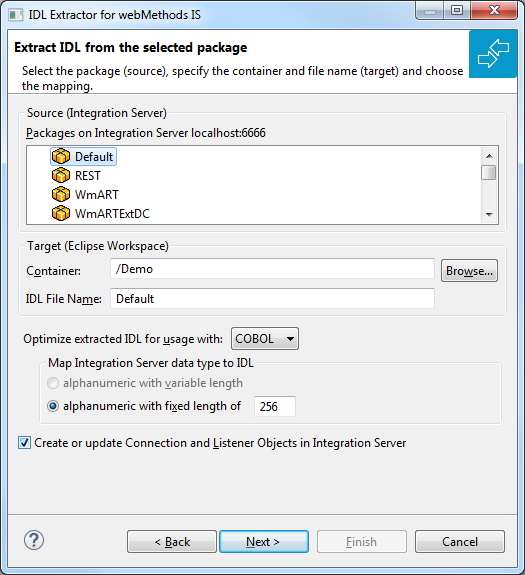
 To extract the IDL from the selected package
Select the package to extract (from the list indicated by Source), for example the package "Default" in the screen above.
Specify the target. By default, the wizard tries to find a valid container based on your position in the Navigator or Package Explorer View.
Or:
Choose to select a container from
your workspace.
Notes:
Optimize the extracted IDL. Use the combo-box and select the target programming language:
COBOL
For usage with the COBOL Wrapper. Enter the default length for IDL type A(default-length) fields which map then to COBOL alphanumeric data items PIC X(default-length).
Natural
For usage with the Natural Wrapper. Choose one option indicated by Map Integration Server data type to IDL:
alphanumeric with variable length: Extract to IDL Type AV fields which map then to Natural DYNAMIC data types. The interface does not have any length restrictions.
alphanumeric with fixed length: Extract to IDL Type A(default-length) fields which map then to Natural fixed-length alphanumeric data types. The interface from a Natural point of view is more
legacy-like and easier to program, but there are length restrictions.
PL/I
For usage with the PL/I Wrapper. Enter the default length for IDL Type A(default-length) fields which map then to PL/I fixed-length alphanumeric fields CHAR (default-length).
Other
For usage with other EntireX Wrappers. If you later use wrappers other than the COBOL Wrapper, Natural Wrapper or PL/I Wrapper, no options need to be specified.
Clear Create Listener Objects in Integration Server to only extract the IDL file from the package. The wizard finishes after extracting the IDL.
Tip:
This is useful if you want to modify the IDL (manually) before
generating clients. In this case, the connections and listeners have to be
created in a separate step. See Step 4c: Create a Connection and Related Adapter Listener in the Integration Server Wrapper documentation.
Choose to store the IDL file in the selected container in the Eclipse workspace. When you go to the next page, the button is disabled, because the IDL file has already been created and this step cannot be reverted.
As a prerequisite, the IDL file has been stored in the workspace and the button is now disabled.
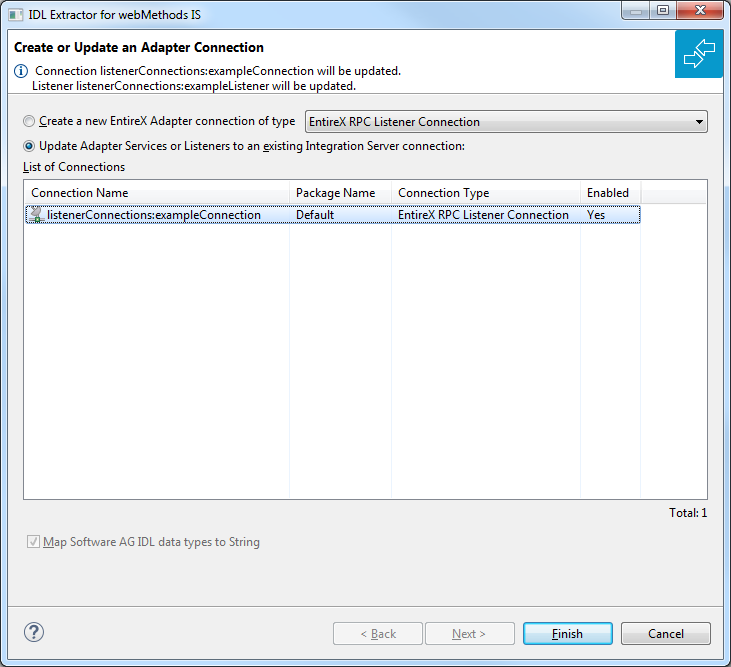
 To create a new connection
Select a Connection type and click .
Notes:
IN parameters.
 To update an existing connection
Select a connection from the list of available listener connections and click .
Notes:
IN parameters.
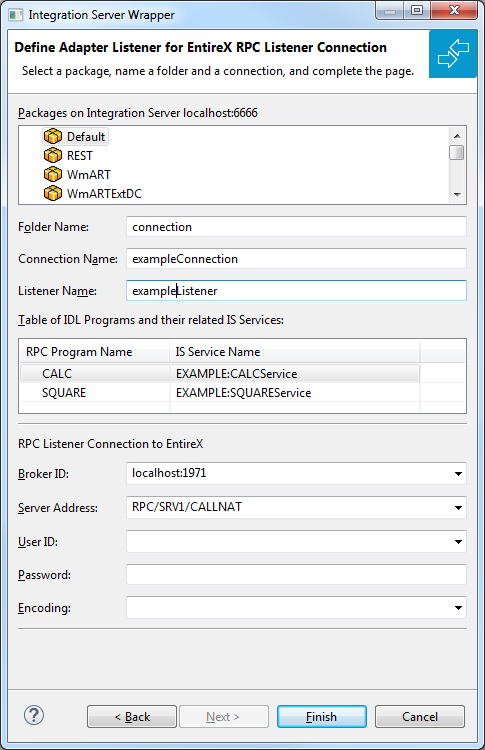
 To define a listener
Select an Integration Server package where the listener will be stored.
Specify the names for Folder Name (default:
library name), Connection
Name (default: library
nameConnection) and Listener Name
(default: library nameListener).
If necessary, edit the Broker settings for the Listener (Broker ID, Server Address, User ID, Password, and Encoding).
Note:
When creating a connection, a package dependency is added such
that the selected package depends on webMethods EntireX
(the package WmEntireX) with the version currently used.
Choose .
As a result, the following objects will be created:
one connection of type EntireX RPC Listener, EntireX Reliable RPC Listener or EntireX Direct RPC Listener
one listener object
For a connection of type EntireX Reliable RPC Listener the following objects will be created in addition for each IDL program:
one notification object
one trigger object
one document type object