You can call Broker ActiveX Control remotely if you use it as an automation server. This means you can use the Broker component from a separate process - either on the same machine or on another machine in the network.
This document covers the following topics:
 To set up the server environment
From the Administrative Tools in the Control Panel, open the Component Services on the server.
The following dialog box will be displayed:
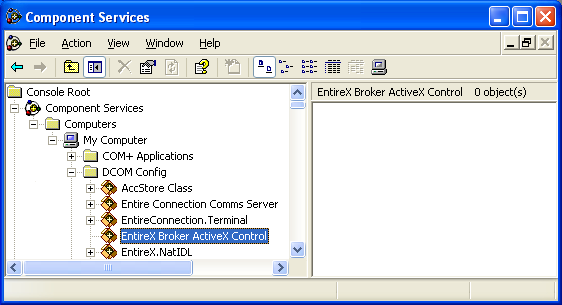
Select EntireX Broker ActiveX Control in the DCOM Config list box and choose the properties from the context menu.
The following dialog box will be displayed:
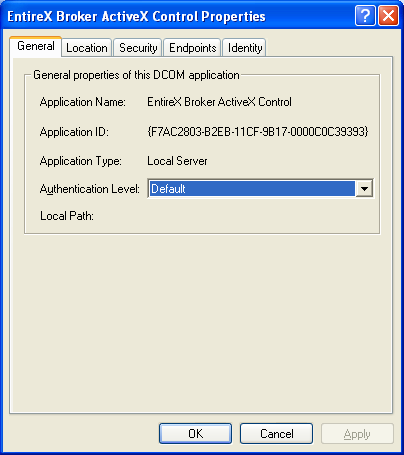
Click the Security tab.
Click the Security tab.
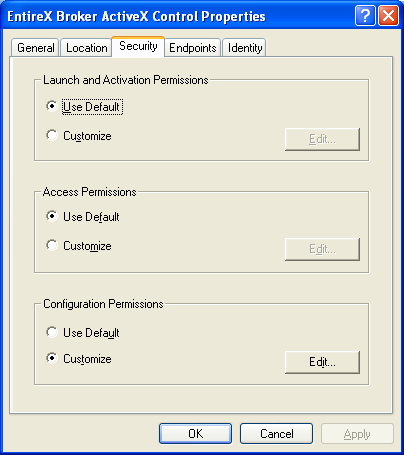
In the dialog box displayed above, keep the defaults for access, launch and configuration permissions.
Click the Identity tab.
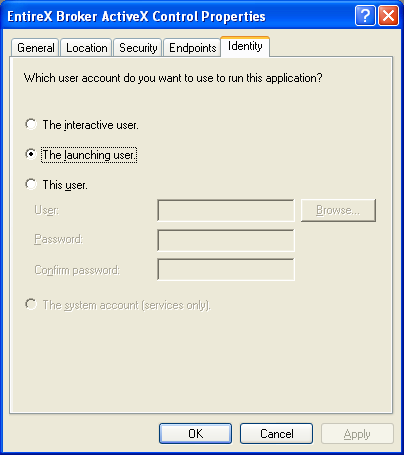
There are three options to define the user account to be used to run the application:
The interactive user
This implies that a user with permission to launch the application must be logged on to the server machine.
The launching user
This implies that an account must be created on the server machine with the same username/password as on the client machine. This account will then be used to launch the application.
This user
A final option is to specify a user account to be used when launching the application.
In each case, the username/password of the client machine must also exist on the server machine.
Select one of the options and choose to return to the Component Services.
Click on My Computer and choose the properties from the context menu.
Click on My Computer and choose the properties from the context menu.

The following dialog box will be displayed; click on the Default Properties tab.
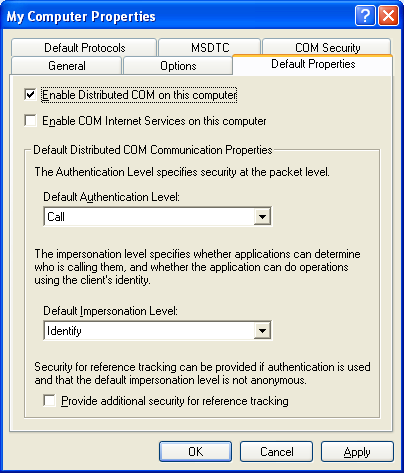
Choose the options as shown in the dialog box above.
Click on the COM Security tab.
Click on the COM Security tab.
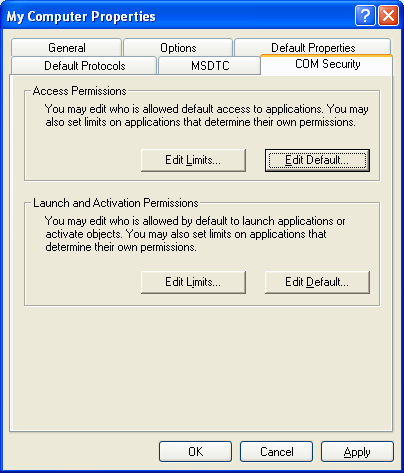
In the Launch and Activation Permissions area of the dialog box displayed above, choose . The following dialog box will be displayed:
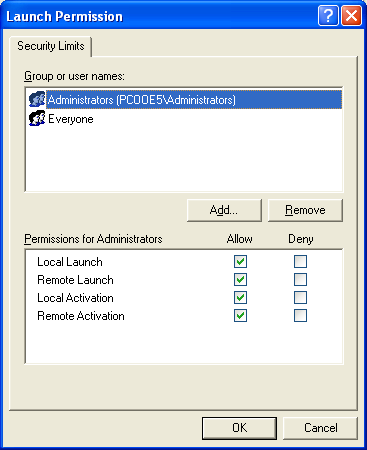
Make sure that either the user corresponding to the client machine account, or a group to which the user belongs, has Allow Launch as Type of Access.
Choose in this screen and then , and exit Component Services on the server.
The EbxProxy.dll is installed by default on the server in directory <drive>:\SoftwareAG\EntireX\bin. Copy the file from the server machine to the client machine.
The DLL must then be registered with: REGSVR32
<path>\EBXproxy.dll.
 To configure the client environment
From the Administrative Tools in the Control Panel, open the Component Services on the client.
The following dialog box will be displayed:

Select EntireX Broker ActiveX Control in the DCOM Config list box, choose the properties from the context menu and click the Location tab.
In the Location tab of the ActiveX Control Properties dialog box above, select the checkbox Run application on the following computer: and enter either the hostname or the IP address of the server machine.

Choose and then .
Select My Computer and choose the properties from the context menu.

The My Computer Properties dialog box will be displayed. Select the Default Properties tab.

Choose the check box Enable Distributed COM on this computer, set the default authentication level to Call and the default impersonation level to Identify.
Choose .
You are now ready to test the connection between the client machine and the server machine.
Test the TCP/IP connection between the client and the server (use, for example, ping).
To test whether an application can be called remotely, you can use the OLE/COM Object Viewer:
Run the OLE/COM Object Viewer on the client.
The OLE/COM Object Viewer dialog box will be displayed:
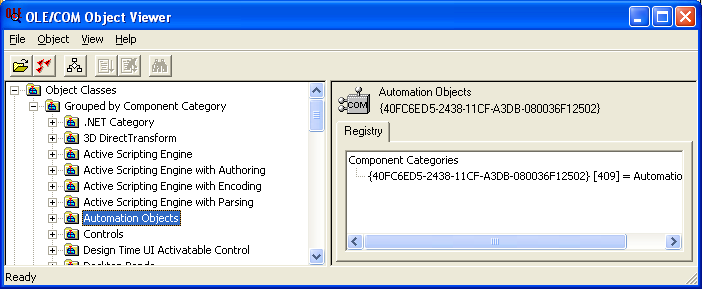
Select Automation Objects in the navigation frame to display a list of all the automation objects on the client machine.
A screen similar to the one displayed below will be displayed:
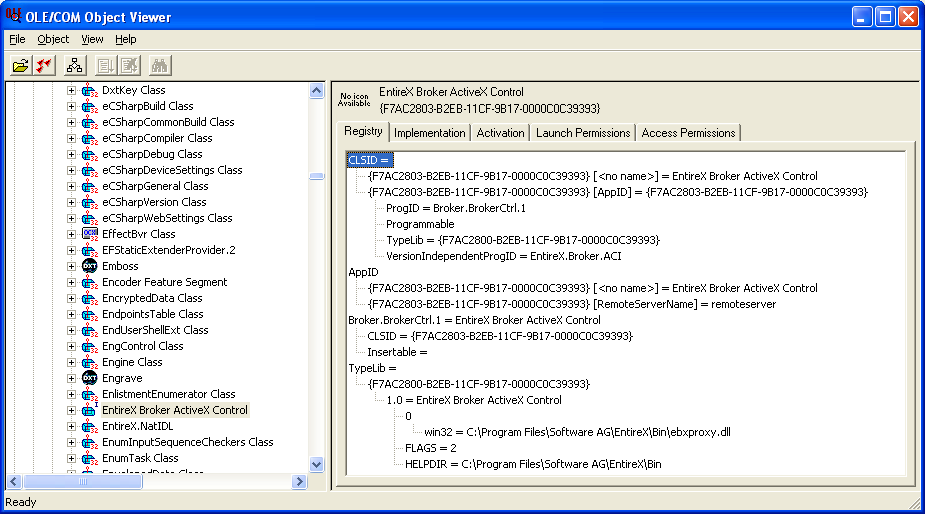
Select EntireX Broker ActiveX Control, open its context menu and choose Create Instance.
If the remote call is successful, the EntireX Broker component on the server machine will be called and the following screen will be displayed:
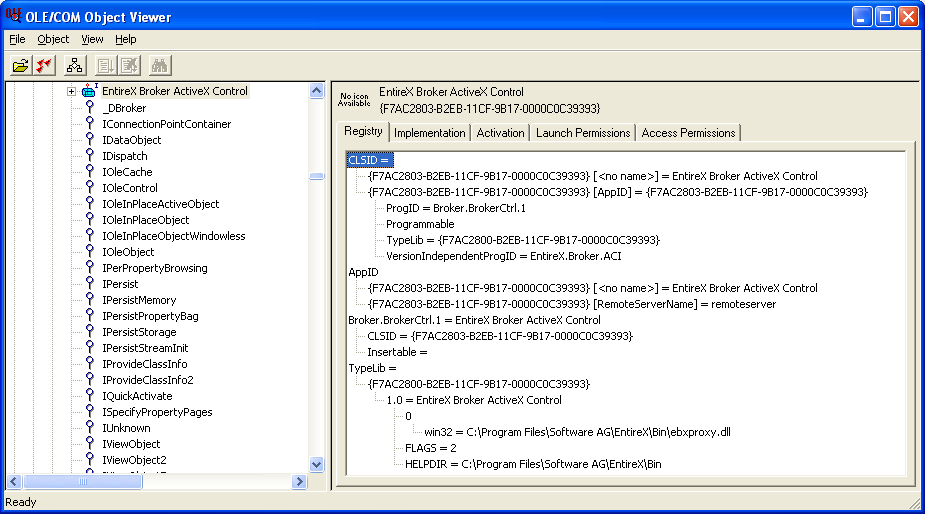
If you receive an error message (for example "Class not registered") check the following:
the TCP/IP connection (with PING)
the security definitions on the server with Component Services
the remote server name on the client (this can also be checked with the OLE/COM Object Viewer)
When the connection has been established, you will be able to run your application on the client. Note that Broker ActiveX Control must be used as automation server. For information on how to use Broker ActiveX Control with Visual Basic see Using Broker ActiveX Control as an Automation Server.