
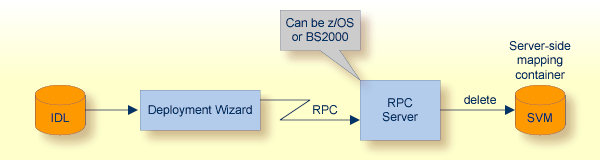
This document describes how to synchronize server-side mapping files between Designer and RPC server (see Server-side Mapping Files in the RPC Server for CICS, Batch, IMS) using the Server Mapping Deployment Wizard. Synchronizing or undeploying server mapping files from the RPC server is part of Migrating Server Mapping Files. This document covers the following topics:
See also Undeploying Server-side Mapping Files for CICS ECI | IMS Connect.
Note:
To synchronize server mapping files to the webMethods EntireX Adapter for Integration Server you need to update your Adapter
connection.
See Step 3: Create or Update an Adapter Connection in the Integration Server Wrapper documentation.
Using the wizard requires an active RPC server. Also, the Deployment Service of the RPC server must be properly configured. See the platform-specific documentation for more information:
BS2000, see Deployment Service in the EntireX RPC Server for BS2000 documentation.
To undeploy a server-side mapping file with the wizard, follow the steps below:
Step 3b: Define the Connection to the Deployment Service and Undeploy
Step 4: Select an Existing Deployment Environment and Undeploy
Make sure the extension of the server mapping file is changed from .svm to .cvm before you start the wizard. This is the first step when you migrate server mapping files from the server-side to the client-side. See Migrating Server Mapping Files.
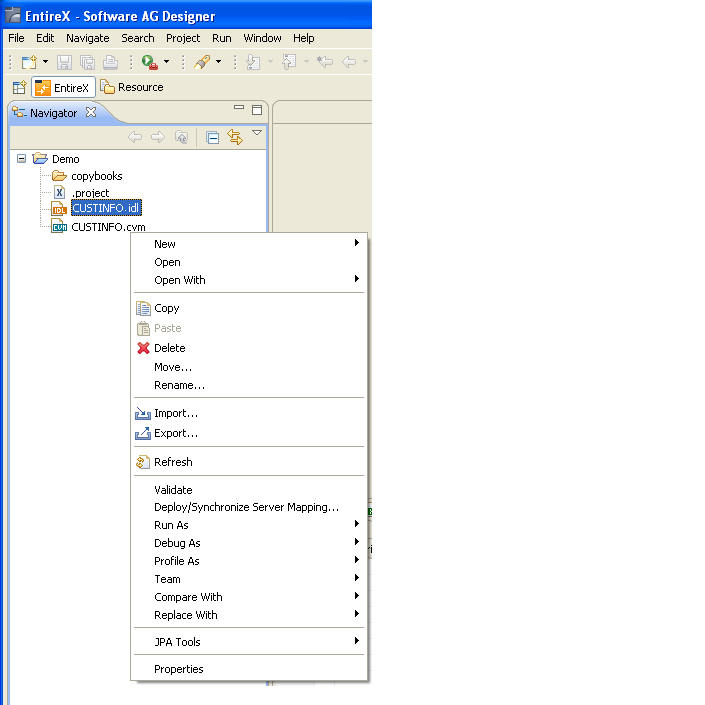
To start the Server Mapping Deployment Wizard, select an IDL file and from the context menu choose .
To continue, press with one of the following choices:
If you are using the Server Mapping Deployment Wizard for first time with no predefined deployment environment preferences, continue with Step 3a: Create a New Deployment Environment below.
If deployment environments are already defined, you may also continue with Step 4: Select an Existing Deployment Environment and Undeploy.
If no deployment environments are defined, you only have the option to create a new deployment environment.
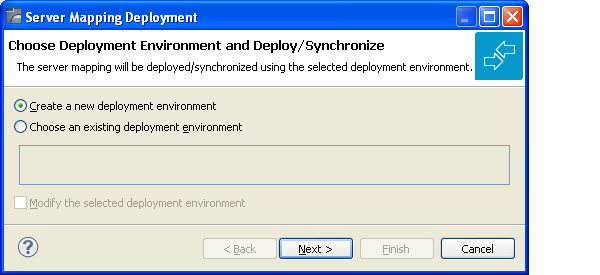
Select Create a new deployment environment and press to continue with Step 3b: Define the Connection to the Deployment Service and Undeploy.
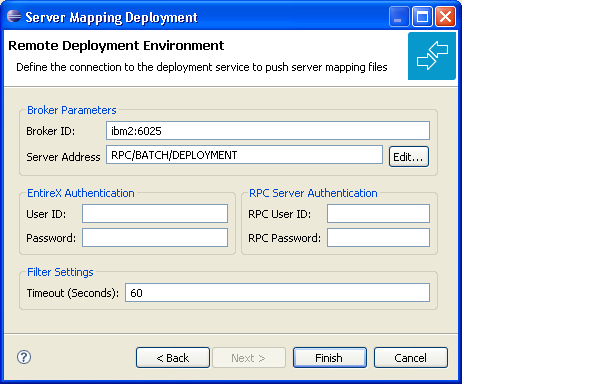
Use this page to define a connection to the deployment service of the RPC server.
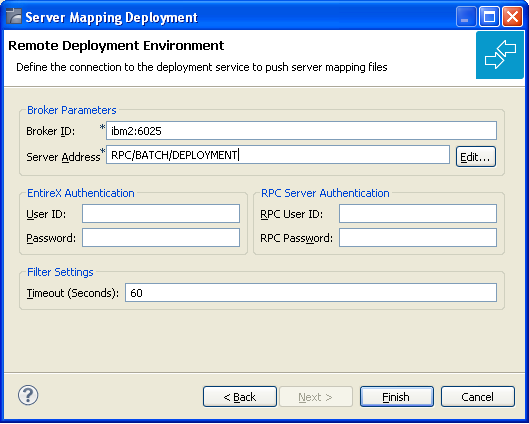
Enter the required fields:
Broker Parameters Broker ID and Server Address, which will have the default format. The last part (broker service) of the server address must always be "DEPLOYMENT".
The EntireX Authentication parameters describe the settings for the broker. These parameters apply if the broker is running with EntireX Security.
The RPC Server Authentication parameters describe the settings for the RPC server. These parameters apply if the RPC server is running with security. See Impersonation under CICS | Batch | IMS.
The given Timeout value must be in the range from 1 to 9999 seconds (default: 60).
Press to undeploy. Undeployment of the server mapping is successful if the wizard ends. No confirmation message is given.
Use this page to select the deployment environment (that is, the RPC server) to which you want to undeploy.

Check the option Choose an existing deployment environment and select a deployment environment from the list. Press to undeploy. Undeployment is successful if the wizard ends. No confirmation message is given.
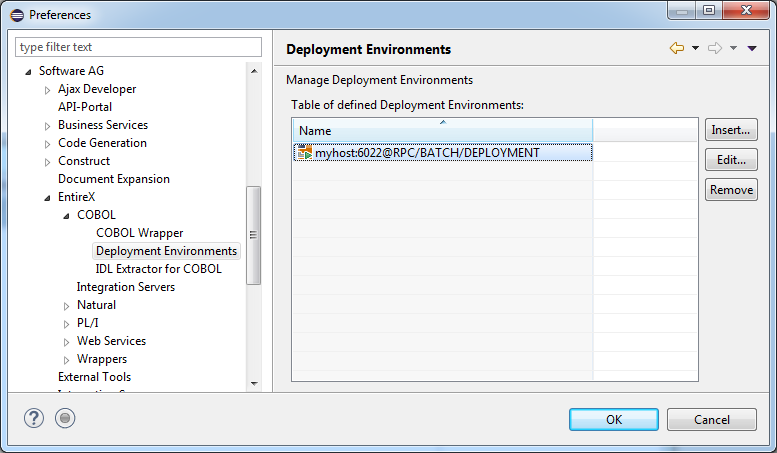
In the preferences for the Server Mapping Deployment Wizard you define deployment environments, a connection to the Deployment Service of the RPC server. See Deployment Service for z/OS (CICS, Batch, IMS) | BS2000 The following sections are offered:
The deployment environment is managed from the deployment environment Preferences page. The deployment environments can be created, edited and removed. The deployment environment will be used for the selection lists in the Deployment Wizard. To manage these deployment environments, open the Preferences page:
 To create a new deployment environment
Press .
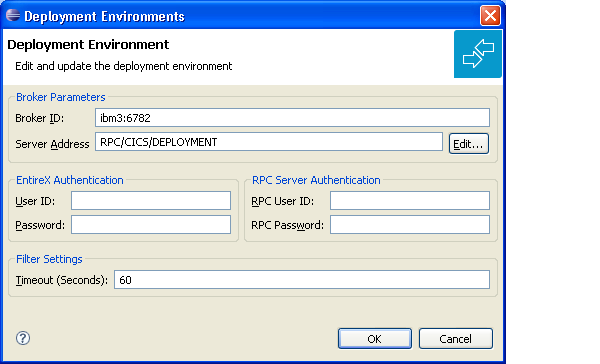
To edit an existing deployment environment
Select the table row and press . If multiple entries are selected, the first entry is used.
To remove an existing deployment environment
Select the table row and press . Multiple selections are possible.
The command -deploy:cobol is provided to synchronize server mapping files between Designer and RPC server,
using the Designer in command-line mode.
See Using EntireX in the Designer Command-line Mode for general information. Synchronizing or undeploying server mapping files from the RPC server is part of Migrating Server Mapping Files.
To undeploy previously deployed server mapping information
Make sure the extension of the server mapping file is changed from .svm to .cvm before you start the wizard. This is the first step when you migrate server mapping files.
Execute the command -deploy:cobol with the IDL file.
| Task | Command | Option | Description |
|---|---|---|---|
| Synchronize SVM files. | -deploy:cobol |
-environment |
Target environment. Name of the COBOL deployment environment or an RPC server description. |
-brokeruser |
User used for broker authentication (optional). | ||
-brokerpassword |
Password used for broker authentication (optional). | ||
-rpcuser |
User used for RPC server authentication (optional). | ||
-rpcpassword |
Password used for RPC server authentication (optional). |
Note:
Run the command from the directory containing the IDL file.
If no server-side mapping file is found (Designer file with extension .svm), the previously deployed server mapping information
related to the
IDL file will be removed on the server side (undeployed). See Undeploying Server-side Mapping Files in the RPC server documentation for CICS, Batch, IMS.
-deploy:cobol /SVMDeployTests/idls/basicodo.idl  /SVMDeployTests/idls/basicdt.idl /SVMDeployTests/idls/basicarr.idl
 -environment ibm2:3980@RPC/RPCALL/DEPLOYMENT
 -brokeruser EXXUSR1
 -brokerpassword EXX$PWD1