Defining Panes for the Application Window
You need to define panes and pane configurations for the user interface of a mobile application. Panes are subsections of an application’s window. The application displays views within panes. A pane configuration indicates how to lay out the panes within the window.
You define panes using the PaneDefinition object. You define a pane configuration using the PaneConfiguration object.
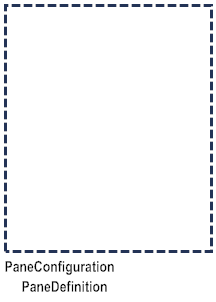
The simplest layout is a single pane. To have a single pane, add a single PaneDefinition child object to the PaneConfiguration object. The PaneDefinition object indicates the pane to display and the view that you initially want the application to display in the pane.
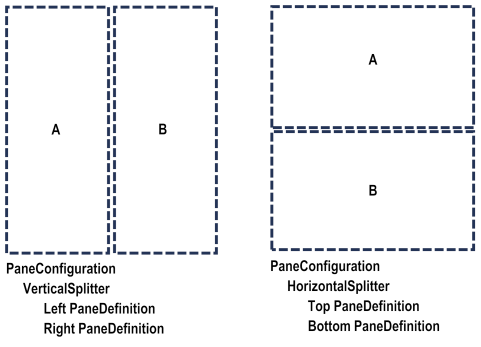
Another simple layout is to use two panes, either vertically (side-by-side) or horizontally (one on top of the other). To define this type of configuration, rather than adding the PaneDefinition child object directly to the PaneConfiguration object, you first add either a VerticalSplitter object or a HorizontalSplitter object to the PaneConfiguration object. You can then add two PaneDefinition child objects to the splitter object. The order you list the PaneDefinition objects is the order the panes display in the window. For example, if you list pane A followed by pane B, in a vertical arrangement pane A is on the left and in a horizontal arrangement pane A is on the top.
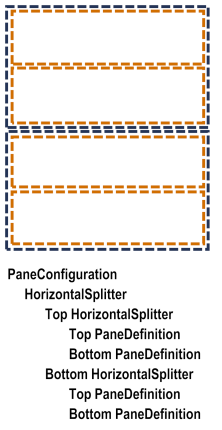
If you need a more complex arrangement of panes for an application’s user interface, you can nest VerticalSplitter and HorizontalSplitter objects under parent splitter objects. For example, the following shows a layout with four panes arranged horizontally.
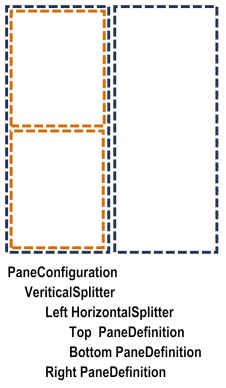
The following shows another example that has three panes, with two panes displayed horizontally on the left and a single pane on the right.
Keep the following usage notes in mind when working with panes:

When you create a new project, by default, the application’s window is named “MainWindow” and has a pane configuration made up of two panes named “MasterPane” and “DetailPane”. The pane configuration is defined to arrange the panes vertical, with the MasterPane on the left and the DetailPane on the right.
If you do not want to use the default panes and configuration, you can delete them.

You can add as many panes as you want.

You can define multiple pane configurations and have the application switch pane configurations, as needed.
For example, you might only want a single pane for an application’s login panels, but switch to a multi-pane setup after the user logs in.

You can use the same named panes in multiple pane configurations.

A pane configuration can include one or more panes.
For smaller devices, such as phones, you might only use a single pane or maybe two, one for the navigation and one for the main view. For larger devices, such as tablets, you might want to use additional panes.

The order you list the
PaneDefinition child objects within a
PaneConfiguration parent object is the order the panes display in the window.

By default, when you use a
HorizontalSplitter, the split creates two equal sections, one on top of the other. However, you can define the size for
one of the sections, and the other section uses the remaining space. To set the absolute size of a pane, set the
HorizontalSplitter object’s
Height property. For more information, see
HorizontalSplitter Properties.
Note:
An exception to the default behavior is when you use a HorizontalSplitter with a NavView in the bottom pane. In this case, the size of the bottom pane is set to the height required for the NavView. The top pane uses the remaining space.

By default, when you use a
VerticalSplitter, the split creates two equal side-by-side sections. However, you can define the size for
one of the sections, and the other section uses the remaining space. To set the absolute size of a pane, set the
VerticalSplitter object’s
Width property. For more information, see
VerticalSplitter Properties.
Related Topics


