How do I Secure API Data Store Communication using HTTPS with Search Guard Plugin?
You can use the Search Guard plugin to secure API Data Store (a simple Elasticsearch instance), one of the components in an API Management setup, to communicate securely over HTTPS.
Note:
If you have secured Data Store using Search Guard, you cannot restore the global cluster state of the Data Store. The global cluster state includes information such as persistent cluster settings, index templates, pipelines, and so on. To restore the global cluster state, you must either perform the restore with the cluster state first, then secure the Data Store, or disable Search Guard, perform the restore with cluster state, and then enable the security plugin. However, you can still perform a restore without the global cluster state with the Search Guard plugin enabled. For information on Restoring data and the usage of restore parameters, refer the Restore using script section.
Before you begin
Ensure that you have:
To secure API Data Store communication using HTTPS
1. Install and initialize Search Guard plugin.
a. Shutdown API Gateway.
b. Open the command prompt to the location Installation_Dir/InternalDataStore/bin
c. Run the following command:
elasticsearch-plugin.bat install Search_Guard_plugin
file_location_in_the_file_system
d. Type y when the installation procedure prompts for additional required permissions it requires.
You should see a procedure completion message Installed search-guard-7 on successful installation.
e. Copy the folder sagconfig from Installation_Dir\IntegrationServer/instances\Instance_name\packages\WmAPIGateway\config\resources\elasticsearch to Installation_Dir\InternalDataStore.
f. Copy the certificates node-0-keystore.jks and truststore.jks from Installation_Dir\InternalDataStore\sagconfig to Installation_Dir\InternalDataStore\config.
g. Navigate to Installation_Dir\InternalDataStore\config\ and open the file elasticsearch.yml.
h. Delete all the properties that start with searchguard, if present, and add the Search Guard properties as follows:
searchguard.ssl.transport.keystore_type: JKS
searchguard.ssl.transport.keystore_filepath: node-0-keystore.jks
searchguard.ssl.transport.keystore_alias: cn=node-0
searchguard.ssl.transport.keystore_password: a362fbcce236eb098973
searchguard.ssl.transport.truststore_type: JKS
searchguard.ssl.transport.truststore_filepath: truststore.jks
searchguard.ssl.transport.truststore_alias: root-ca-chain
searchguard.ssl.transport.truststore_password: 2c0820e69e7dd5356576
searchguard.ssl.transport.enforce_hostname_verification: false
searchguard.ssl.transport.resolve_hostname: false
searchguard.ssl.transport.enable_openssl_if_available: true
searchguard.ssl.http.enabled: true
searchguard.ssl.http.keystore_type: JKS
searchguard.ssl.http.keystore_filepath: node-0-keystore.jks
searchguard.ssl.http.keystore_alias: cn=node-0
searchguard.ssl.http.keystore_password: a362fbcce236eb098973
searchguard.ssl.http.truststore_type: JKS
searchguard.ssl.http.truststore_filepath: truststore.jks
searchguard.ssl.http.truststore_alias: root-ca-chain
searchguard.ssl.http.truststore_password: 2c0820e69e7dd5356576
searchguard.ssl.http.clientauth_mode: OPTIONAL
searchguard.enable_snapshot_restore_privilege: true
searchguard.check_snapshot_restore_write_privileges: true
searchguard.restapi.roles_enabled: ["SGS_ALL_ACCESS"]
searchguard.authcz.admin_dn:
- "CN=sgadmin"
i. Save and close the file.
j. Shutdown and restart the API Data Store.
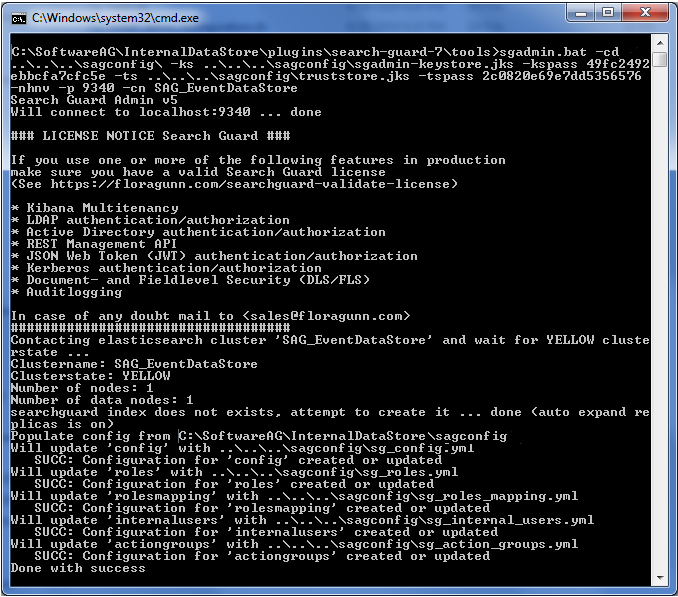
k. Navigate to Installation_Dir\InternalDataStore\plugins\search-guard-7\tools and run the following command to initialize the API Gateway Data Store.
sgadmin.bat -cd ..\..\..\sagconfig\
-ks ..\..\..\sagconfig\sgadmin-keystore.jks
-kspass 49fc2492ebbcfa7cfc5e -ts ..\..\..\sagconfig\truststore.jks
-tspass 2c0820e69e7dd5356576 -nhnv -p 9340 -cn SAG_EventDataStore
If you are using the Linux command it would be as follows:
sgadmin.sh -cd ../../../sagconfig\
-ks ../../../sagconfig/sgadmin-keystore.jks
-kspass 49fc2492ebbcfa7cfc5e -ts ../../../sagconfig\truststore.jks
-tspass 2c0820e69e7dd5356576 -nhnv -p 9340 -cn SAG_EventDataStore
2. Add users for basic authentication.
a. Navigate to Installation_Dir\InternalDataStore\sagconfig and open the sg_roles_mapping.yml file.
b. Add the username (for example, TestUser) in the users list as follows:
sg_all_access:
reserved: true
users:
"TestUser"
backend_roles:
"admin"
c. Generate the hash code for your password.
a. Run the command as follows:
Installation_Dir\InternalDataStore\
plugins\search-guard-7\tools>hash.bat.
b. Type the password.
c. Press Enter.
This generates the hash code.
d. Navigate to Installation_Dir \InternalDataStore\sagconfig and open the file sg_internal_users.yml.
e. Add the username and password as follows:
#keys cannot contain dots
#if you have a username with dots then specify it with username: xxx
Administrator:
hash: "$2a$12$sm2AEpQx6QNq6YRSYHGCnetiRWKMWrQY/udSSI0dDFZ1r3qo51bzK"
TestUser:
hash: "$2a$12$Ua1gUiWaW5/b8ohgDqTfg.ruEDNOCsuV9RexlTigNf65TvSn6/Loy"
f. Shutdown and restart the API Data Store.
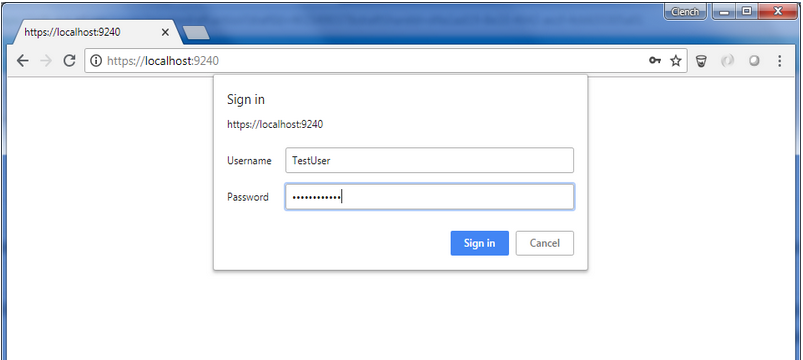
API Data Store now runs on a secure channel on the HTTPS port and requests the basic authentication details.
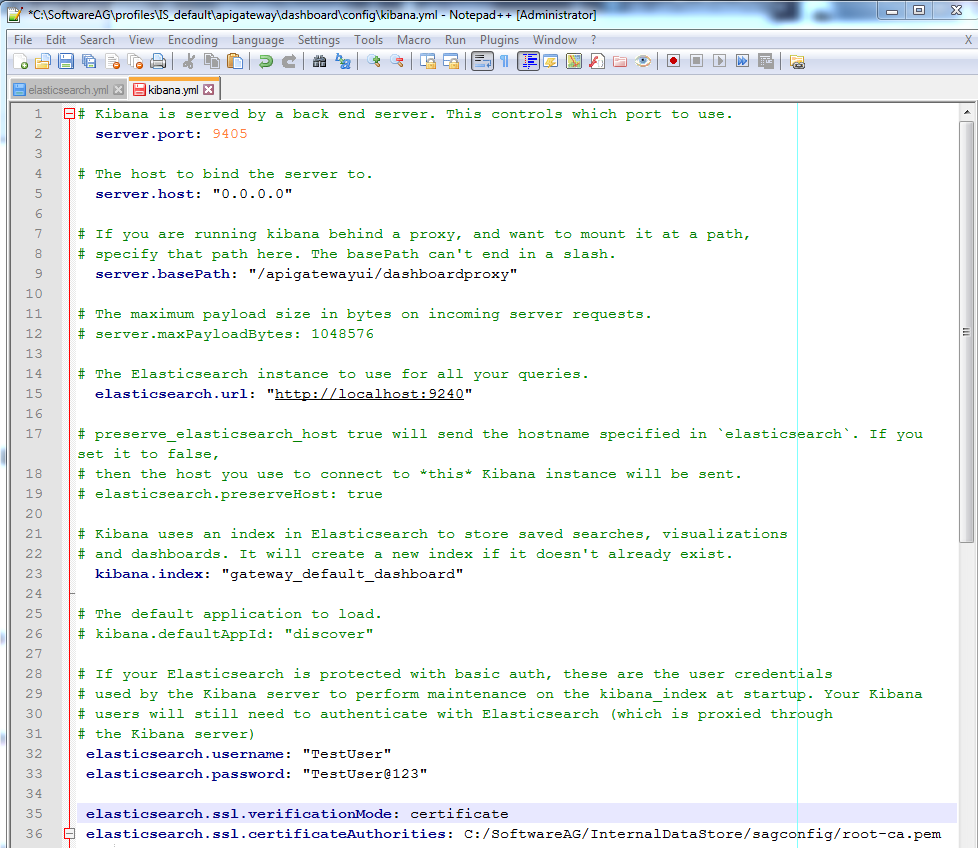
3. Change the Kibana configuration to connect to Elasticsearch.
a. Navigate to Installation_Dir\profiles\IS_default\apigateway\dashboard\config\ and open the file, kibana.yml.
b. Uncomment the following properties and update them as follows:

elasticsearch.username:
TestUserelasticsearch.password:
TestUser@123elasticsearch.ssl.verificationMode:
certificateelasticsearch.ssl.certificateAuthorities:
file path of your root-ca.pem certificate elasticsearch.url: https://
hostname:
9240Sample kibana.yml file
c. Open the uiconfiguration.properties file located at Installation_Dir\profiles\IS_default\apigateway\config and set apigw.kibana.autostart to false.
4. Change the API Gateway configuration to connect to Elasticsearch.
a. Navigate to Installation_Dir\IntegrationServer\instances\default\packages\WmAPIGateway\config\resources\elasticsearch and open config.properties file.
b. Uncomment the following properties and update them as follows:
pg.gateway.elasticsearch.http.username=TestUser
pg.gateway.elasticsearch.http.password=TestUser@123
pg.gateway.elasticsearch.https.truststore.filepath=Installation_Dir/InternalDataStore
/sagconfig/truststore.jks
pg.gateway.elasticsearch.https.truststore.password=2c0820e69e7dd5356576
pg.gateway.elasticsearch.https.enabled=true
c. Start the API Data Store manually.
d. When API Data Store is up and running, start the Kibana server manually by running the kibana.bat file located at Installation_Dir\profiles\IS_default\apigateway\dashboard\bin.
e. Start API Gateway.
You can now log on, create APIs, and access the Analytics page with the user credentials.
Configuring Search Guard with self-generated certificates
As an API Provider, if you want to generate your own certificates to use with Search Guard instead of the default certificates that are shipped with API Gateway, you can configure Search Guard with user generated certificates as Step 5. Search Guard provides an offline TLS tool. Use the tool to generate the required certificates for running Search Guard in a production environment.
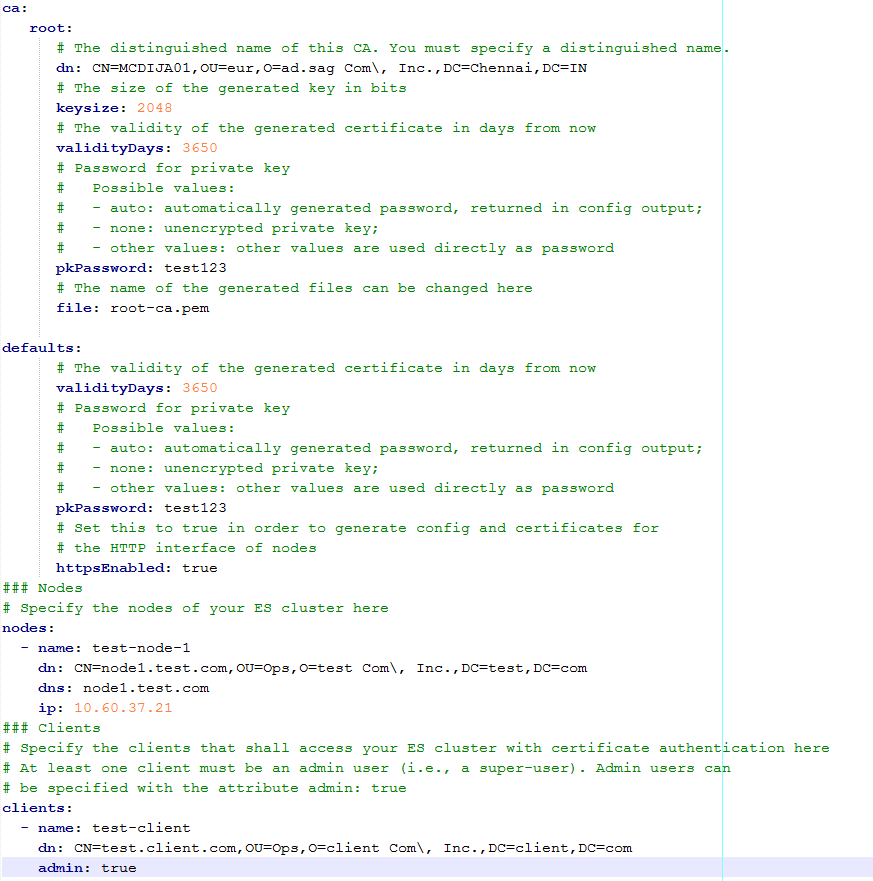
1. Configure Search Guard with user generated certificates.
b. Create a YAML file at Tool Installation Directory\config
When you run the TLS tool command, it reads the node and certificate configuration settings from this YAML file, and places the generated files in a configured directory.
Sample YAML file
c. Run the following command to generate the required certificates.
Tool Installation Directory/tools/sgtlstool.bat
-c ../config/Demo.yml -ca -crt
The generated certificates are placed in the Tool Installation Directory/tools/out folder.
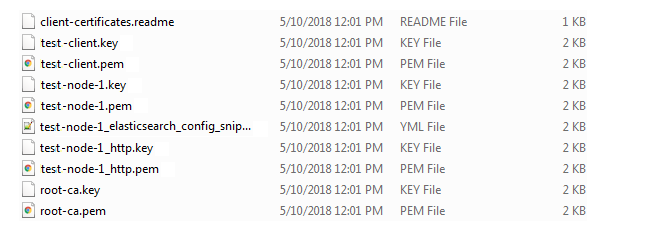
d. Copy the certificates listed below from the folder Tool Installation Directory/tools/out to the Installation_Dir/EventDataStore/config folder.
test-node-1.key
test-node-1.pem
test-node-1_http.pem
test-node-1_http.key
test-client.pem
test-client.key
root-ca.pem
root-ca.key
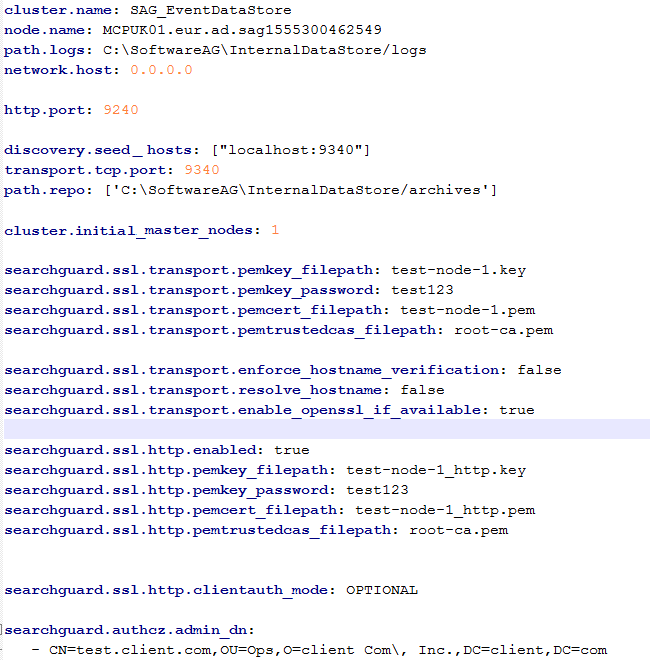
e. Configure the generated certificates in the API Data Store elasticsearch.yml file.
f. Start API Data Store manually.
A log message warns that the Search Guard is not initialized after API Data Store is up because the Search Guard is not initialized with the latest certificates.
g. Open a command prompt and change the directory to Installation_Dir\EventDataStore \plugins\search-guard-7\tools
h. Run the command
sgadmin.bat -cd ..\sagconfig -nhnv -icl -cacert
..\..\..\config\root-ca.pem -cert ..\..\..\config\test-client.pem
-key ..\..\..\config\test-client.key
-keypass your certificate password -p 9340
Done with success log message appears.
i. Shut down and restart API Data Store.
API Data Store now uses the generated certificates for SSL communication.