How to enable SAML SSO in API Gateway?
This use case explains the steps involved in enabling SSO for API Gateway using SAML protocol.
The use case starts when you configure the SAML settings for SSO in API Gateway and ends when you log into API Gateway using SSO.
Before you begin
Ensure that you have:
 API Gateway Manage User
 administration privilege.
Downloaded and stored the IdP metadata file locally.

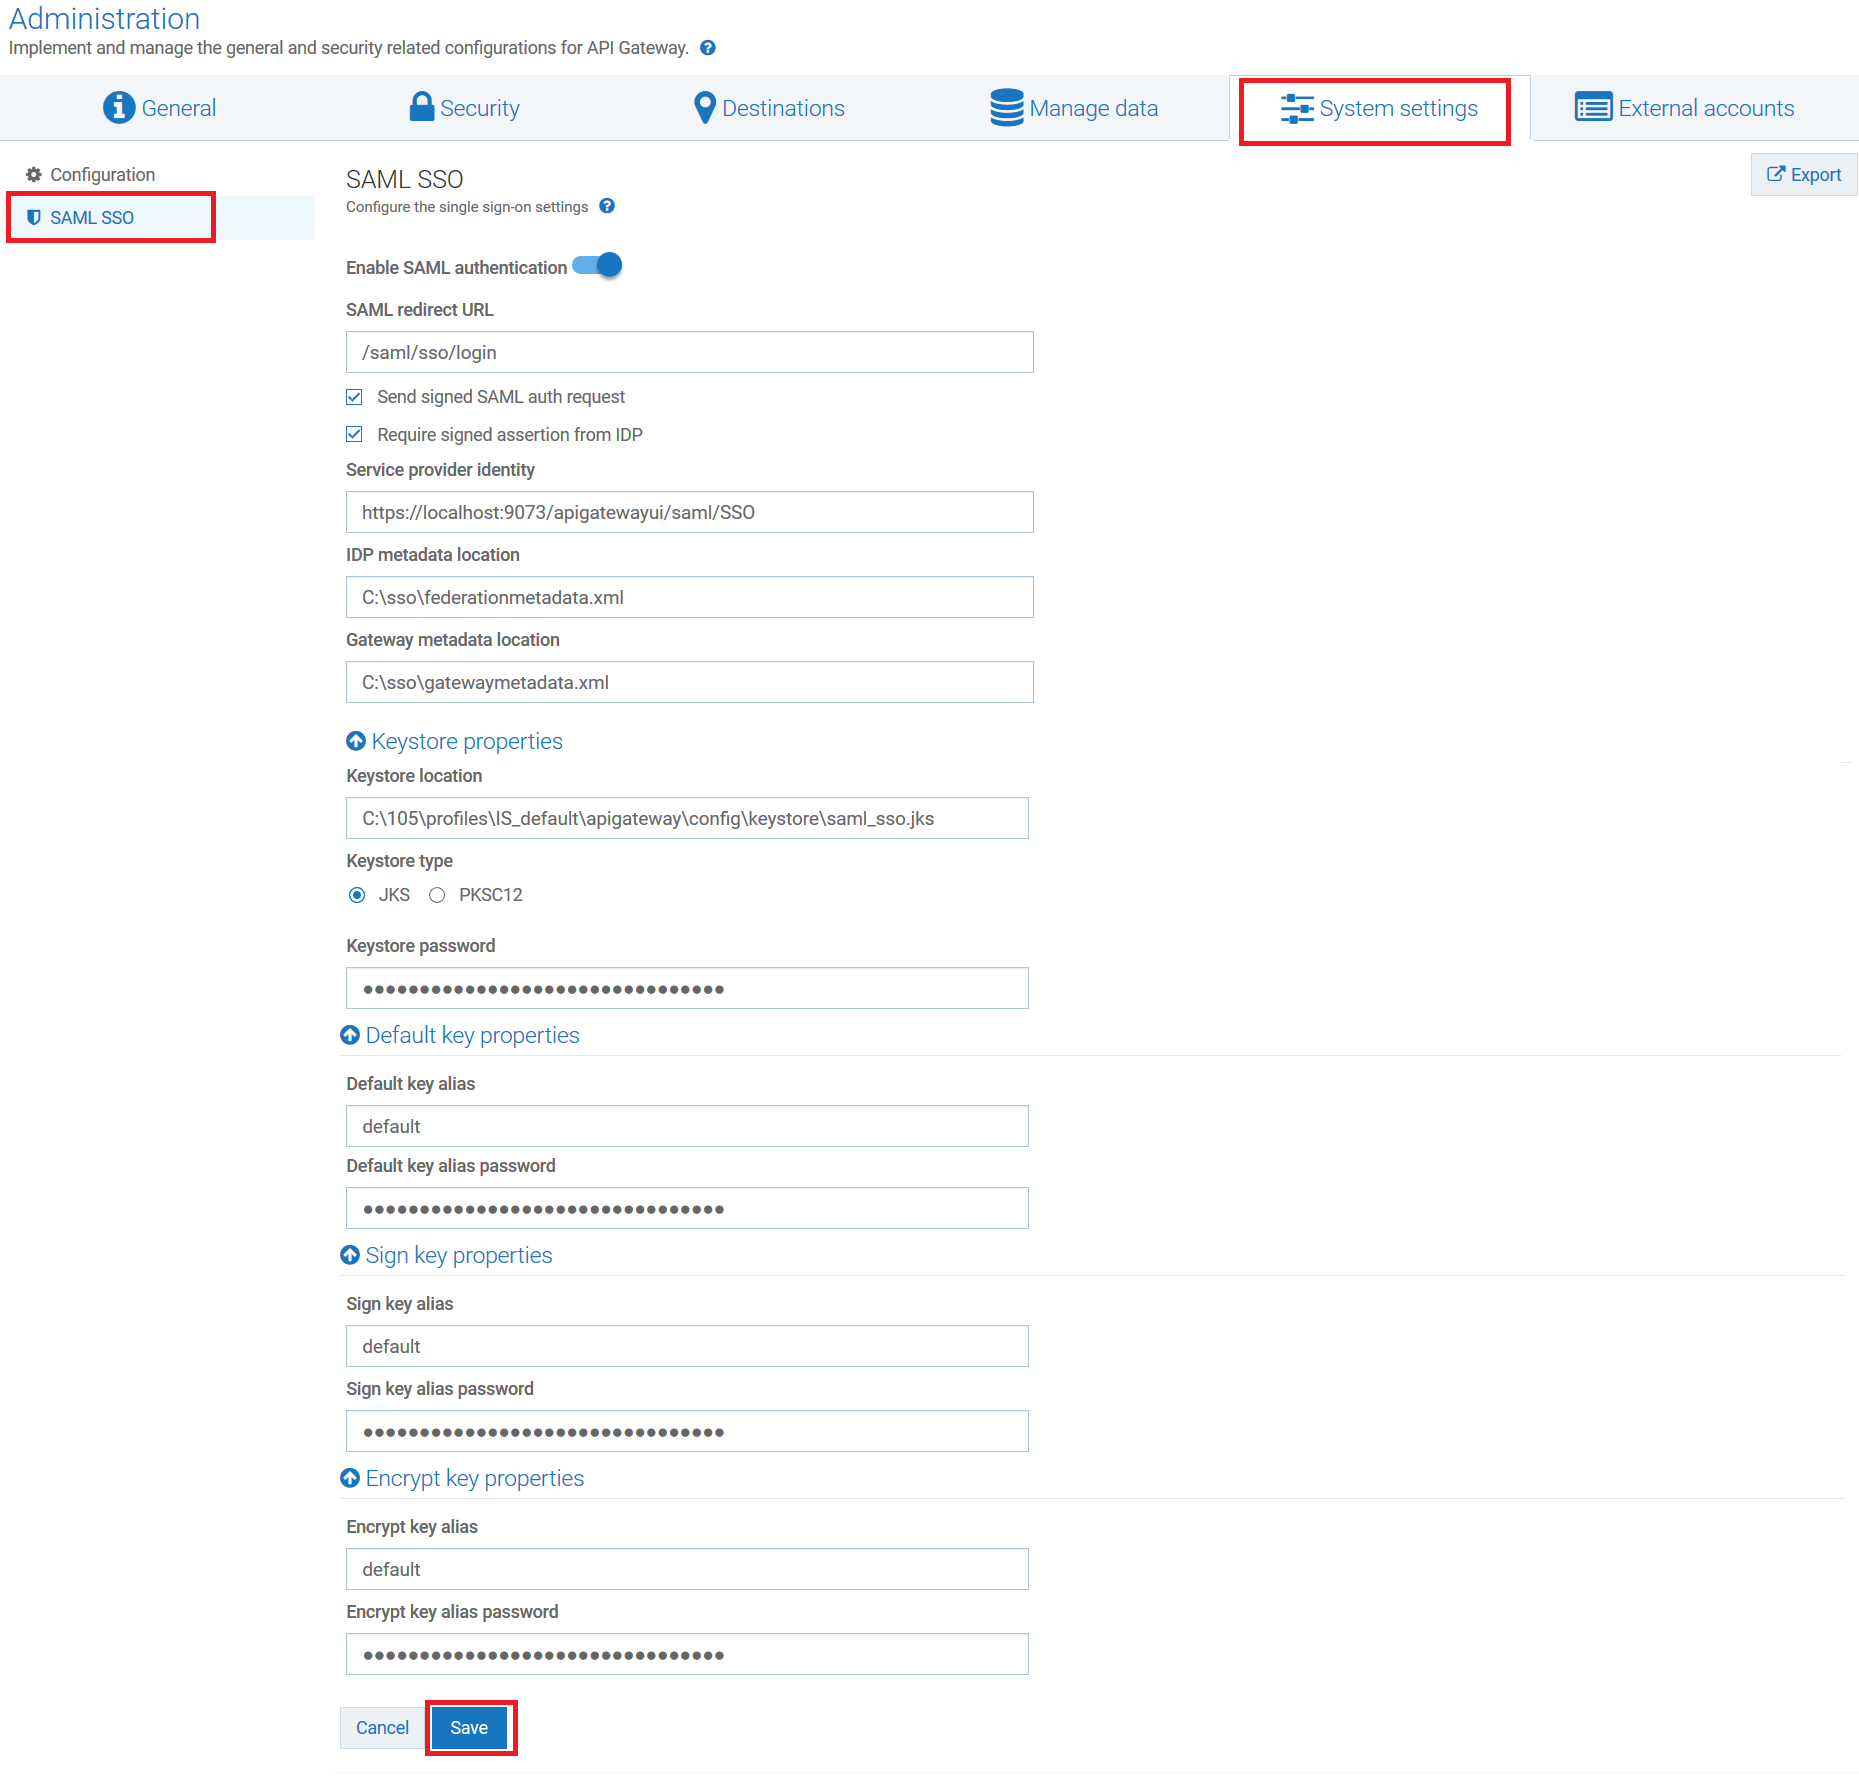
To configure SAML settings for single sign-on
1. Expand the menu options icon  , in the title bar, and select Administration.
 2. Select System Settings > SAML SSO.
3. Set the toggle button to the on position to enable SAML.
4. Provide the SSO URL to which you want to redirect the browser in the SAML redirect URL field. For example, /saml/sso/login.
5. Select Send signed SAML auth request, if you want to send out the signed SAML authorization request to the Identity Provider (IdP).
6. Select Require signed assertion from IDP to receive a signed assertion from IdP.
7. Provide the service provider's unique URL, in the Service provider identity field, which is used to identify the service provider.
For example: https://hostname:9073/apigatewayui/saml/SSO. Make sure you specify the HTTPS port in the URL. When you configure the service provider in IdP, make sure you use the same URL.
8. Provide the location where you have saved the IdP metadata file in the IDP metadata location field.
For example, C:\sso\federationmetadata.xml.
9. Provide the location where you want to download the API Gateway metadata file in the Gateway metadata location field.
For example, C:\sso\gatewaymetadata.xml.
10. Provide the following information in the Keystore properties section:
Keystore location: Location where the keystore file is stored.
This is used for the communication between API Gateway and IdP. By default, API Gateway is shipped with saml_sso.jks file. You can view this file in the SAGInstallDir\profiles\IS_default\apigateway\config\keystore\saml_sso.jks location. In this example, the default saml_sso.jks file is used.
Keystore type: Select the file type of the keystore file. The file type can be either
JKS or
PKCS12.
Keystore password: The password to access the keystore file. As the default
saml_sso.jks file is used in this example, the password to open the default
saml_sso.jks file is
apigwstore.
11. Provide the following information in the Default key properties section:
Default key alias: Choose the default key alias, when you want to use the same default key alias for signing and encrypting the requests .
Default key alias password: The password to access the default key alias. As the default
saml_sso.jks file is used in this example, the default password for default key is
defaultapigw.
12. Provide the following information in the Sign key properties section:
Sign key alias: The alias of the default key used to digitally sign requests sent to the service provider .
Sign key alias password: The password to access the sign key alias. As the default
saml_sso.jks file is used in this example, the default password for sign key is
signapigw.
13. Provide the following information in the Encrypt key properties section:
Encrypt key alias: The alias of the default key used to encrypt the request that is sent to the service provider.
Encrypt key alias password: The password to access the encrypt key alias. As the default
saml_sso.jks file is used in this example, the default password for sign key is
encryptapigw.
14. Click Save.
The SSO settings is configured with the entered configuration.
15. Restart the API Gateway.
16. Download the API Gateway metadate file from http(s)://hostname:9073/gatewayui/saml/sso/metadata and save it in the location as specified in the step 9.
17. Restart the API Gateway.
The API Gateway Login page appears with the Login with SSO link.