How do I secure the access token by directly calling API Gateway's REST APIs?
This use case starts when you enforce the PKCE and ends when you get access the token securely using REST APIs.
Before you begin
Ensure that you have:

enforced PKCE at global level.

To secure the access token
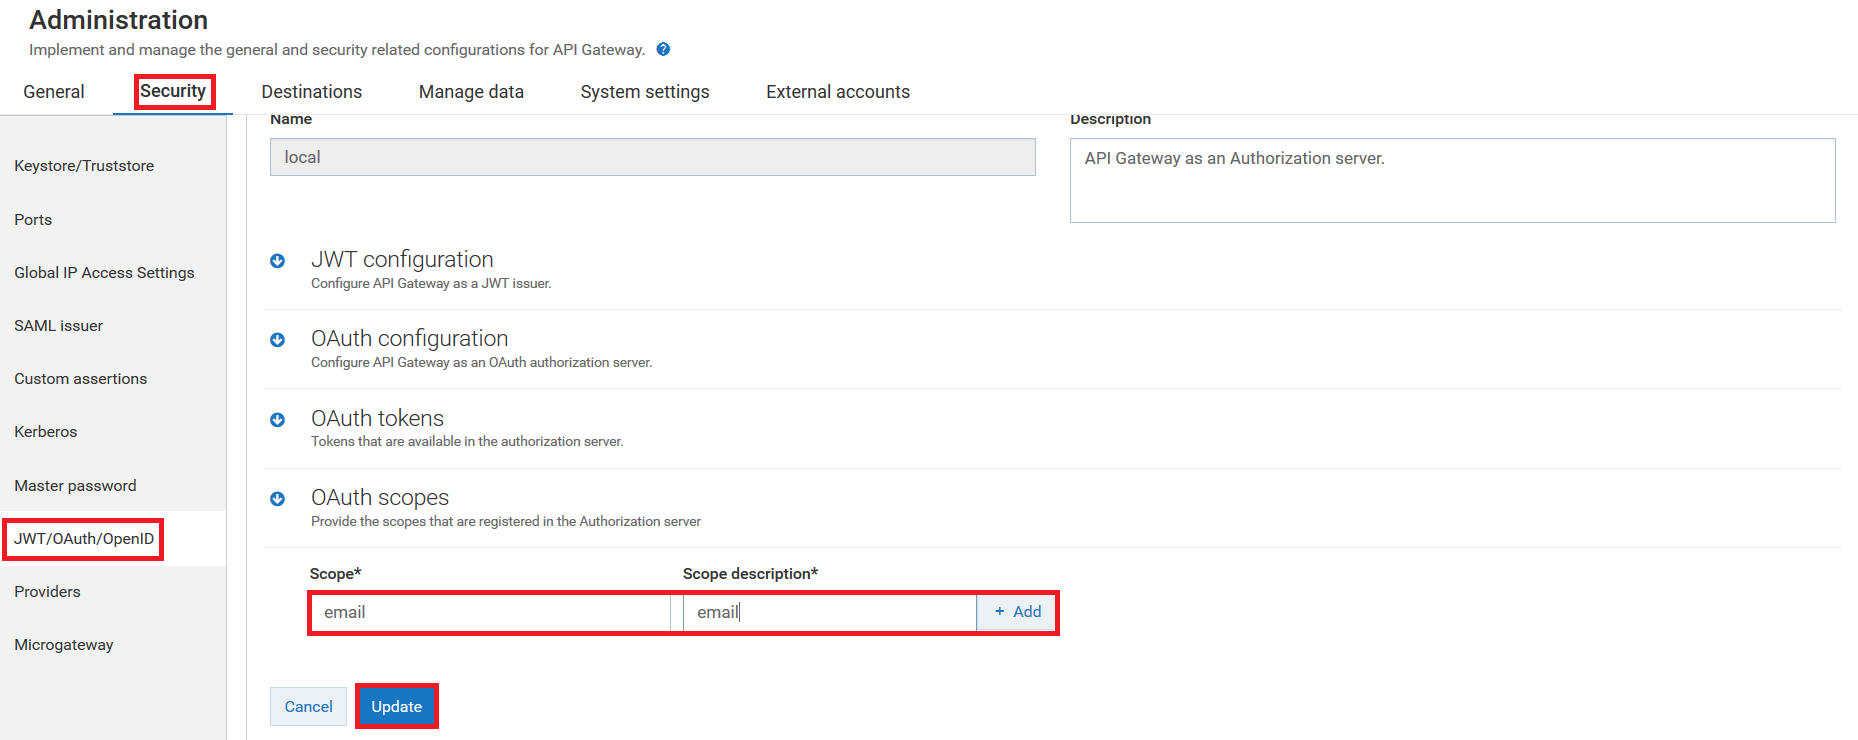
1. Create OAuth scope in the local authorization server.
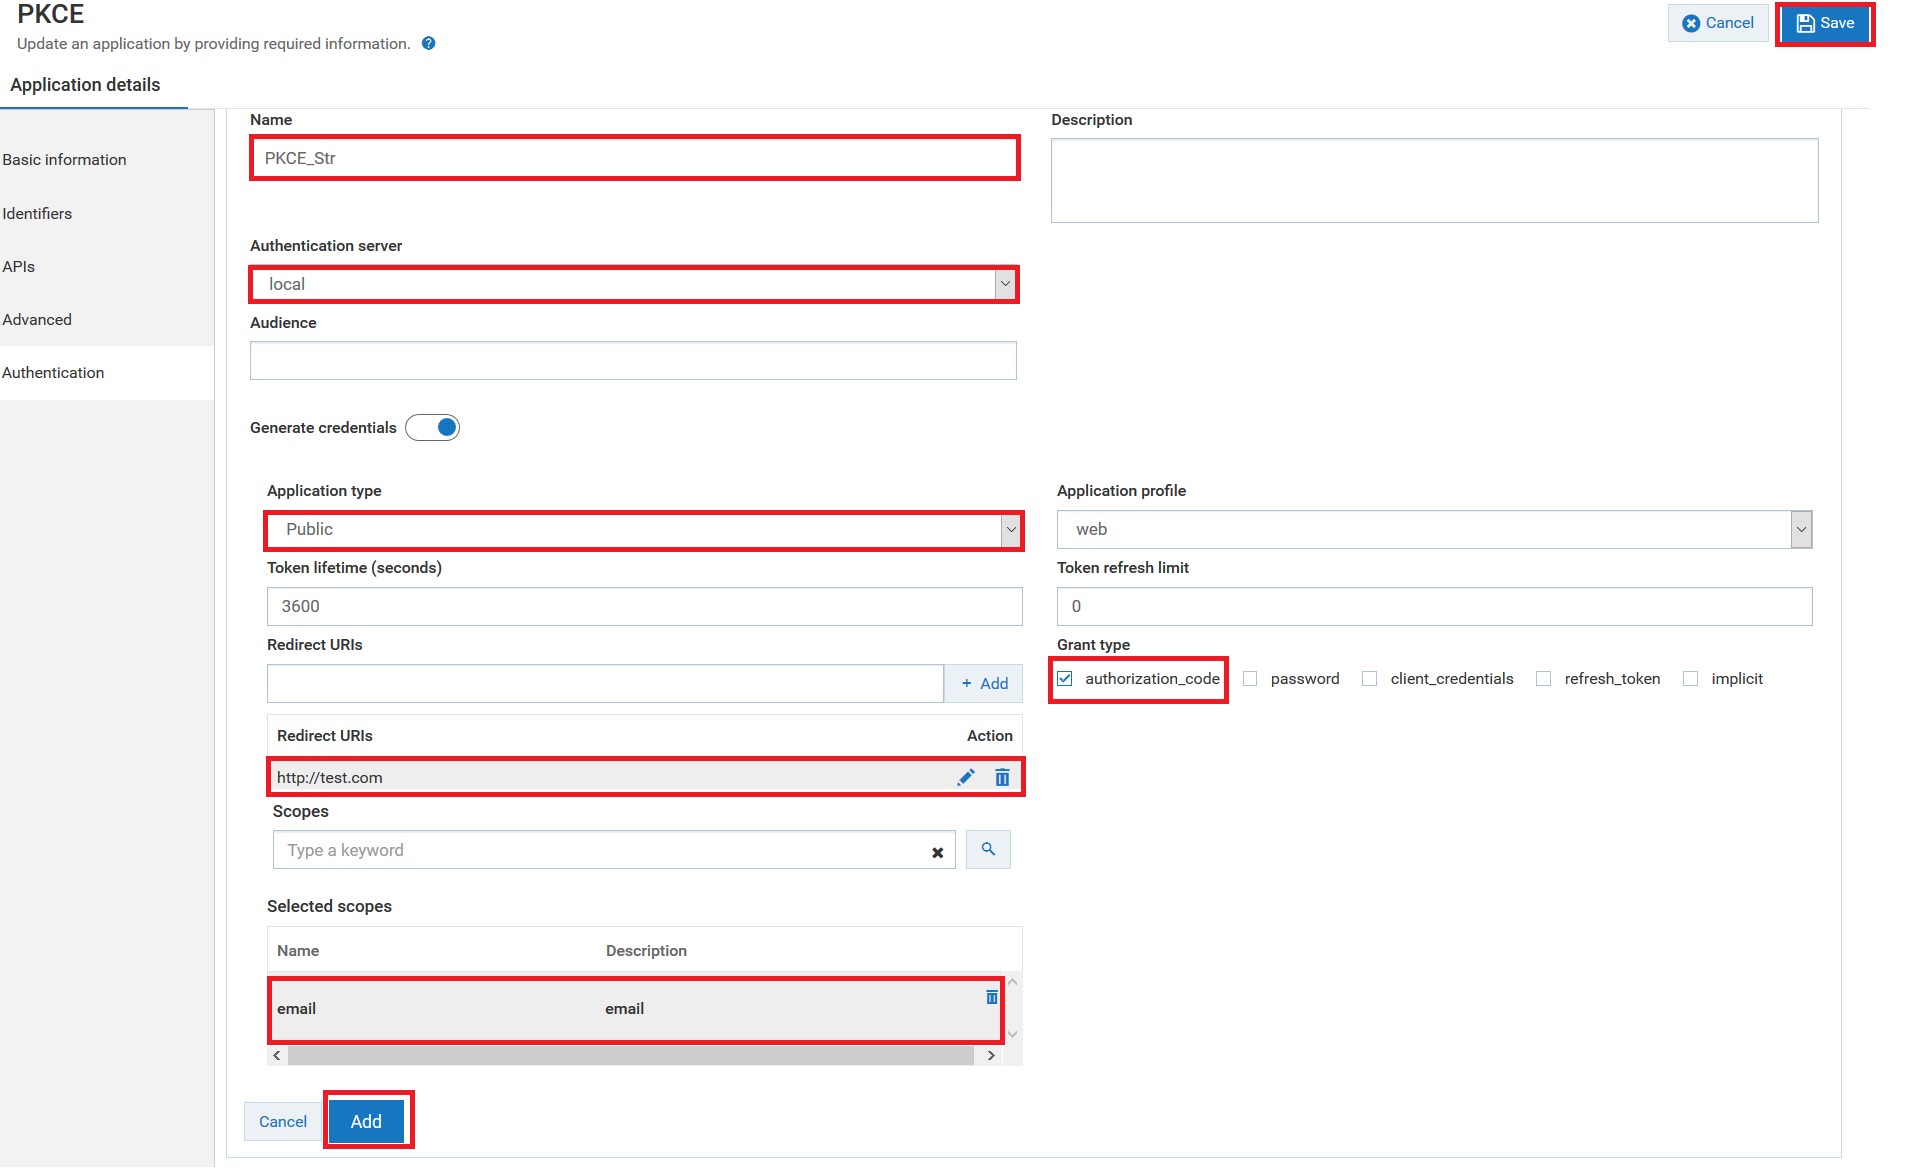
2. Create an application with OAuth2 authentication strategy. For details about creating an application, see
Creating an Application. a. Click the Authentication tab to create a strategy with OAuth2 authentication.
Make sure you have selected the following mandatory fields for this use case:
Select the
Authentication schemes as
OAUTH2.
Specify the
Authentication server as
local.
Select the
Application Type as
Public.
Specify the grant type to be used to generate the credentials. For this specific use case, you must select authorization_code, which are dynamically populated from the authorization server.
Specify the URIs that the authorization server can use to redirect the resource owner's browser during the grant process. You can add multiple URIs by clicking +Add.
Specify the OAuth scope that you have created for the local authorization server in Step 1.
b. Click Add to save the strategy.
c. Click Save to save the application.
3. Get authorization code.
a. Call the authorize endpoint using a REST client. http(s)://hostname:port/invoke/pub.apigateway.oauth2/authorize? response_type=code&redirect_uri=<redirectURI>&client_id=<Client ID>&code_challenge=<Code_Challenge>&code_challenge_method=S256
Note:
Make sure you have replaced the redirectURI , ClientID, and Code_Challenge in the above mentioned URL. You can get the redirect URI and client ID from the Authentication tab of the Application screen.
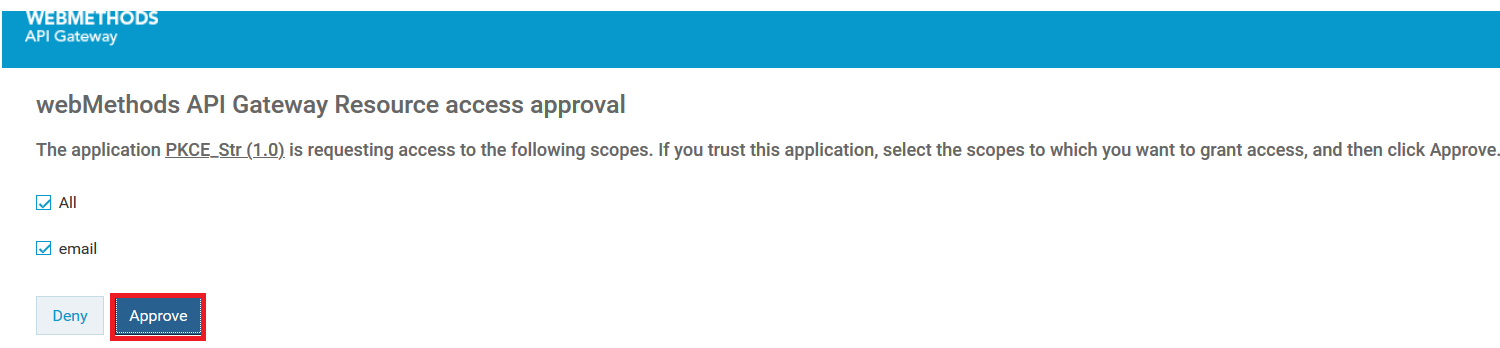
b. Click the Approve button
c. Provide the credentials of API Gateway user to approve the request.
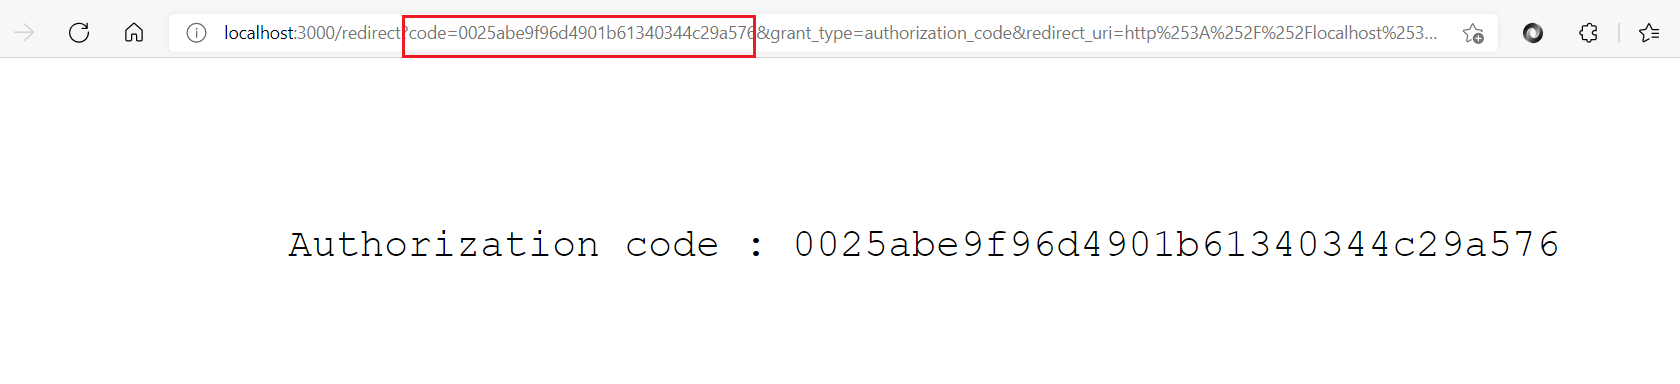
You are re-directed to the redirect URI as per the configuration in the application strategy. The screenshot below is just a sample, you are redirected to a different URL based on your configuration, so the screenshot varies accordingly. If the given redirect URI is not a valid web page, you might get a Page not found error, which is fine, because we get the authorization code value from the browser URL.
d. Make a note of the authorization code.
Note:
If the redirect URL screen is not able to display the authorization code, then you can take it from the address bar of the browser. As highlighted in the above image's URL, you can see the authorization code in the code=field of the URL.
e. Click Save to save the application.
4. Get access token.
a. Invoke the access token endpoint using a REST client.
Request: POST http(s)://hostname:port/invoke/pub.apigateway.oauth2/getAccessToken.
In the Authorization tab, select the authorization type as Basic Auth . Provide the client ID as username and client secret as the password. You can get the client ID and client secret in the Authentication tab of the Application screen.
Sample request body
{
"redirect_uri":"http://test.com",
"scope":"email",
"grant_type":"authorization_code",
"code":"0025abe9f96d4901b61340344c29a576",
"code_verifier":"a4793f15479a4c5697f93b44d055ab6cbd16be50400a4591892f914b1a256da8",
"client_id":"374b1fae-4405-411b-85a0-6e1ab90923ba"
}
Note:
You must replace the redirect_URI, scope, code, and code_verifier with appropriate values. For the code field, make sure you use the authorization code you noted down in the step 3.d.
Sample response body
{
"access_token": "b5b33bc9c57945f388010f8caf5fe9b6b14abef468d346e68e0cd374c0df60d7",
"token_type": "Bearer",
"expires_in": 3600
}