How to enable SAML SSO in API Gateway?
This use case explains the steps involved in enabling SSO for API Gateway using the SAML protocol.
The use case starts when you configure the SAML settings for SSO in API Gateway and ends when you log into API Gateway using SSO.
Prerequisite
Ensure that you have:

Manage user administration privilege.
Provided the service provider SSO URL to the IdP administrator. Based on the service provider SSO URL, the IdP administrator generates the metadata.
Ensure the service provider SSO URL is in the given http(s)://hostname:portnumber/apigatewayui/saml/SSO format.
Note:
For a standalone environment, replace the
hostname and
portnumber with the hostname and port number that is used to access the
API Gateway.
For a cluster environment, replace the
hostname and
portnumber with the hostname and port number of the load balancer.
The metadata URL or file handy that was shared to you by the IdP administrator.
Configured the keystore through which SSO communication is established between
API Gateway and IdP.

To configure SAML settings for single sign-on
1. Expand the menu options icon  , in the title bar, and select Administration.
 2. Select System Settings > SAML SSO.
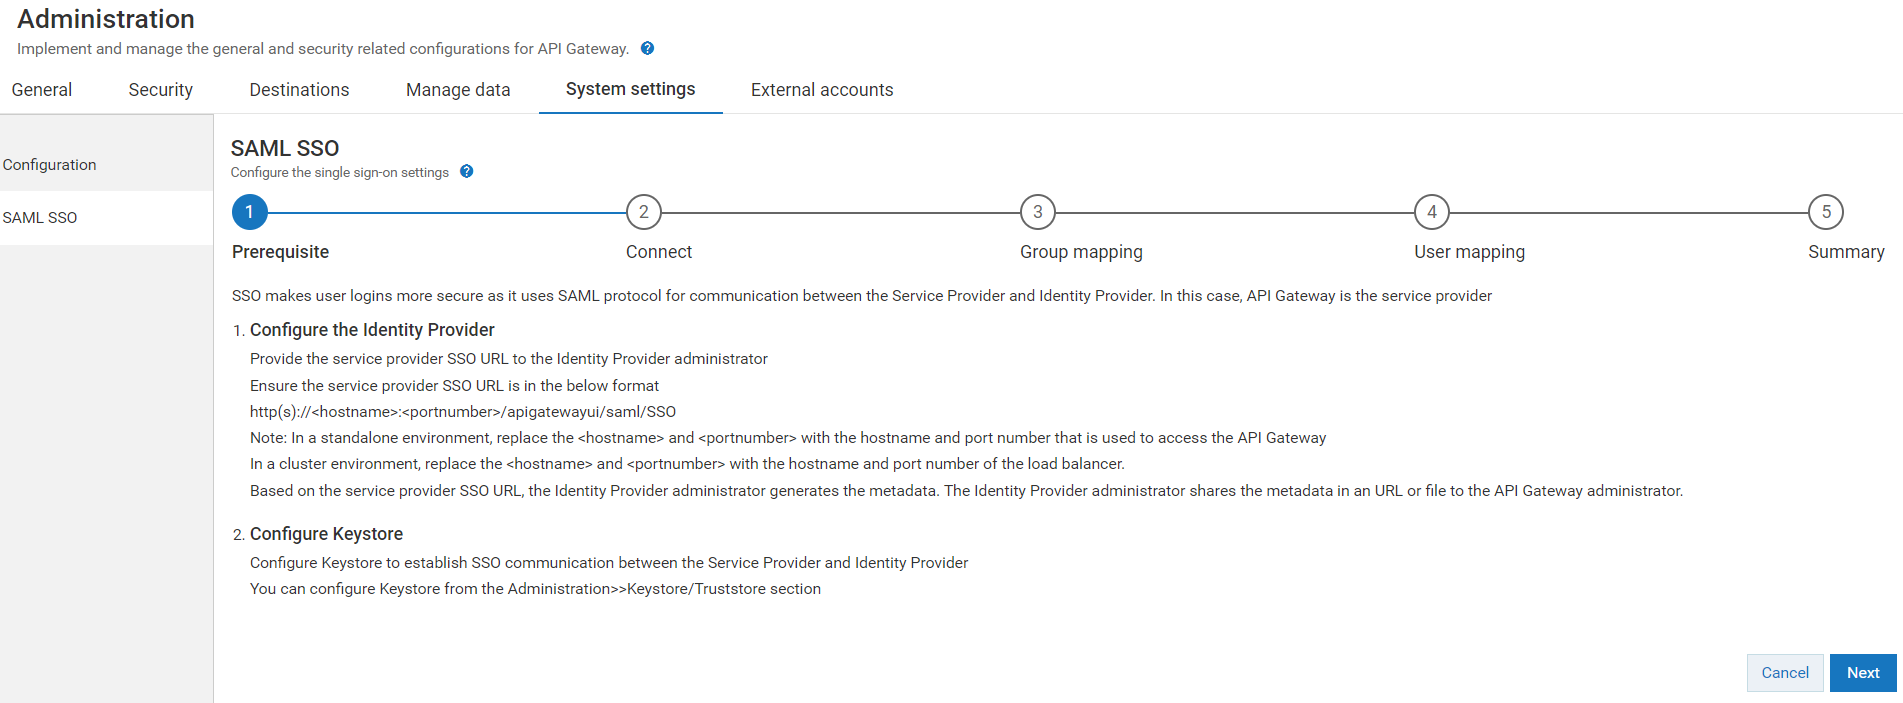
The Prerequisite page appears.
3. Ensure that you have performed all the pre-requisite steps.
4. Click Next.
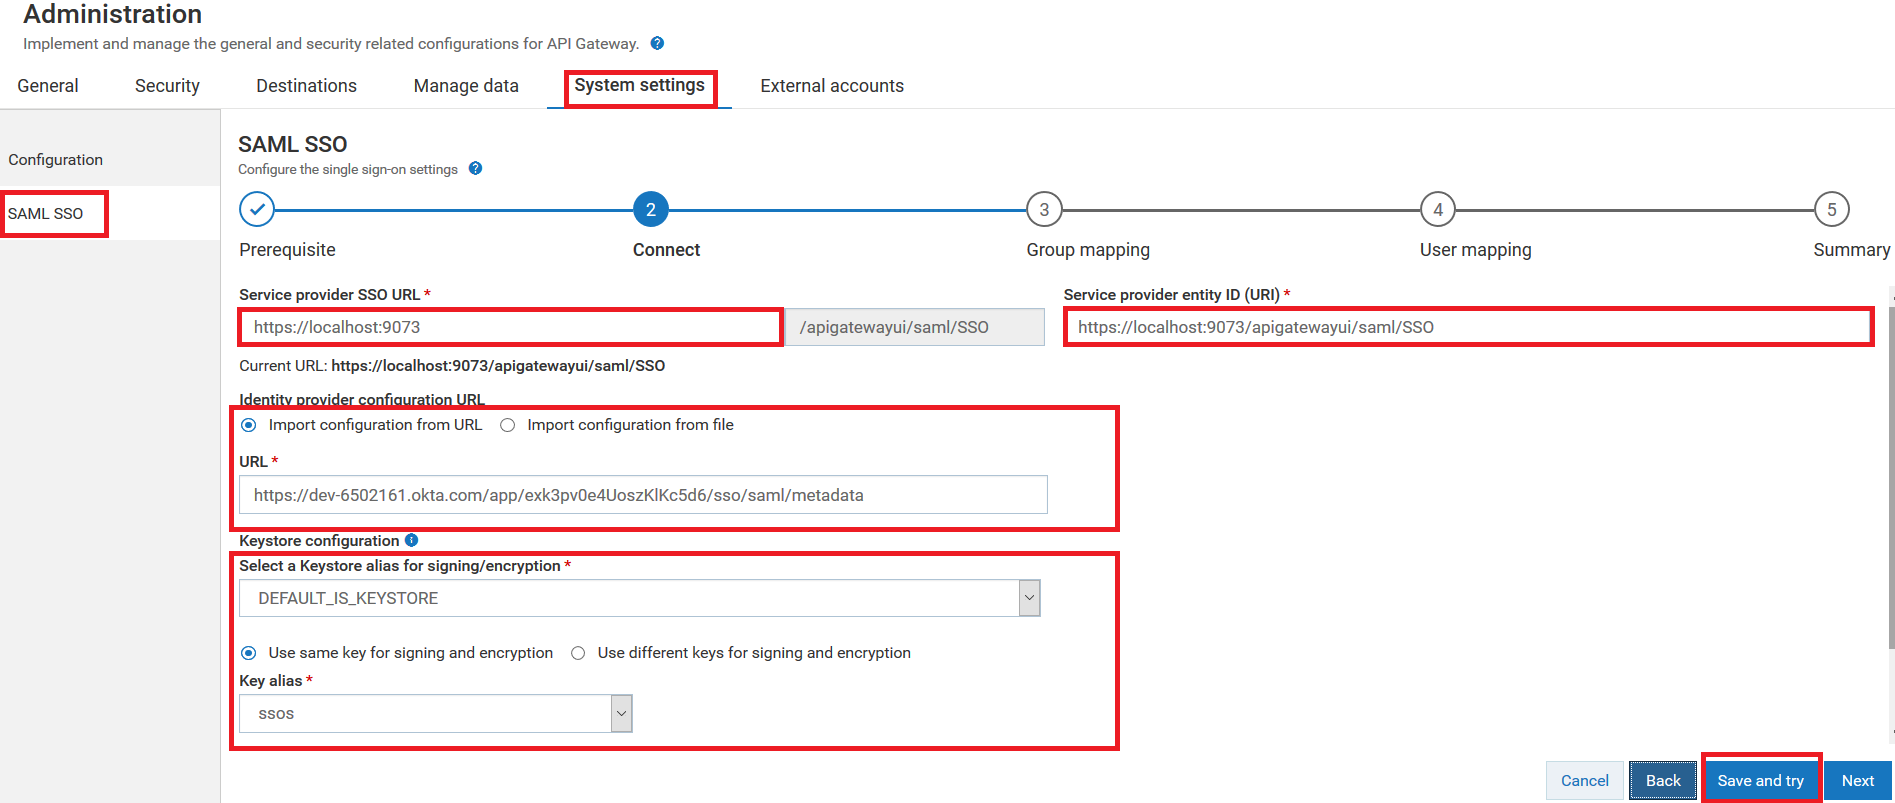
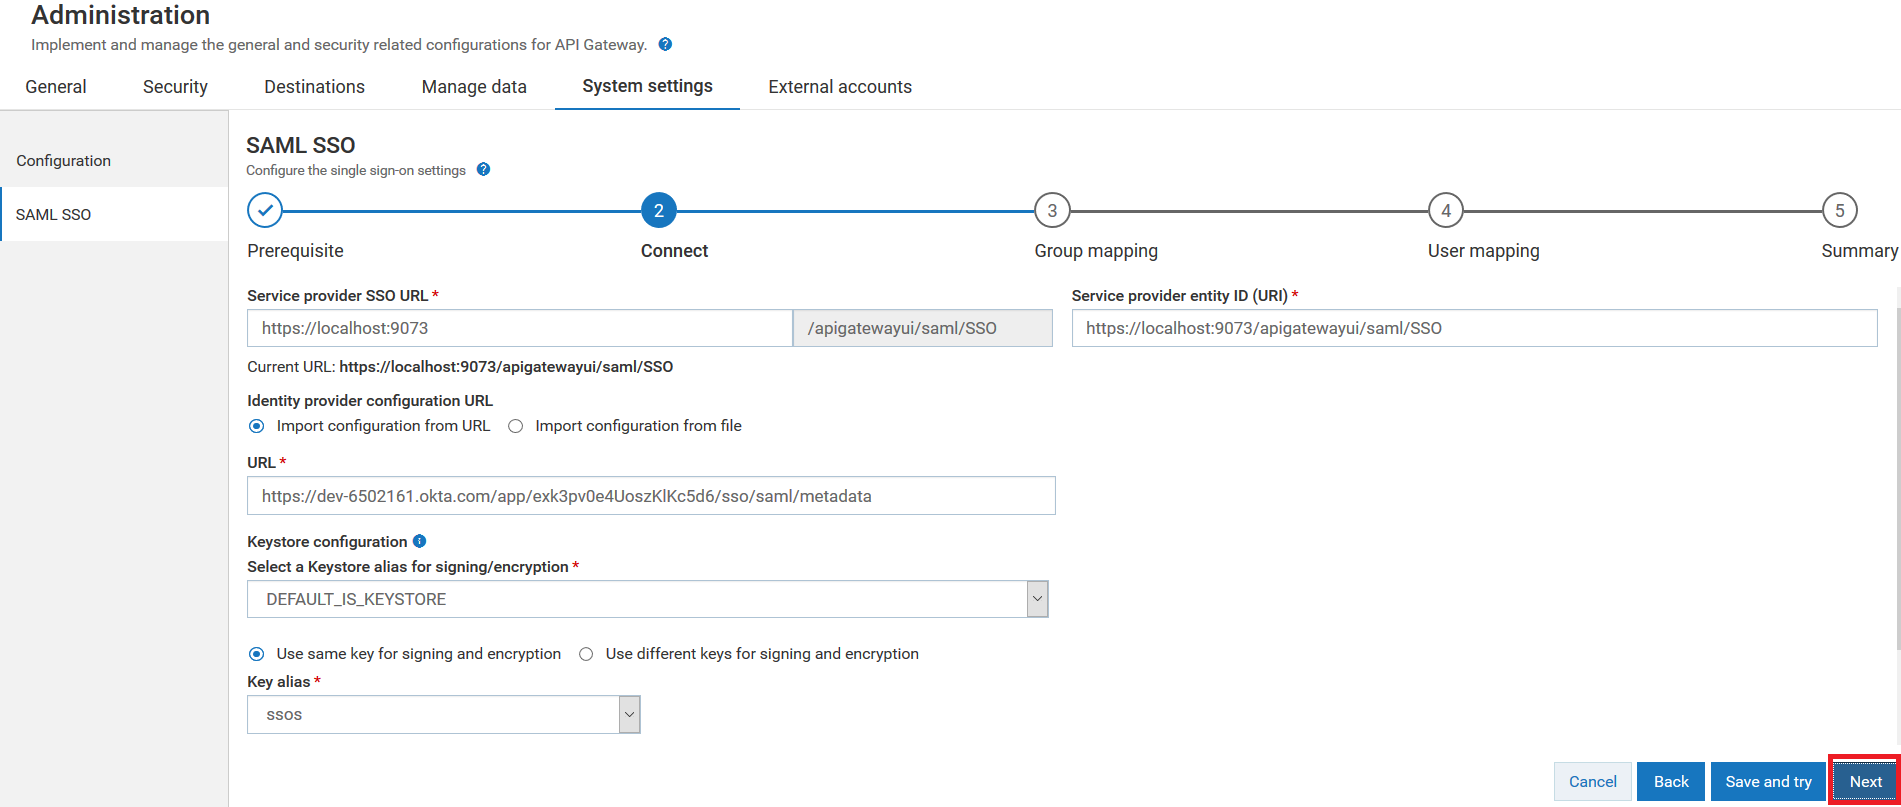
The Connect page appears.
5. Provide the SSO URL to which you want to redirect the browser in the Service provider SSO URL field.
Note:
By default, the Service provider SSO URL field is populated with the load balancer's web application URL that you have specified in the Administration > General > Loadbalancer > Web application URLs section. If you have not specified the load balancer's web application URL, then the Service provider SSO URL field is populated with http(s)://hostname : portnumber through which you access the API Gateway instance.
6. Provide the API Gateway's entity ID in the Service provider entity ID (URI) field.
7. Provide the following information in the Identity provider configuration URL section:
Click
Import configuration from URL to import the metadata file that the IdP administrator shared with you using the URL.
Provide the metadata file's URL in the
URL field.
Click
Import configuration from file to import the metadata file that the IdP administrator shared with you.
Provide the location where you have saved the metadata file in the
File field.
8. Provide the following information in the Keystore configuration section:
Field | Description |
Select a Keystore alias for signing/encryption | Select a keystore through which you can establish SSO communication between the IdP and API Gateway. Note:
You can create the keystore from Administration > Security > Keystore/Truststore section. For details on how to configure keystore, see
Configuring Keystore Information. |
Use same key for signing and encryption | Click this if you use the same keystore alias for signing and encryption. Select the keystore that is used for both signing and encryption from the Key alias drop-down menu. |
Use different keys for signing and encryption | Click this if you use two different key alias for signing and encryption. Select the keystore that is used for signing from the Sign key alias drop-down menu. Select the keystore that is used for encryption from the Encrypt key alias drop-down menu. |
9. Provide the following information in the Keystore configuration section:
a. Select Send signed SAML auth request, if you want to send out the signed SAML authorization request to the Identity Provider (IdP).
b. Select Require signed assertion from IDP to receive a signed assertion from IdP.
10. Click Save and try.
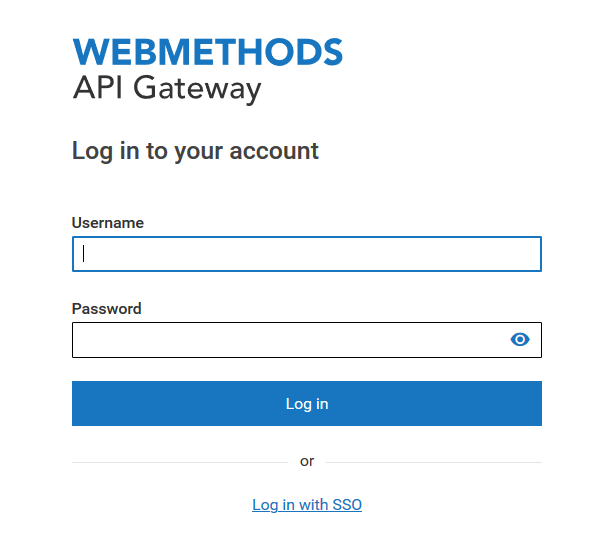
The API Gateway Login page appears with Log in with SSO link.
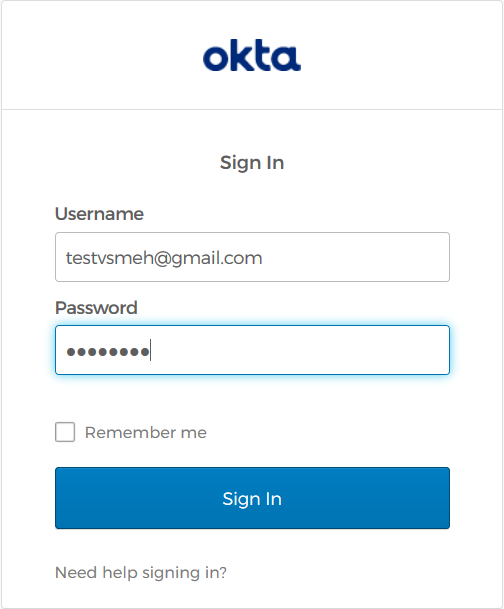
Click the Log in with SSO link to validate the SSO configuration. In this use case, as you have configured the OKTA as IdP, OKTA login page appears.
Note:
You can also skip this validation part and proceed with Group mapping page.
11. Once you successfully log into API Gateway using SSO, expand the menu options icon , in the title bar, and select Administration > System Settings > SAML SSO . 12. Click Edit to update the SAML SSO configuration with group mapping and user mapping details.
The Connect page appears with the existing configuration.
13. Click Next.
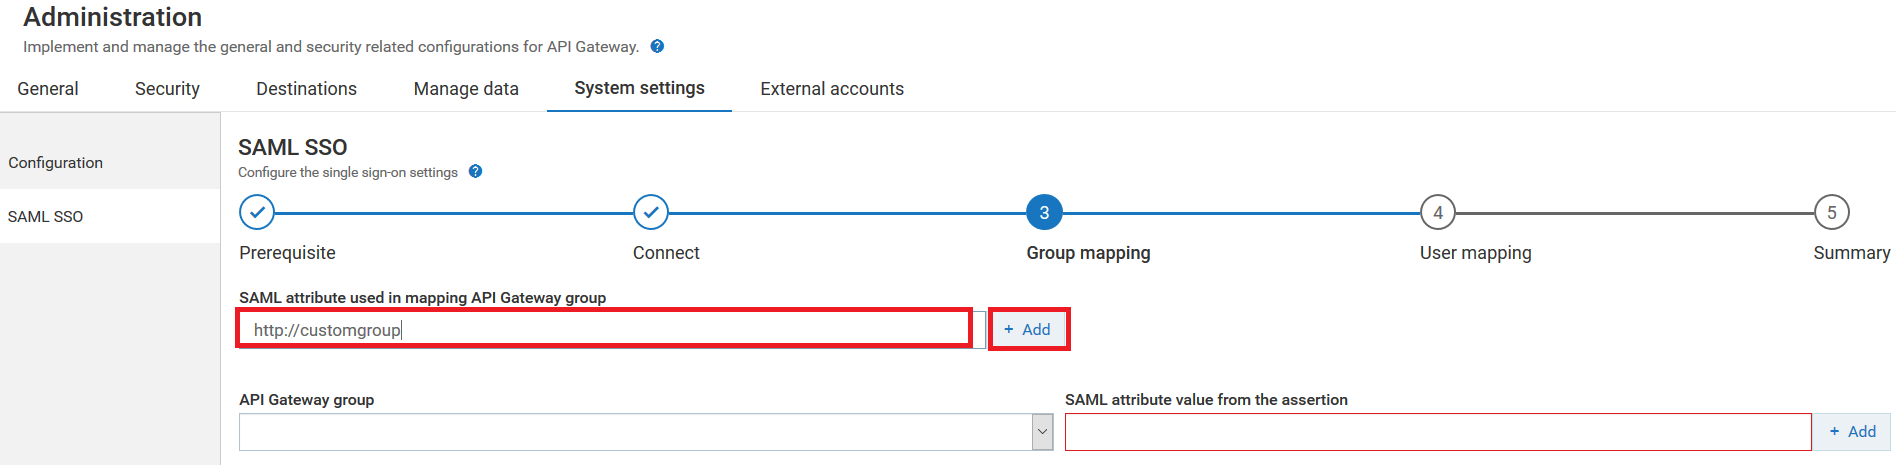
The Group mapping page appears.
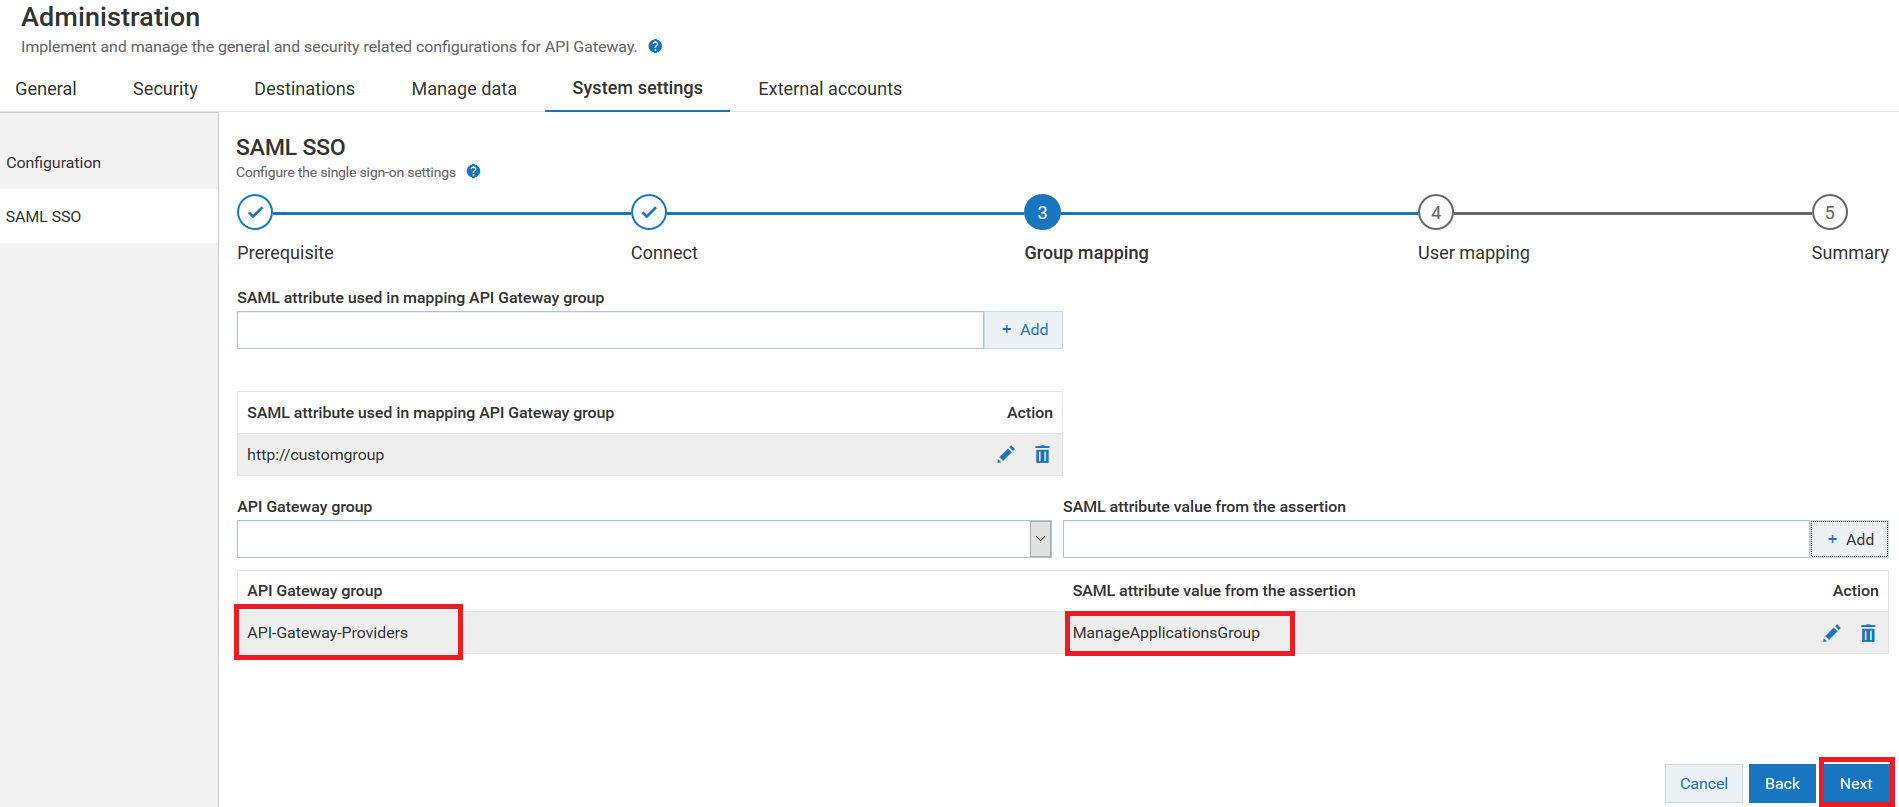
14. Provide the attribute name in the SAML assertion that you want to map to the API Gateway group in the SAML attribute used in mapping API Gateway group field.
By default, API Gateway supports the following two attribute names in the SAML assertion:
http://schemas.microsoft.com/ws/2008/06/identity/claims/role
http://schemas.xmlsoap.org/claims/Group
In addition, to the above two attribute names, if the SAML assertion has more attribute names, you can provide their attribute names in the SAML attribute used in mapping API Gateway group field and click + Add.
For example: http://customgroup .
Sample SAML assertion for group mapping
<AttributeStatement>
<saml2:Attribute Name="http://customgroup"
NameFormat="urn:oasis:names:tc:SAML:2.0:attrname-format:unspecified"
>
<saml2:AttributeValue xmlns:xs="http://www.w3.org/2001/XMLSchema"
xmlns:xsi="http://www.w3.org/2001/XMLSchema-instance"
xsi:type="xs:string"
>ManageApplicationsGroup</saml2:AttributeValue>
</saml2:Attribute>
</AttributeStatement>
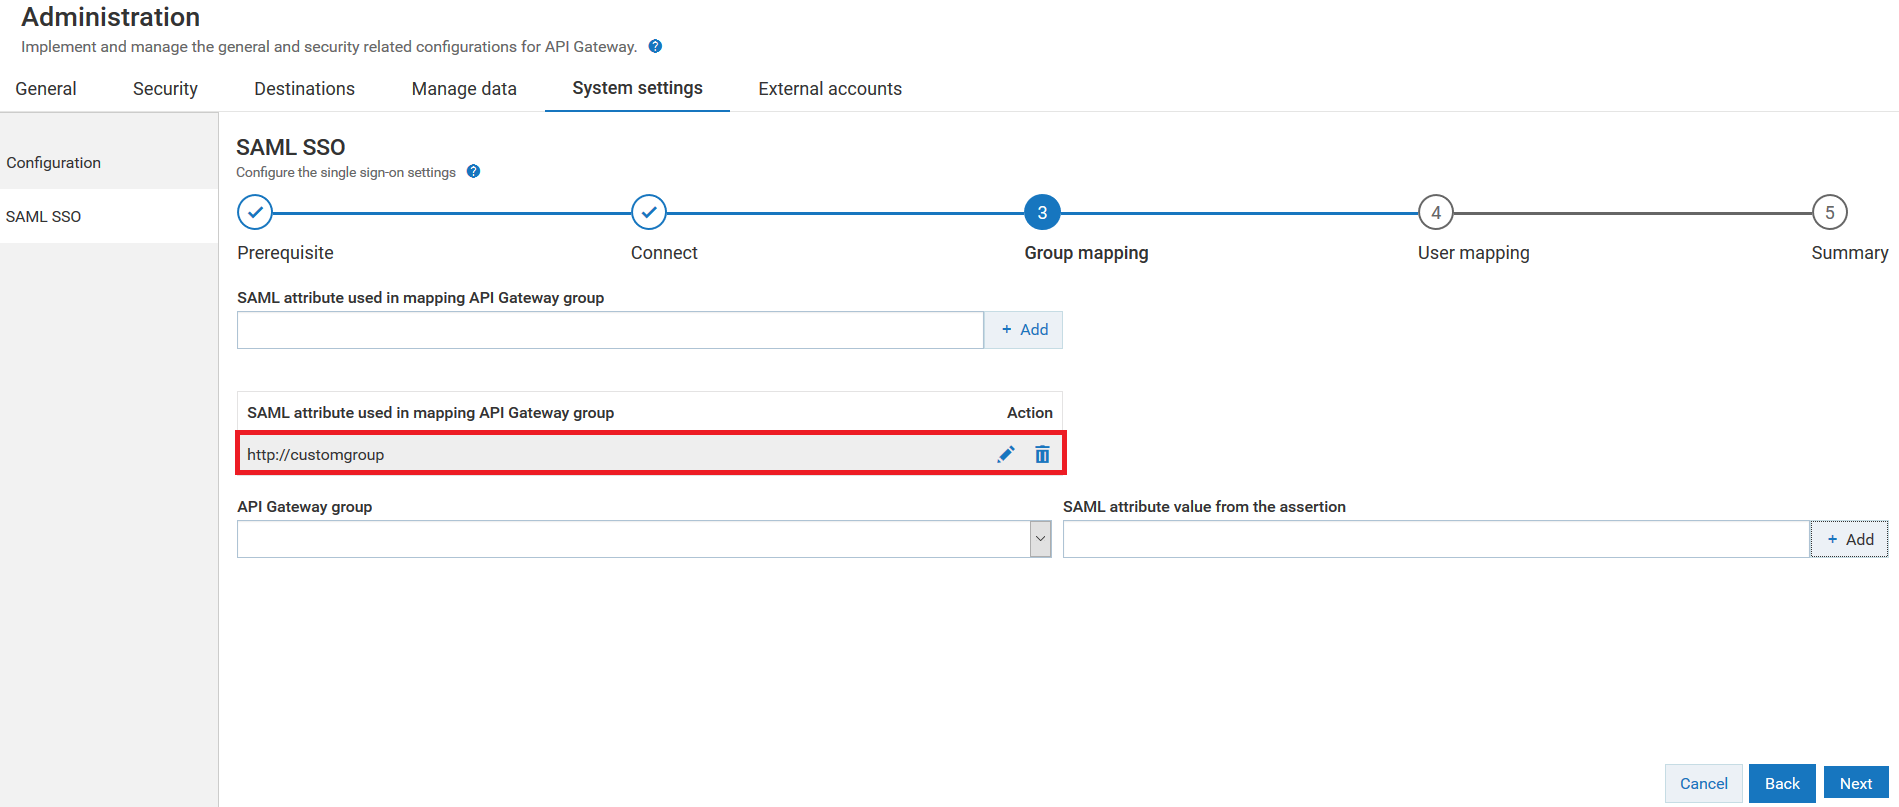
In the sample SAML assertion, the user is associated to a new attribute name called http://customgroup and group called ManageApplicationsGroup in the IdP.
As shown in the image, the new attribute name http://customgroup specified in the SAML assertion is added to the API Gateway so that its corresponding attribute value ManageApplicationsGroup specified in the SAML assertion can be mapped to an API Gateway group.
You can edit or delete the attribute name by clicking the

or

icons respectively. For details about what is SAML assertion, see
SAML Assertion.
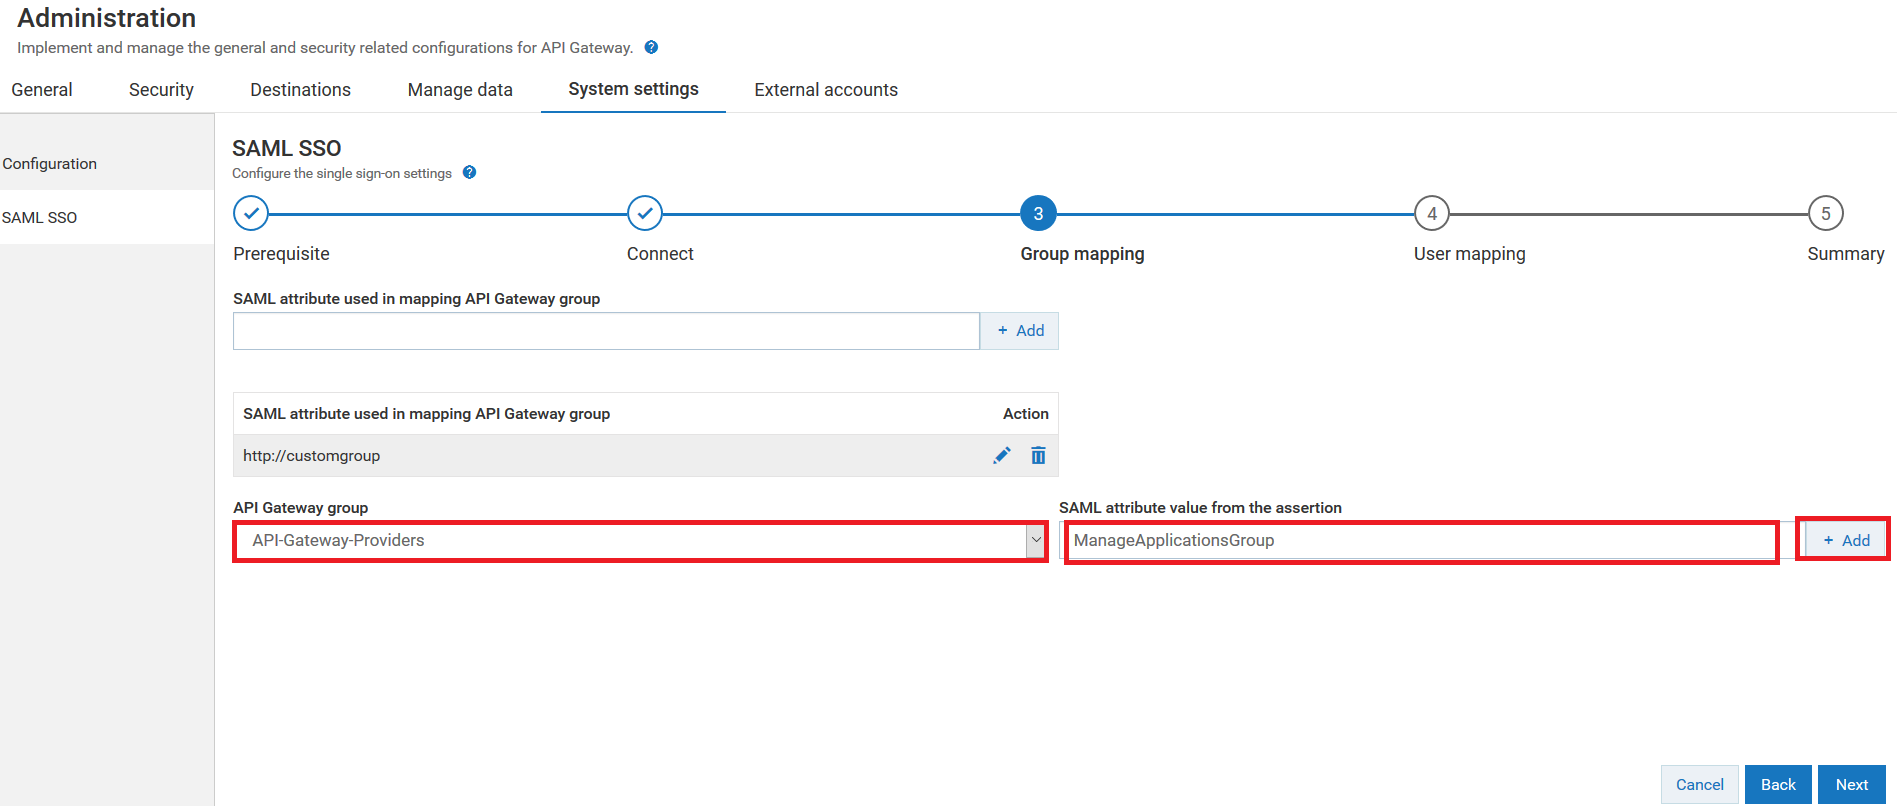
15. Select the API Gateway group to which you want to map the logged in user from the API Gateway group drop-down menu.
For example select API-Gateway-Providers.
16. Provide the attribute value from the SAML assertion to which group the logged in user was mapped at the IdP in the SAML attribute value from the assertion field.
For example based on the sample SAML assertion, provide the user group as ManageApplicationsGroup
17. Click + Add to map the IdP group of the logged in user specified in SAML assertion to the selected API Gateway group.
As shown in the image, the logged in user associated with the ManageApplicationsGroup in IdP is mapped to the API-Gateway-Providers group in API Gateway.
You can add multiple group mapping. You can edit or delete the group mapping by clicking the
or
icons respectively. For details on how to map the SAML assertion group to the
API Gateway group, see
Precedence in Group Mapping18. Click Next.
The User mapping page appears.
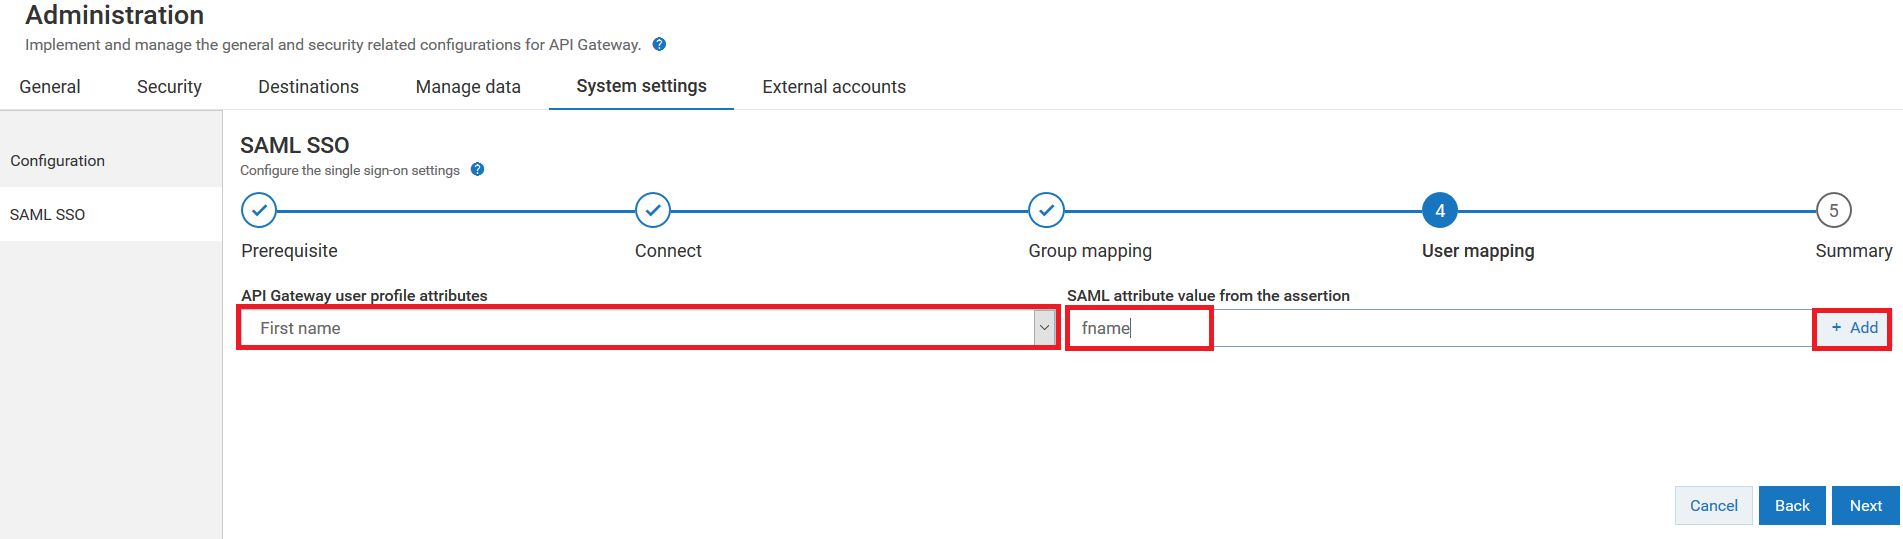
19. Select the user profile attribute name in API Gateway from the API Gateway user profile attributes drop-down menu.
For example: Select the user profile attribute name as First name.
Sample SAML assertion for user mapping
<AttributeStatement>
<saml2:Attribute Name=fname
NameFormat="urn:oasis:names:tc:SAML:2.0:attrname-format:unspecified"
>
<saml2:AttributeValue xmlns:xs="http://www.w3.org/2001/XMLSchema"
xmlns:xsi="http://www.w3.org/2001/XMLSchema-instance"
xsi:type="xs:string"
>Joe</saml2:AttributeValue>
</saml2:Attribute>
</AttributeStatement>
In the sample SAML assertion, the user is associated to an attribute name called fname and attribute value as Joe in the IdP.
As shown in the image, the attribute name fname specified in the SAML assertion is mapped to user profile attribute called First name in API Gateway.
20. Provide the user attribute name from the SAML assertion of the logged in user in the SAML attribute value from the assertion field.
For example: Provide the user profile attribute name as fname.
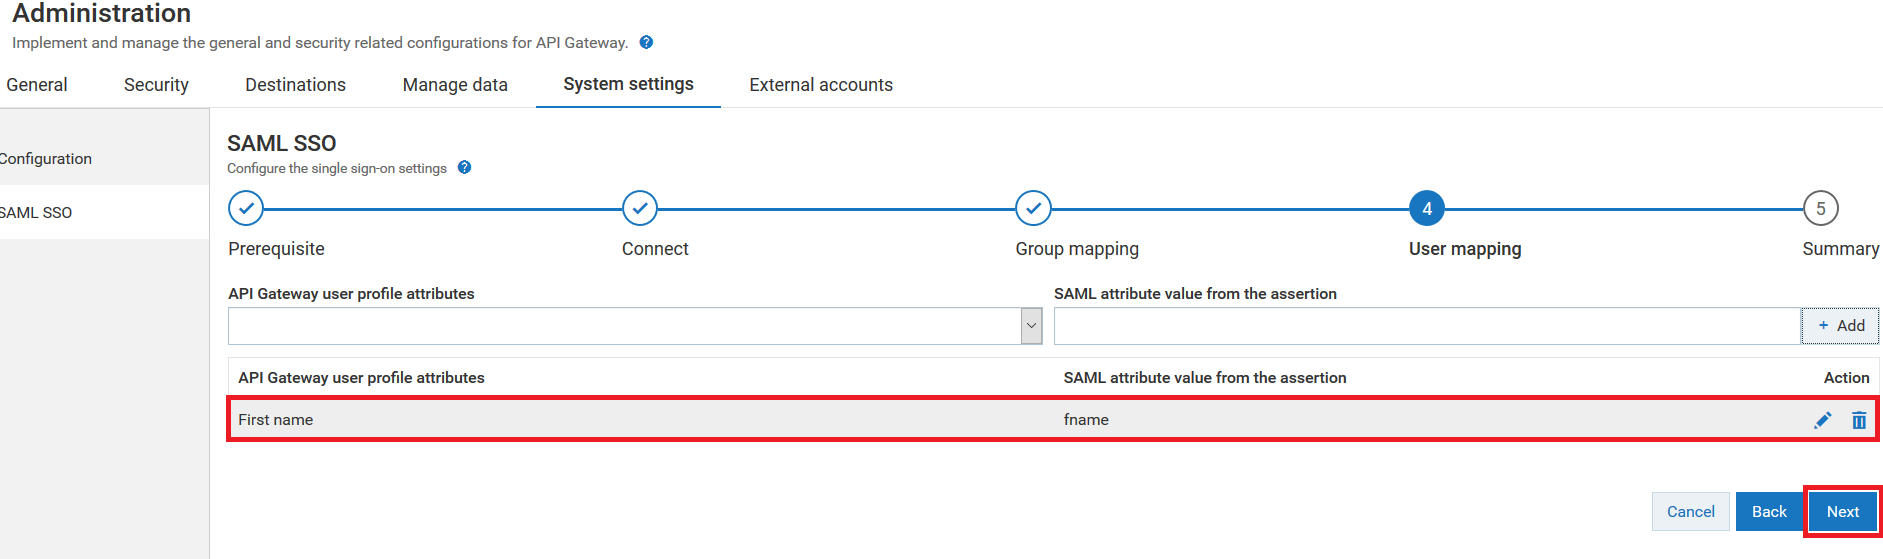
21. Click + Add to map the IdP user profile attribute value of the logged in user specified in SAML assertion to the selected API Gateway 's user profile attribute.
As shown in the image, the attribute name fname specified in the SAML assertion is mapped to user profile attribute called First name in API Gateway.
You can add multiple user profile attribute mapping. You can edit or delete the user mapping by clicking the
or
icons respectively.
22. Click Next.
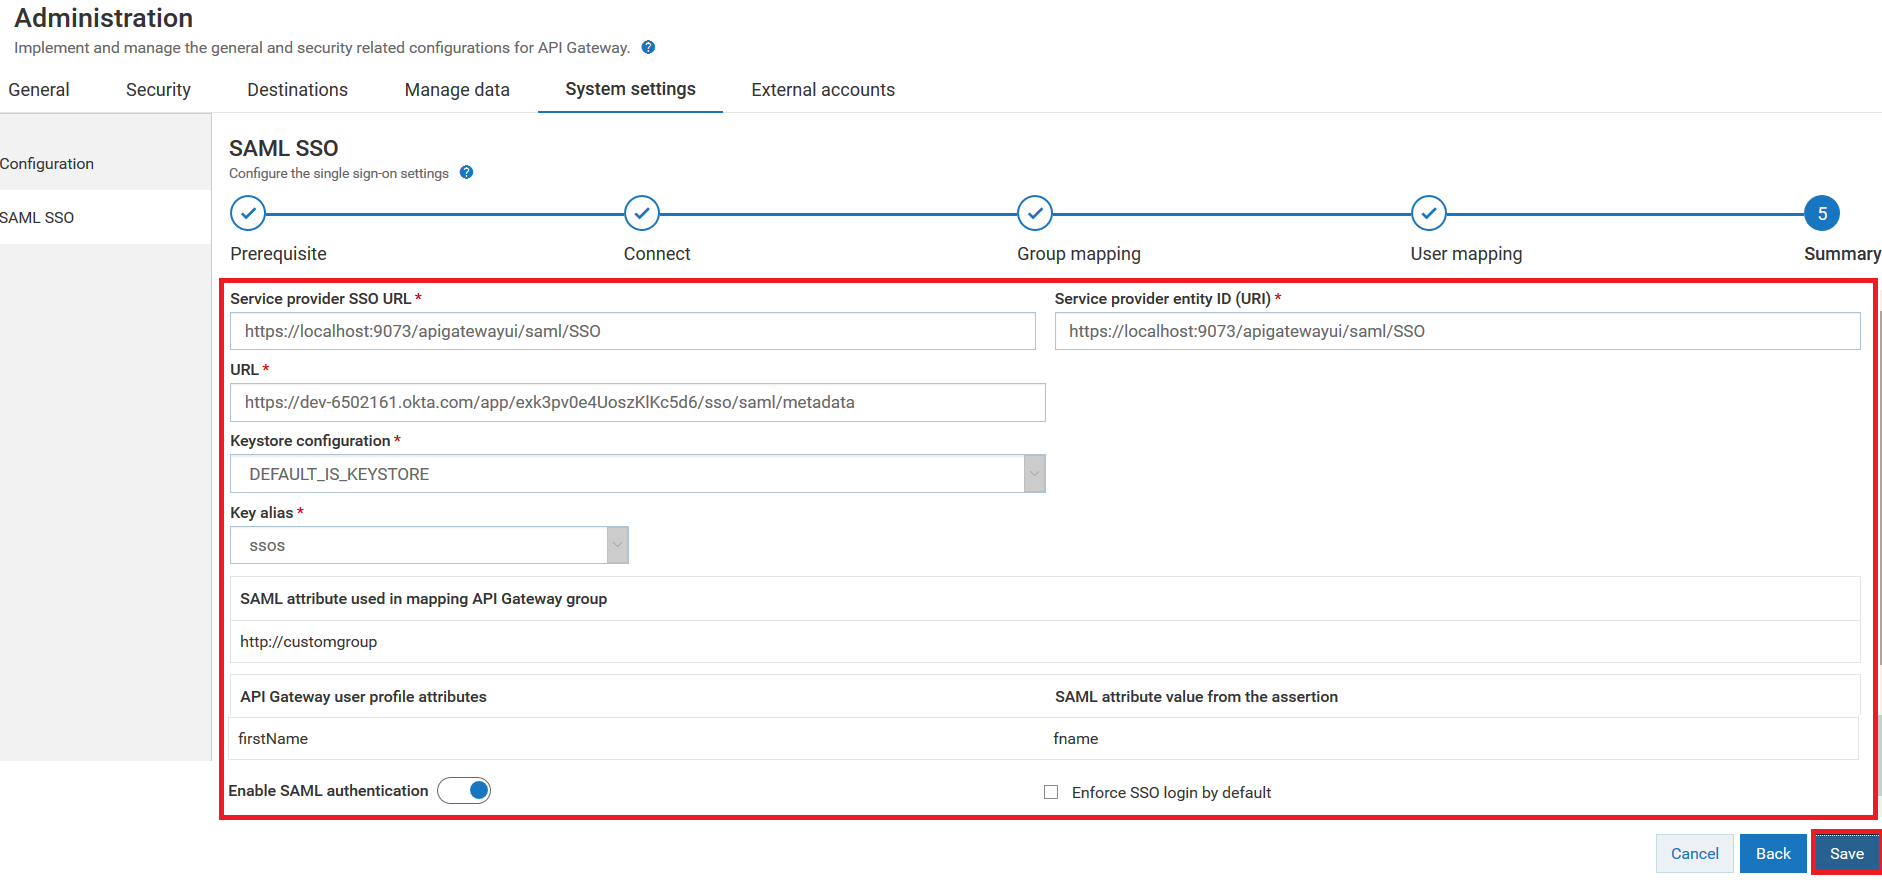
The Summary page appears.
23. Review the SSO configuration, group mapping, and user mapping information in the Summary page.
By default, the Enable SAML authentication toggle button is set on. If you want to disable the SAML authentication, set the toggle button off.
24. If you want to enable SSO login by default, select the Enforce SSO login by default check box.
If you have enabled SSO login by default, you will be directed to the SSO login page directly.
25. Click Save to save the group and user mapping details.