Monitoring API Data Store
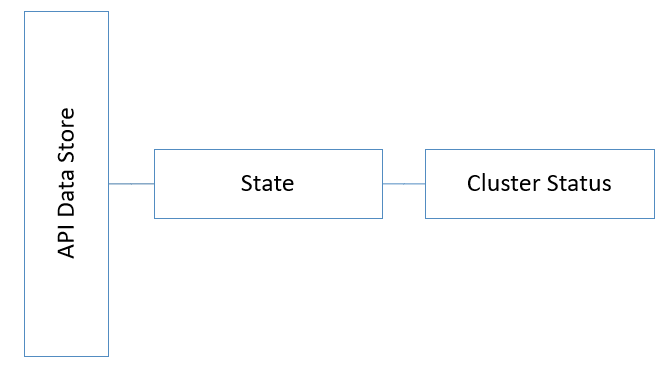
As part of application monitoring, you can monitor the state, that is the cluster status of API Data Store along with the resources.
How do I set up probes to monitor the health of API Data Store?
Pre-requisites:

You must be a valid
API Gateway user for using the Readiness Probe.
All the node level probes must be setup to target the the local instance, typically, localhost.
Software AG recommends to set up a dedicated port for monitoring with an appropriate private thread pool.
Set up Readiness Probe - Node Level
To monitor the readiness of API Data Store, that is to check if the traffic serving port of a particular API Data Store node is ready to accept requests , use the following REST endpoint:
GET HTTP://host:port/_cluster/health
The following table shows the response code and the status.
Response | Status |
200 OK | Readiness check is successful. Readiness probe continues to reply OK if API Gateway remains in an operational state to serve the requests. |
500 Internal server error | Readiness check failed and denotes a problem. The response JSON indicates the problem. |
timeout or no response as the request did not reach the probe | Several factors can contribute to the delay when the Readiness Probe initiates, which may result in the timeout errors. To know the reasons for timeout errors, see
Causes for timeout errors for more information. |
The response JSON of the health check request displays a status field in the response. The status can have the values green, yellow or red.
Green indicates that the cluster is in a desired healthy state.
Red indicates the cluster failure and an outage.
Yellow indicates node failure. However, the cluster is still functioning and operational.
Furthermore, the response JSON displays the active shards, relocating shards, initializing shards, unassigned shards, and so on.
A sample HTTP response is as follows:
{
"cluster_name": "SAG_EventDataStore",
"status": "yellow",
"timed_out": false,
"number_of_nodes": 1,
"number_of_data_nodes": 1,
"active_primary_shards": 95,
"active_shards": 95,
"relocating_shards": 0,
"initializing_shards": 0,
"unassigned_shards": 92,
"delayed_unassigned_shards": 0,
"number_of_pending_tasks": 0,
"number_of_in_flight_fetch": 0,
"task_max_waiting_in_queue_millis": 0,
"active_shards_percent_as_number": 50.80213903743316
}
If the readiness probe fails, it implies that your cluster health is not good.
If readiness probe fails, you can perform one of the following actions:
If you have installed
API Gateway directly, check the Elasticsearch logs to find the status or exception.
If you have installed
API Gateway through docker image or Kubernetes, ensure that the existing pod is resolved or a new pod is created (automatically) and ready for serving the requests.
Set up Liveness Probe - Node Level
As API Data Store works in a cluster-based environment, the result of the liveness probe is determined by the cluster health. You can check the cluster status using the same endpoint mentioned for the readiness probe.
Application Metrics
Monitor the following parameters to get the basics of application health.
Index Size
Cluster Health
Number of Shards
GC Monitoring
Note:
The threshold values, configurations, and severities that are mentioned throughout this section are the guidelines that Software AG suggests for an optimal performance of API Data Store. You can modify these thresholds or define actions based on your operational requirements.
For details about how to generate thread dump and heap dump, see
Troubleshooting: Monitoring API Data Store.
Index Size
When data on a particular index exceeds a certain limit, it is essential to rollover and create a new index. In API Gateway, it is essential to monitor the indices for transactional events. For transactional events, you must rollover the index, when the index size exceeds 25 GB. When an index is rolled over, a new index is created with two primary and a replica for each shard. The naming convention of the new index is gateway_default_analytics_transactionalEvents_YYYYMMDDHHMM.
For information on creating a rollover, see
Creating Rollover of an Index.
API Data Store cluster health
To ensure optimal health and performance of API Data Store, Software AG recommends to monitor the API Data Store cluster health regularly.
To retrieve the API Data Store cluster health status, run the following command:
curl -X GET http://localhost:9240/_cluster/health?pretty
To check the cluster health status from the response, use the JSON path expression $.status.
To check the number of nodes in the cluster from the response, use the JSON path expression $.number_of_nodes.
The cluster health status is displayed based on the following color codes:
Green. If the cluster health status is green, then the cluster is in good health. No action is needed to correct the cluster health. When the API Data Store is handling huge data, it takes some time to display the cluster health status.
Yellow. If the cluster health status is yellow, identify the cause and rectify it. During this time, API Data Store processes the requests for the index that is available. If there are unassigned shards, then identify the unassigned shards, check the reason for the unallocation and resolve the issue.
Run the following command to retrieve the list of unassigned shards.
curl -X GET “http://localhost:9240/_cat/
shards?h=index,shard,primaryOrReplica,state,docs,store,ip,node,segments.count,unassigned.at,unassigned.details,unassigned.for,unassigned.reason,help,s=index&v”
Run the following command to check the unallocated reason for specific shards.
curl -X GET "http://localhost:9240/_cluster/allocation/
explain" -d ‘{ "index" :"index name","primary" : "true|false","shard": "shardnumber"}’reason,help,s=index&v”
Red. If the cluster health status is red, then the API Data Store nodes are down or not reachable or the API Data Store master is not discovered. If the number of nodes does not match the number of API Data Store nodes configured, identify the node that did not join the cluster and identify the root cause for the node to not join the cluster. Based on the root cause, you can perform one the following tasks to resolve the issue:
Identify if your API Data Store is down. If your API Data Store is down and not reachable, check the connectivity.
Number of shards
To ensure proper allocation of shards to nodes, Software AG recommends to monitor the number of shards regularly.
To retrieve the number of shards on API Data Store, run the following command:
curl -X GET "http://localhost:9240/_cluster/health?pretty"
If the total number of active shards from the response exceeds the
heap space * nodes * 20 count then increase the heap space of API Data Store nodes or add a new Elasticsearch node. For more information on adding a new API Data Store node, see
Adding New Nodes to an Elasticsearch Cluster.
API Data Store considers a maximum of 20 active shards per GB of heap space as healthy.
Perform any of the following actions to maintain the total number of active shards:
Scale up the API Data Store node.
If you are not able to scale up the API Data Store node, then increase the heap size as the last option. The heap space should not be more than half of system memory (RAM). Example, if the system memory is 16 GB you can allocate a maximum of 8 GB for API Data Store.
To increase the heap space, modify the parameters Xms2g and Xmx2g in the jvm.options file located at SAG_Install_Directory\InternalDataStore\config.
Garbage Collection (GC) Monitoring
The GC metric counts the number of seconds for which GC ran and the GC count. You must check GC run once every five minutes. The average GC run should not exceed one second. To check GC run time, you can view the quotient of (elasticsearch_jvm_gc_collection_seconds_sum / elasticsearch_jvm_gc_collection_seconds_count) metrics.
If the quotient of the above operation is more than 1 second, it implies that GC is taking longer time to run and this slows down the API Data Store request processing. You must collect the logs and get the mapping of API index and transaction index.
Infrastructure Metrics
Infrastructure metrics include system metrics and container metrics. For information about container metrics, see
Container Monitoring Metrics.
System Metrics
It is important to monitor the following system metrics for an optimal performance of API Data Store. If the metrics return an exceeded threshold value, you can consider the severity as mentioned below and perform the possible actions that Software AG recommends to identify and debug the problem and contact Software AG for further support.
CPU usage
Disk usage
Memory usage
Monitor the CPU usage
To ensure that CPU is not over utilized, you must monitor the CPU health regularly. You can monitor the CPU usage at two levels: process level and OS level. If the process level CPU is utilized beyond the threshold limits, you can share the load. However, if the OS level CPU has reached its limits, you must contact your IT team.
To retrieve the CPU utilization by the API Data Store pods, run the following command:
curl -X GET http://localhost:9240/_nodes/stats/process?pretty
To view the percentage of CPU usage by an API Data Store pod, use the following JSON path expression:
$.nodes.nodeid.process.cpu.percent.
If a pod is using 80% of the CPU space for more than 15 minutes, you can consider the severity as WARNING and perform the possible actions listed to identify the reason.
1. Identify the process that consumes the highest CPU.
2. Generate the thread dump.
3. Analyze the thread dump to identify the thread locks.
If a pod is using 90% of the CPU space for more than 15 minutes, look for Prometheus metrics elasticsearch_os_cpu_percent and elasticsearch_process_cpu_percent.
If elasticsearch_os_cpu_percent is more than 90%, you can consider the severity as CRITICAL and perform the possible actions listed to identify the reason.
1. Restart the pod.
2. Check the readiness and liveliness of the pod.
If
elasticsearch_process_cpu_percent is more than 90%, you can consider the severity as
CRITICAL and add a new node to the cluster. To learn more about how to add a new API Data Store node, see
Adding New Nodes to an Elasticsearch Cluster.
Note:
The Prometheus metrics names can differ in your environment if you are using a different Prometheus exporter.
Monitor the Disk usage
To ensure all nodes have enough disk space, Software AG recommends to monitor the disk space regularly.
To retrieve the disk space of the Elasticsearch nodes, run the following command:
curl -X GET http://localhost:9240/_nodes/stats/fs
This command lists the disk space available in all nodes.
For more information about Elasticsearch node statistics, see
Elasticsearch documentation.
To view the disk space usage, use the following JSON path expression:
Total disk space $.nodes..fs.total.total_in_bytes
Free disk space $.nodes..fs.total.free_in_bytes
Available disk space .nodes..fs.total.available_in_bytes
To know the configured disk-based shard allocations in Elasticsearch, run the following command. To learn more about disk-based shard allocations, see
Elasticsearch documentationcurl -X GET http://localhost:9240/_cluster/settings?pretty
The shard allocation is based on the thresholds known as the Low, High, and Flood watermark.
To view different levels of watermark, use the following JSON path expression:
Low $.persitent.cluster.routing.allocation.disk.watermark.low
The default threshold for this level is 80%. Once the threshold is reached, Elasticsearch does not allocate new shards to nodes that have used more than 80% disk space. You can calculate if the disk usage is low by using the expression ( average Disk Usage of the Elasticsearch cluster / standalone). If the result of this expression exceeds the defined threshold (80%), the disk is said to have reached the "Low" stage. If your disk usage has reached low, you can perform the following steps:
Query the transaction event index size and verify that the index size is above 525 GB (HA)/175 GB (single node). If its already breached, monitor the purge scripts are running and index size is decreasing.
Verify if the size of each transaction event index size is more or less equal to (range of 25 GB) the sum of used space. If this doesn't match, some other external items like increased logs size or heap dump are occupying a lot of space. Clear the logs and heap dump.
Repeat the above steps until the transaction event index size is less than 525 GB and the average disk usage of the cluster becomes less than 80%
High $.persitent.cluster.routing.allocation.disk.watermark.high
The default threshold for this level is 85%. Once the threshold is reached, Elasticsearch attempts to relocate shards away from a node whose disk usage is above 85%. You can calculate if the disk usage is low by using the expression ( average Disk Usage of the Elasticsearch cluster / standalone). If the result of this expression exceeds the defined threshold (85%), the disk is said to have reached the "High" stage. If your disk usage has reached high, you can perform the following steps:
Query the transaction event index size and verify that the index size is above 525 GB (HA)/175 GB (single node). If its already breached, monitor the purge scripts are running and index size is decreasing.
Verify if the size of each transaction event index size is more or less equal to (range of 25 GB) the sum of used space. If this doesn't match, some other external items like increased logs size or heap dump are occupying a lot of space. Clear the logs and heap dump.
Repeat the above steps until the transaction event index size is less than 525 GB and the average disk usage of the cluster becomes less than 85%
Flood $.persitent.cluster.routing.allocation.disk.watermark.flood
The default threshold for this level is 90%. Once the threshold is reached, Elasticsearch enforces a read-only index block (index.blocks.read_only_allow_delete) on every index that has one or more shards allocated on the node that has at least one disk exceeding the flood stage. This is the last resort to prevent nodes from running out of disk space.
You can calculate if the disk usage is in flood stage, by using the expression ( average Disk Usage of the Elasticsearch cluster / standalone). If the result of this expression exceeds the defined threshold (90%), the disk is said to have reached the "Flood" stage. If your disk usage has reached the flood stage, you can perform the following steps:
Monitor the purging of data and ensure the purging happens and the disk space occupancy gets reduced.
If this situation is due to a peak in requests count & size, you can do follow-up actions like verifying with the customer about the reason for this sudden peak, ask the customer to compress payload data for transaction logging or not to store request or response payload, and so on.
To get information of specific metrics like fs, http, os, process, and so on, run the following command:
curl -X GET http://localhost:9240/_nodes/stats/metric
For more information about metrics, see
Elasticsearch documentation.
Memory Check
To retrieve the memory status utilized by the Elasticsearch pods, navigate to the following URL:
http://HOST:9240/_nodes/nodeid/stats/os
To get the nodeid in the above API, use the following:
http:URL/nodes?v&full_id=true&h=id,name,ip
This returns the node id, node name, and the node IP address.
You can now use the following JSON expression to get the percentage of memory that is free.
$.nodes.nodeid.os.mem.free_percent
If a pod is using 85% of the available memory, you can consider the severity as WARNING and identify the process that consumes more memory and generate the heap dump.
If a pod is using 90% of the available memory, you can consider the severity as CRITICAL and perform the possible actions listed to identify the reason.
1. Identify the process that consumes more memory.
2. Generate the heap dump.
3. Restart the pod.
4. Check the readiness and liveliness of the pod.