Customizing CentraSite Login Page
The Login page used to access CentraSite Business UI can be customized to suit your requirements. You can change the logos used, colors, text, time formats, and layouts. You can also define links that navigate you to the Welcome page or guest access page, the user registration, and Take a Tour link of the CentraSite Business UI.
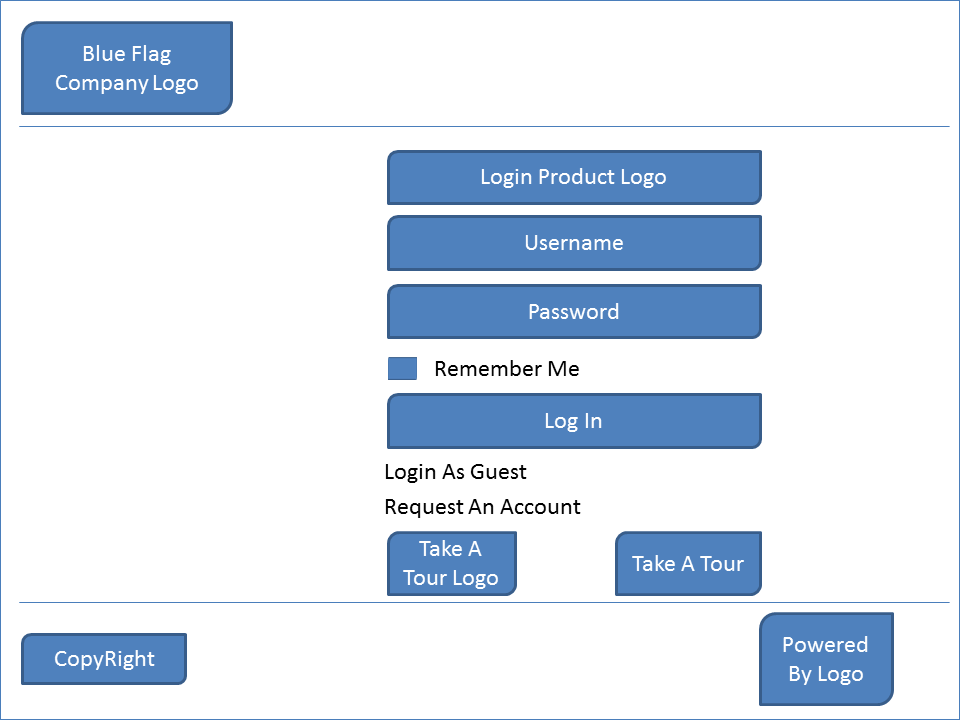
The standard Login page contains a header section, a login section, and a footer section. The following figure depicts the schematic layout of the Login page:
The header section displays the company logo. You can change the company logo and colors used to display the logo or hide the logo as part of the page customization. You can change the product name and the individual field labels and change the font and color used to display them. You can optionally choose to hide the product name as part of the page customization.
The footer section shows the copyright information. You can hide the copyright information as part of the page customization.

To customize and install the customized login page
1. Stop Software AG Runtime.
2. Customize the Login page configuration.
The standard configuration file
centrasite.xml delivered with the
CentraSite kit contains all of the names of the
CentraSite Business UI extension points, including the extension point for the Login page configuration. You must create a copy of the extension point for the Login page configurations in the customization file,
centrasite.xml, in order to define a customized Login page. For more information, see
CentraSite Login Page Configuration.
You can find the customization file, centrasite.xml, on <CentraSiteInstall_Directory>\cast\cswebapps\BusinessUI\custom\conf.
3. Start Software AG Runtime.
The changes incorporated are now visible in the Login page.

