New entities can be created via the menu item. When creating a new entity, you are required to enter a name.
Note:
The entity's name can only include a-z, A-Z, 0-9, or "." and must not
start with a digit (0-9) or ".".
Edit the entity by double clicking on the entity in ApplinX Explorer. A single click on an entity will display the entity's properties in the properties area. The description of the entity can be edited in the Properties area.
Delete, copy and paste an entity by right-clicking on the entity in ApplinX Explorer and selecting the relevant option.
Locate/find and open an entity by right-clicking on the repository in the ApplinX Explorer and selecting , or by selecting in the Menu. Use ? to substitute a single character, and * to substitute a string.
As an ApplinX user, you may like to divide applications into folders according to the specified interests and needs, such as development teams, sub-applications etc. The same folder contains different types of entities and sub-folders varying according to each application. This allows you greater flexibility organizing your entities. A new folder can be created via the menu item.
The Designer has built-in access to the host session, this session can
be used to make the definition of entities easier. This is achieved using the
Session's Copy from session feature. To copy from the session, mark the
relevant string of data in the host's screen, and next to the relevant field
click the Copy from session icon
![]() . The string and/or position
are copied.
. The string and/or position
are copied.
Entities can be copied between from folder to folder within an application and/or between applications/servers. This can be performed by dragging and dropping the relevant entity or by using the Copy/Paste actions. When copying between applications, the pasted entities will be placed in the root node of the repository.
Note:
When coping an entity to an application that has the same entity name, the existing entity will be overwritten by the new
one.
The timestamps of the new entity (for example creation and modification date) also overwrite the values of the original entity.
These changes take effect immediately, not after reloading the application.
You can search and open a specific entity in the Editor area by right-clicking on the Repository node and selecting . The search can be filtered by entity and you can determine to search within a specific folder. You can sort the results by created/modified timestamp.
You can rename an application or entity (though not a field) by selecting it in the ApplinX Explorer and then either selecting from the menu or by right-clicking on the application/entity and selecting .
Field renaming is performed via the Field Mappings tab in the Screen Editor where the relevant field is mapped. Before renaming a field, you may want to see which other entities refer to this field. This is done by clicking on the icon next to the Field name field. To rename a field, click on the icon next to the Field name field, and access the field editor. In the field editor click, on the button and rename the field.
Note:
A field which does not have references can be edited directly in the
Field name field in the screen editor.
ApplinX entities may be interrelated with each other. The ApplinX Server maintains tables that keep track of entities that refer to other entities. For example, a field entity: the screens it is mapped to, the procedures it is an input or output parameter of, or the paths that employ it as an input / setting variable / test by field. This feature allows you to keep in check the database and avoid situations in which deleting one entity makes another entity non valid.
 To view an entity's references
In the ApplinX Explorer, right-click on the entity and select .
The references are displayed in the reference view. Double-click on an entity to edit it.
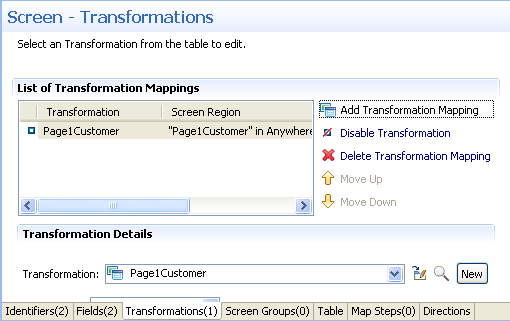
When working in an entity Editor such as the Screen editor, the Transformation editor or any other editor, you are sometimes required to select an entity from the application's repository. This is possible either by clicking on the drop-down arrow which appears on the right of the relevant field, or by dragging and dropping the entity from the Applinx Explorer tree into the field. For example, in the Transformation tab of the Screen editor, after adding a new transformation mapping, you are required in the Transformation Details area to select the transformation.

You can either click on the arrow next to the transformation field, or drag a transformation from the ApplinX Explorer tree
