
A Procedure Group is required when exposing procedures using Web services or the Procedure client. A procedure group consists of a number of procedures.
 To create a new Procedure Group
Select the relevant application.
In the menu select . The New Procedure Group wizard is displayed.
Enter a name for the Procedure Group, a suitable description and determine the folder where the screen is to be located. Click . You have now created a Procedure Group entity in the repository.
See also: Procedure Groups' Generated Web Services and Deploying a Procedure Group to WS-Stack
To assign a Procedure to a Procedure Group
In the ApplinX Explorer, double-click on a Procedure Group. The Procedure Group will be displayed in the Editor area.
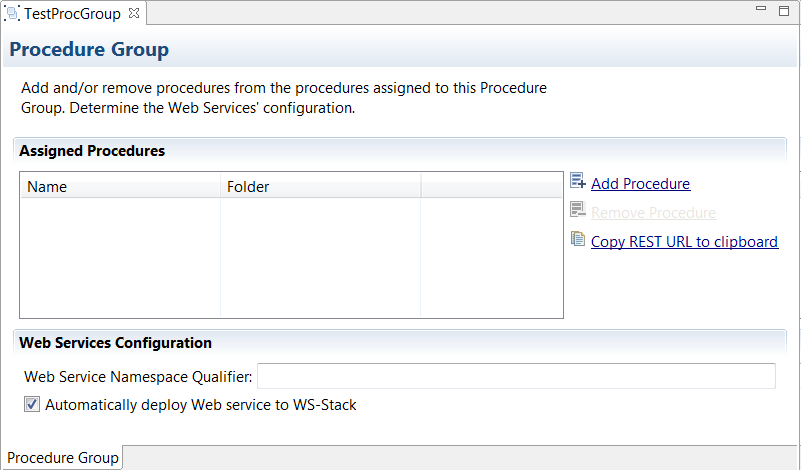
Click on the link. The Multiple Procedure Selector dialog box is displayed.

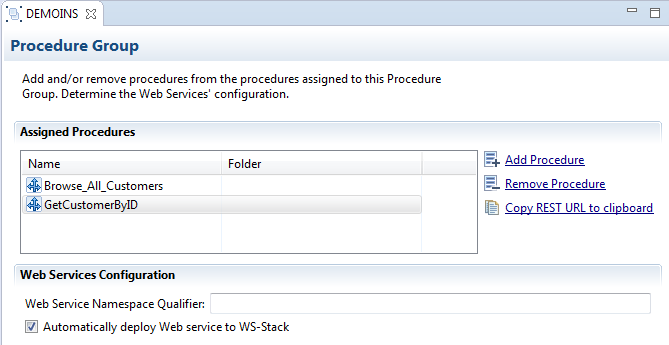
Select the procedures that you want to assign to this Procedure Group. Click .
See also: Procedure Groups' Generated Web Services and Deploying a Procedure Group to WS-Stack
A Procedure is a well-defined business-logic (with input and output arguments). A Procedure Group is a container of Procedures. Procedure Groups are exposed as Web services via WS-Stack. Flow procedures, path procedures, Web procedures, programs and path wrappers that are placed within a procedure group can be exposed as operations within a Web service. ApplinX allows you to connect to the ApplinX server and request information from it, which can be obtained from a legacy system. In other words, you can connect to the ApplinX Server through your browser and ask the server to perform some logic by way of procedures (Web methods) to receive the required information.
Note:
The user is sometimes required to enter input values for parameters.
In such a case a pop-up appears. For example:
<In>
<password></password>
<reconnect>true</reconnect>
<user>demo5</user>
</In>
The values displayed within the tags are default values set by the user.
When deleting a text value and/or not entering a value (e.g.
<password></password>), an empty string is used.
When deleting a boolean, numeric or date value and/or not entering a value, the ApplinX default is used (ApplinX default values are as follows: for a boolean parameter - false, numeric - 0 and date - current date).
When removing a whole element (such as deleting
<reconnect>true</reconnect>), the user defined default
is used when one exists, otherwise, the ApplinX default is used (ApplinX
default values are as follows: for a boolean parameter - false, numeric - 0,
date - current date and string - empty string).
To invoke a procedure from a SOAP client, right-click on the relevant Procedure Group, and select and paste it into your external application (right-clicking on the Procedure Group and selecting will display the WSDL file within a browser).
ApplinX web services can be invoked using REST. From the Procedure Group Entity Editor, select a procedure and choose .
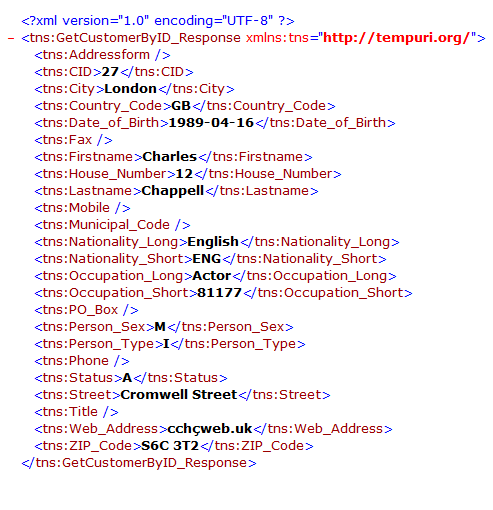
The URL is copied to the clipboard, and you can then consume it using any client. Currently only simple GET requests with flat input are supported. Structured or complex input is not supported.
The GET request contains all inputs with their default values. If the input does not have a value, the URL will contain a placeholder < your_value_here >, which you should fill with the required values.
POST requests, used for structured inputs, are currently not supported out of the box, but you can consume structured procedures by creating the request in application/xml format.
The example above creates the following REST URL: http://localhost:2380/wsstack/services/SOADemo.DEMOINS/GetCustomerByID?Select_Customer_ID=27. The browser's response is as follows:
A Procedure Group can be deployed to WS-Stack manually or automatically. Refer to Integration between ApplinX and WS-Stack for further details.
To automatically deploy Web services, access the relevant Procedure Group, and select the Auto deploy Web service to WS-Stack check box.
Note:
When deploying automatically, ensure that the initialization mode
"When first accessed" is selected. If this mode is
not selected, the Web Services will not be deployed until the application is
loaded.
Before manually deploying a Procedure Group to WS-Stack, ensure that you have the WS-Stack plug-in for Eclipse installed. If you do not have the plug-in installed, install it from the SAG installer.
To manually deploy a procedure group to WS-Stack
Ensure that in the Procedure Group Editor, the Auto deploy Web service to WS-Stack check box is not selected (the following time this Procedure Group is saved, the Web service will be undeployed).
Right-click on the relevant Procedure Group and select .
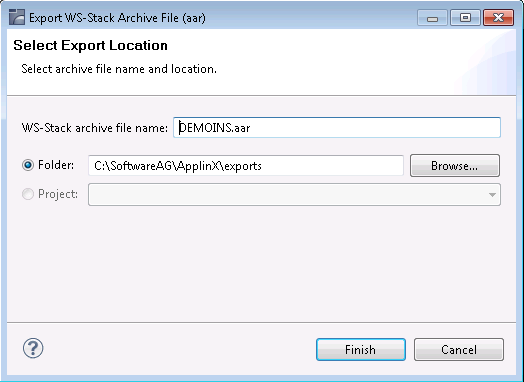
Enter a name for the AAR file.
Select a folder or an existing project in Eclipse, where the external web service should be placed. Click Finish.
The AAR file is created in your Eclipse project (If you selected Folder in the previous step, place the AAR file in the relevant project in Eclipse).
Right-click on to deploy. Additional configuration for the web service (such as security) is possible. For further details, refer to the WS-Stack documentation on Empower.
ApplinX procedures can be registered as Web services in CentraSite. CentraSite is an open and standard-based SOA repository that allows customers to manage and govern their SOA environment and to achieve control and transparency across all IT resources related to the SOA, initiative services, policies and processes within the organization.
To register a procedure group
Define the WS-Stack definitions in ApplinX.
Right-click on the relevant Procedure Group and select . The Export WS-Stack Archive wizard is displayed.
Enter a name for the WS-Stack archive file that is to be created. By default the name is the name of the Procedure Group you selected in Step 2).
Select the folder or Java project where the file is to be created (to select a Java Project, ensure that such a project exists).
In the Java Perspective of Eclipse, deploy the web service package and then register the web service package (refer to the WS-Stack documentation for further details).
ApplinX procedures can be registered as services in webMethods Integration Server. webMethods Integration Server supports the integration of diverse services, such as mapping data between formats and communication between systems.
Note:
This feature is only available when working with a SOA
license.
Note:
Ensure that you have the EntireX adapter installed (this does not
require a special license).
To register a procedure group
Right-click on the relevant procedure group and select. The Integration Server Wrapper wizard is displayed.
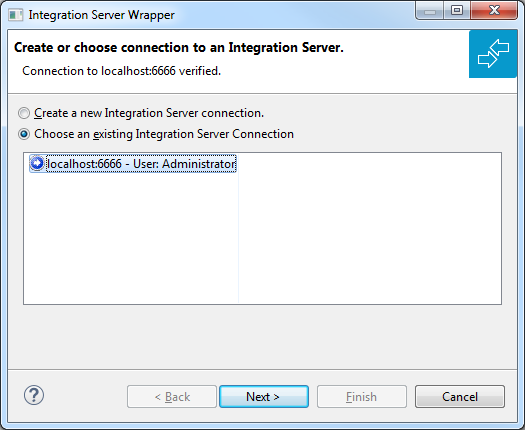
Select to create a new Integration Server Connection or choose an existing Integration Server connection. Click
When selecting to create a new Integration Server connection, you are required to specify the Integration Server's connection settings: the server address (IPv4 and IPv6 address formats are supported), user name and password and secure connection settings.
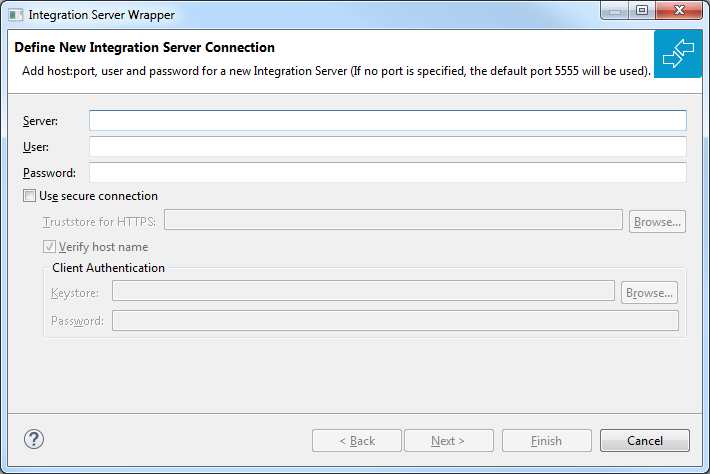
Click
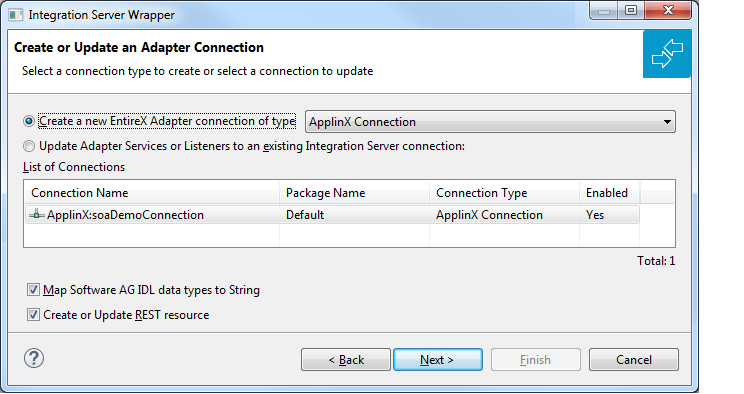
In this step you can either create a new Integration Server connection or update adapter services to an existing Integration Server connection.
To create a new connection
Select connection type ApplinX connection from the drop down list and press .
To update an existing connection
Select an ApplinX connection from List of Connections.
As a result, you are informed on how many adapter services will be created, modified or left unchanged.
The update process can be characterized as follows:
The metadata is updated for each IDL program.
An adapter service is created for each new IDL program is created.
An existing adapter service is updated if it is contained in the IDL file for the update.
A connection remains unchanged with respect to its type and settings (broker ID, server address, user ID, etc.).
Click Next or Finish.
The checkbox Map Software AG IDL data types to String specifies how to map IDL data types to Integration Server data types. The default is to map all data types (except binary) to String.
Check Create or Update REST Resource if you want to create REST V2 resources for your connection. An additional dialog will appear to define the destination of the resource.
To create or update a REST resource
Select a package.
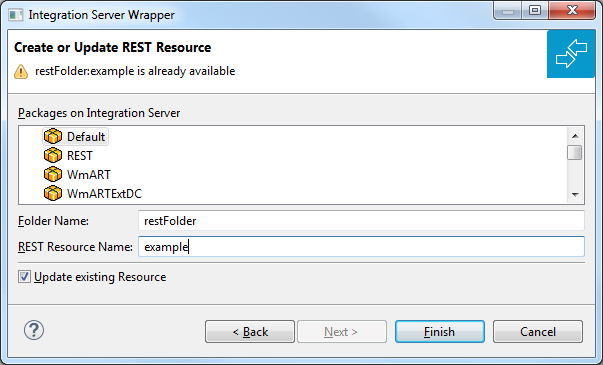
Define a folder name. If the folder does not exist, it will be created.
Define the REST Resource name.
Check Update existing Resource if you want to add additional services to an existing resource.
See the REST Developer's Guide in the webMethods Integration Server documentation for information on using the generated REST resources.
Software AG Web Services Stack (WSS) is a toolkit that provides functionality for execution, configuration and management of web services. It handles the complex process of sending and receiving of web services requests in Software AG products. It allows everyone to do web services while knowing only a few of the details about the web services specifications.
The core part of the WSS runtime is the SOAP engine, based on Apache Axis2. Incoming SOAP requests are processed by this SOAP engine. The SOAP request is given to the SOAP Runtime and sent back to the client as a SOAP response message. If an error occurs a SOAP fault message is sent back to the client.
ApplinX and other products in the webMethods suite use WS-Stack for exposing and deploying web services.
To configure WS-Stack in ApplinX
For WS-Stack Administration, you must have SMH (System Management Hub) installed. This is provided with the Software AG Installer.
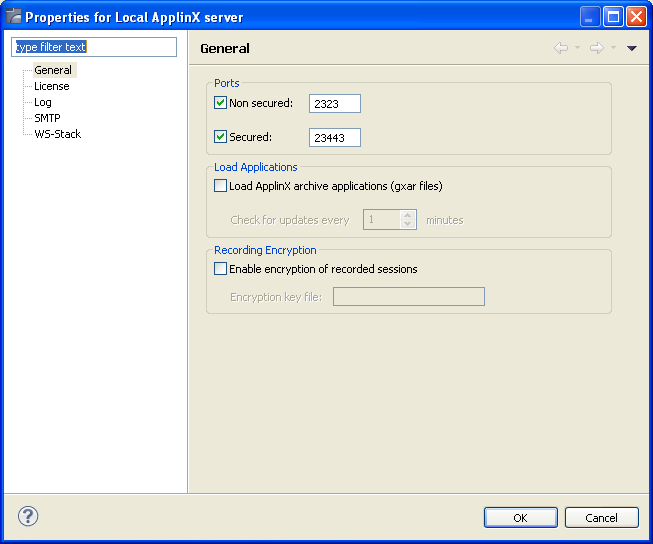
Open the Server Properties dialog box (right-click on the relevant server in the ApplinX Explorer and select ).
Select whether to work in embedded (default) or in external mode. Use the Embedded mode when WS-Stack uses the same Tomcat as ApplinX and also when working with Web Services created in previous ApplinX versions (Administrative Web Services and Procedure Group generated Web Services). Use the External mode when not using the same Tomcat as ApplinX, for example when working with one WS-Stack Web application for all SAG products or when working with a WS-Stack Web application which is on a different machine.
. When working in the Embedded mode, it is not necessary to configure any parameters as the values are configured automatically.
When working with Web Services Stack that uses a Platform Tomcat Server that was installed when installing ApplinX, it is not necessary to configure any parameters as the values are configured automatically. When working with Web Services Stack that uses a Platform Tomcat Server that was installed before installing ApplinX, once ApplinX installation was completed, restart the Platform Tomcat Server by restarting its service - Software AG Tomcat Server Service (sagctp82).
In the Server Properties dialog box, configure the WS-Stack External mode parameters: enter the host name, the Tomcat port where WS-Stack Web application is deployed, the URL of the servlet that the WS-Stack uses for deployment tasks and the user name and password used by WS-Stack.
Copy the applinx-wsstack.jar file (can be found in the ApplinX installation wsstack\WEB-INF\lib directory) and the applinx-shared.jar file (can be found in the ApplinX installation shared\lib directory) from the ApplinX installation, to the WS-Stack Web application, WEB-INF\lib directory. Restart the WS-Stack Tomcat.
In the Server Properties dialog box, configure the WS-Stack External mode parameters: enter the host name, the Tomcat port where WS-Stack Web application is deployed, the URL of the servlet that the WS-Stack uses for deployment tasks and the user name and password used by WS-Stack.
Copy the applinx-wsstack.jar file (can be found in the ApplinX installation wsstack\WEB-INF\lib directory) and the applinx-shared.jar file (can be found in the ApplinX installation shared\lib directory) from the ApplinX installation, to the WS-Stack Web application, <Software AG installation directory>\profiles\CTP\workspace\wsstack\repository\lib. Restart the Platform Tomcat Server by restarting its service - Software AG Tomcat Server Service (sagctp82).
Note:
To work in External mode with an application from a previous
ApplinX version, manually redefine the Web Services after upgrading the ApplinX
application.
Note:
Refer to the WS-Stack documentation for further information.
When working in the Embedded mode, ApplinX supports Web services created in previous ApplinX versions and that have not been edited. Once you make a change in the Web service, and require regenerating the client, you will need to make a number of changes in the code in order for the new client to work.
To migrate to a remote WS-Stack
Copy the applinx-wsstack.jar file (can be found in the ApplinX installation wsstack\WEB-INF\lib directory) and the applinx-shared.jar file (can be found in the ApplinX installation shared\lib directory) from the ApplinX installation, to the WS-Stack Web application, WEB-INF\lib directory.
In the Server Properties dialog box, configure the WS-Stack remote parameters: enter the host name, the Tomcat port where WS-Stack Web application is deployed, the URL of the servlet that the WS-Stack uses for deployment tasks and the user name and password used by WS-Stack.
Procedure client is a code representation of an ApplinX Procedure Group which can be integrated into any Java/.NET development environment to execute ApplinX procedures.
ApplinX server can generate three types of procedure clients: C#, VB.NET and Java clients. The generated client contains four types of classes:
Service class (per procedure group): Contains methods for each procedure under the relevant procedure group. Calling a certain method will execute the corresponding ApplinX procedure.
Request class (per procedure): Encapsulates all the inputs of that procedure.
Response class (per procedure): Encapsulates all the outputs of that procedure.
Data Structure class (per Data Structure): Using a Data Structure in a procedure generates a separate class. This class contains as field members all the attributes of that Data Structure.
Generating a procedure client can be performed either using the Eclipse Designer (JSP) or the .NET add-in.
To generate a procedure client (JSP)
In the Root directory of the relevant application, right-click on a procedure group and select . The Generate Procedure Client wizard is displayed.
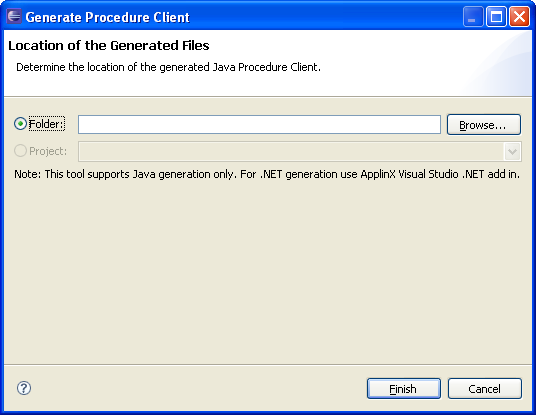
Browse and locate the directory where the generated code will be saved.
Click .
For Java clients, each class (as discussed above) is generated as a separate Java file. Therefore, when using Java, the namespaces defined in ApplinX are used as package names for each class. If no namespaces are defined, in ApplinX the package name will be the same as the procedure group's name.
For example: If procedure group "Test" is defined in ApplinX under the namespace TestNamespace, then the generated service class will be named TestService and its package name will be TestNamespace.
Code example:
Package TestNamespace
Public Class TestService
{
Public method A
Public method B
}
For .NET clients (C#) a single class file is generated, which contains all the classes aforementioned. In the case where no namespaces entities were defined in ApplinX, all the classes will be nested inside a single namespace, whose name will be the same as the Procedure group's name. However, if a procedure group or Data Structure were defined under a specific namespace in ApplinX, they will be nested inside that namespace in the generated class file.
For example: If the procedure group "Test" is defined in ApplinX under
the namespace TestNamespace, then the generated service class will
be named TestService and will be nested under
TestNamespace.
Code example:
Namespace TestNamespace
{
Public class TestService
{
Public method A
Public method B
	}
}
Namespace BusinessEntityNamespace
{
Public class MyBusinessEntity
	{
Public field A
Public field B
	}
}
This section explains how to use the procedure client classes in your application. This example illustrates how to run a simple flow procedure that gets a string array as input and returns a Data Structure with two attributes as output. Refer to the SOA demo application to see an implementation.
Note:
The code in the example below is written in C# syntax.
Create a new instance of the Request class.
ProcedureRequest request = new ProcedureRequest ();
Create a new instance of the Data Structure class.
BusinessEntityClassName InputObject = new
                                   BusinessEntityClassName();
Set the attributes of the Data Structure with values
InputObject.Attribute1 = Value1;
InputObject.Attribute2 = Value2;
Set the attribute of the request object (created in step 1) with the Data Structure object (created in step 2 and 3).
request.InputAttribute = InputObject;
Create a new instance of the service class.
ServiceClass service = new ServiceClass();
Call the method that runs the relevant procedure. Pass the request object to that method. The method will return a response object.
ResponseClass Response = service.Procedure(request)
The string array output can be extracted from the response object and used anywhere in your application.
ForEach (string str in Response.Output)
{
Console.Out.Writeln(str);
ApplinX enables a secure SSL connection between a Procedure Client and ApplinX server. To enable this feature you will need to first configure the server to support working with a secure SSL connection and then make the necessary changes in the code that executes the service.
To configure the secure SSL connection:
Configure the server:
In the Server Properties (right-click on the server), General tab, select the Secured port check box and enter the port number. By default the port number is 23443.
Restart the ApplinX server.
Check that you can successfully connect using a secure connection; login to the ApplinX Administrator and select the Secured connection checkbox.
After generating a Procedure Client, access the code that executes the service (when using ApplinX Web framework it is located in the "code behind" of the page (<page_name>.java/<page_name>.cs)) and add the following two lines beneath your service:
service.setApplinXServerPort(<secured port number>);
service.setSecured(true);
<secured port number> being the port number defined in Secured port configured in step 1.a.