
Creating an ApplinX for JSP Web Application using the Software AG Designer (recommended)
Creating an ApplinX for JSP Web Application using JDK and Tomcat (no IDE)
Creating an ApplinX .NET Web Application using Visual Studio 2015 or 2017
Creating an ApplinX .NET Web Application using .NET (no IDE)
Upgrading an ApplinX .NET Web Application to Visual Studio 2015 or 2017
The following is based on the released Eclipse version. Additional information can be found on Eclipse website and WTP (web tool platform) site.
 To create a new Dynamic Web project
In the Eclipse workspace, select to create a new project.
Select .
Click to create a new web project. The New Dynamic Web Project dialog box is displayed.
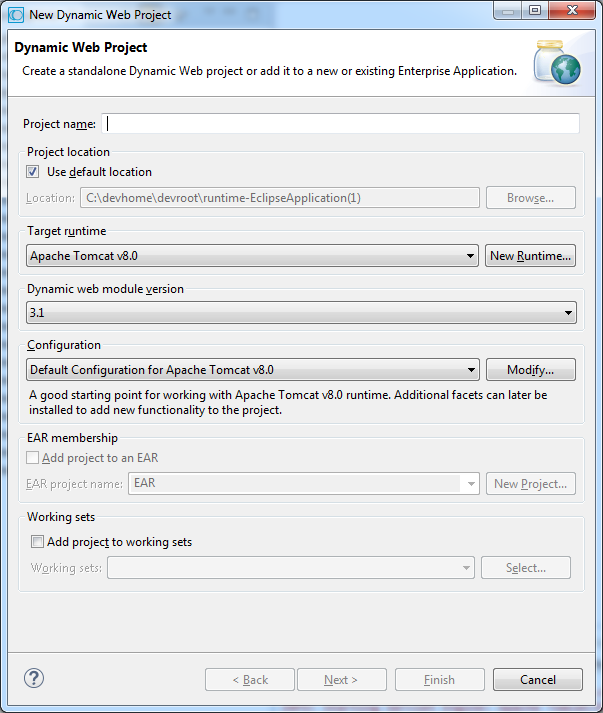
Enter a name for the project.
In the Target Runtime field, select the Tomcat installation: click and select the server to be used: Either J2EE Preview (recommended) or Tomcat v5.5.
Important:
The Restart function in the J2EE Preview server does not work
properly. Instead of using the Restart function, stop and the start the server.
In addition, editing files only works after stopping and starting the
server.
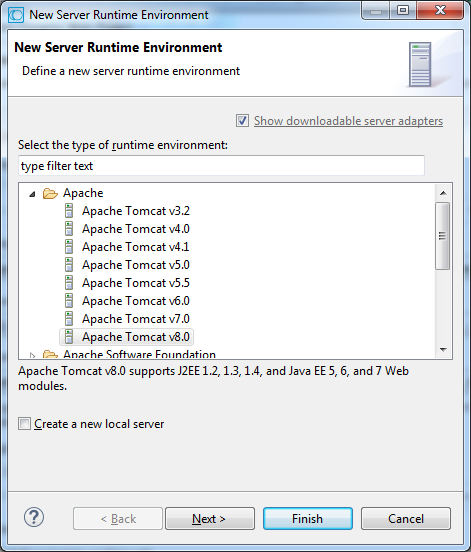
Click .
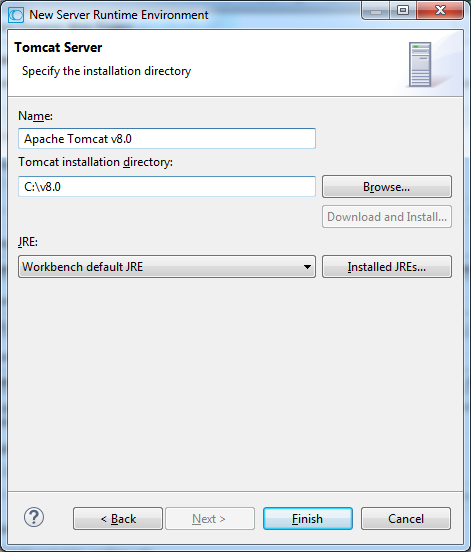
Browse and select the Tomcat installation.
Note:
Currently the ApplinX internal Tomcat cannot be used to create a
web application and when selecting to use Tomcat, you are required to install
an additional Tomcat 8.5 version.
Select a JRE or click to add a new JRE. The Preferences dialog box is displayed.
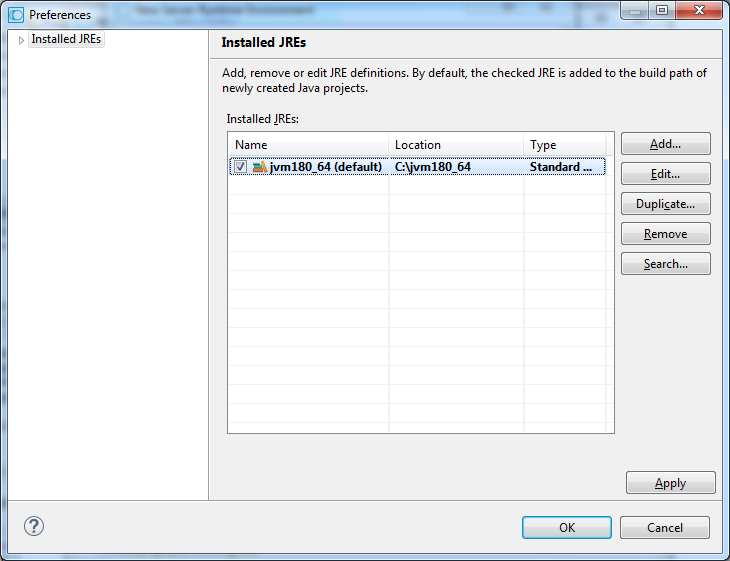
Define the Runtime Environment (JRE) for the server: JSP server requires a full JDK and not only the JRE bundle. If you need to add a new JRE, click the button.
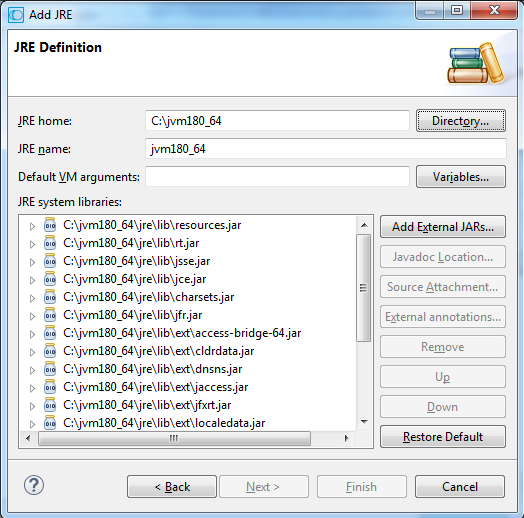
Assign a name to the new JRE.
Enter the JRE home directory (when necessary, click to locate the file).
Add VM arguments when required.
Click to return to the New Server Runtime dialog box. Select the newly created JRE. Click .
Click . The New Dynamic Web Project dialog box is displayed.
You have completed the configuration of the flexible project, the server (Tomcat) and the JDK.
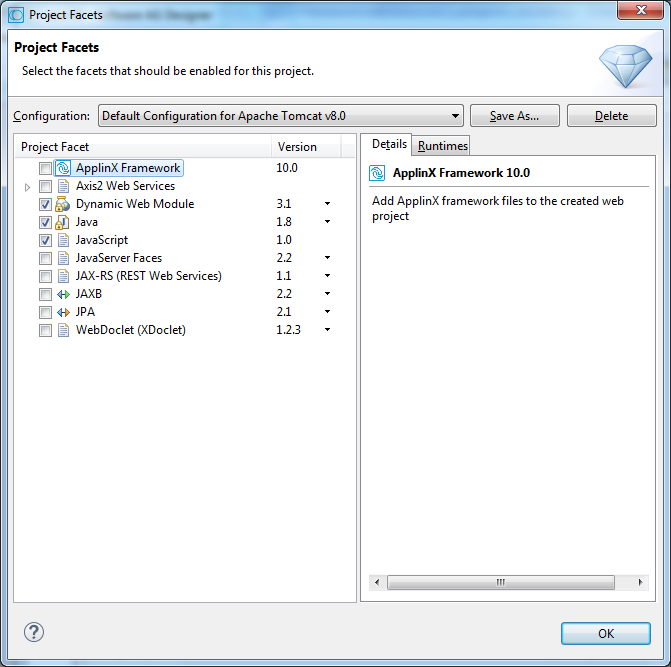
Change the configuration to Custom and click .
Select ApplinX Framework. Ensure that the Dynamic Web Module and Java check boxes are selected. Click .
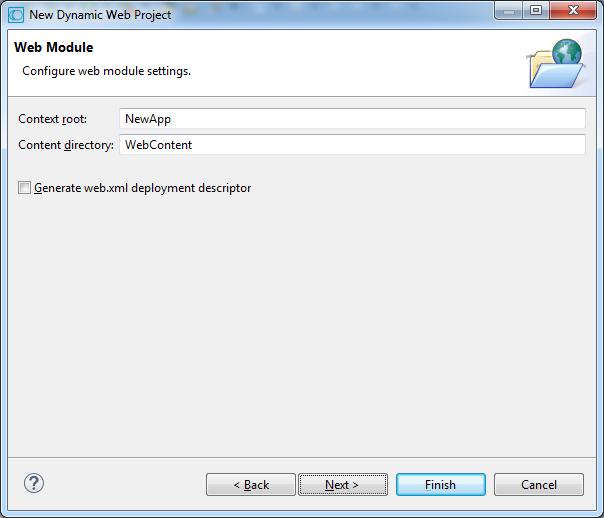
Click .
Click .
You have completed the creation of a standard WAR file (Java Web Archive).
Click .
Select the type and template of your web application:
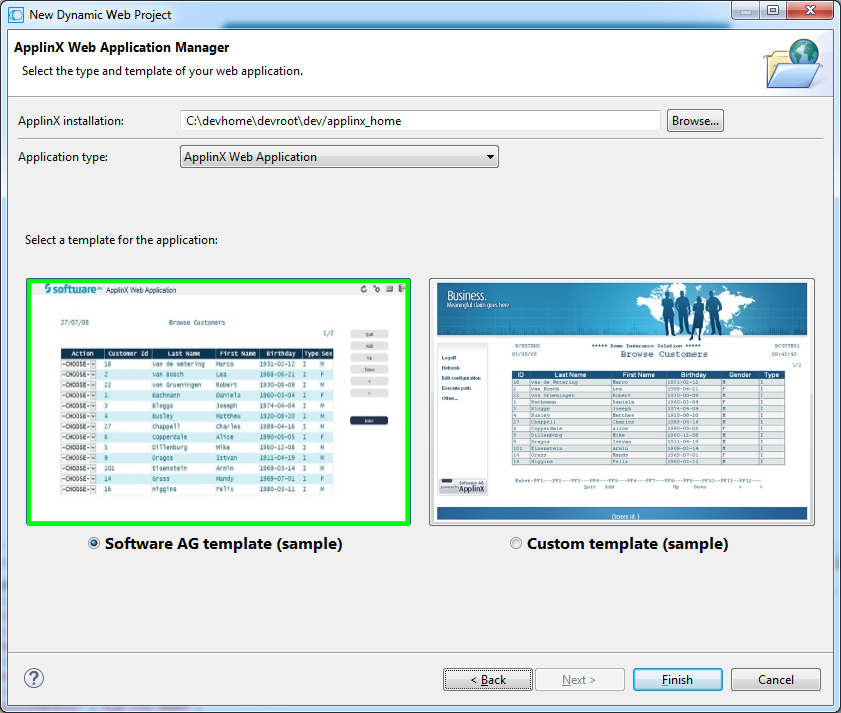
Ensure that in the menu, is selected.
To run the project, right-click on the project's folder in the Project Explorer view and select .
The first time you run a project you are required to select a default server:
Select the server you configured.
Select the Always use this server when running this project check box. The next time you run the application, this dialog box will not be displayed. The server you selected will automatically be used.
Click to continue. A browser window will be opened.
Note:
The browser type can be configured under . It is recommended to configure it to Default system web browser.
When using the Javadoc you will have:
Online usage of the Eclipse Javadoc for ApplinX API.
Suggested argument names for the ApplinX API, instead of arg0, arg1, etc.
To use Javadoc capabilities when developing your project
Right-click on the project node and select . The Properties dialog box is displayed.
In the Libraries tab, expand the gxframework.jar node, click on Javadoc location and then click on the Edit... button to determine the location of the Javadoc.
You can either enter the URL http://localhost:2380/applinx-help or browse and select the Javadoc location path <Software AG installation> > ApplinX > Help > API. Then click .
Click to close the Properties dialog box.
Note:
This is not available when working with a SOA license.
To create a new JSP application without any IDE and with JDK
Refer to ApplinX for JSP Web Application in Software Requirements.
During the installation process, choose the option .
In the ApplinX Explorer, right-click on the relevant application and select . The Web Application Manager wizard is displayed.

Ensure that Create a new Web application (for IIS or Tomcat) is selected. Click . The Create a New Web Application screen is displayed.
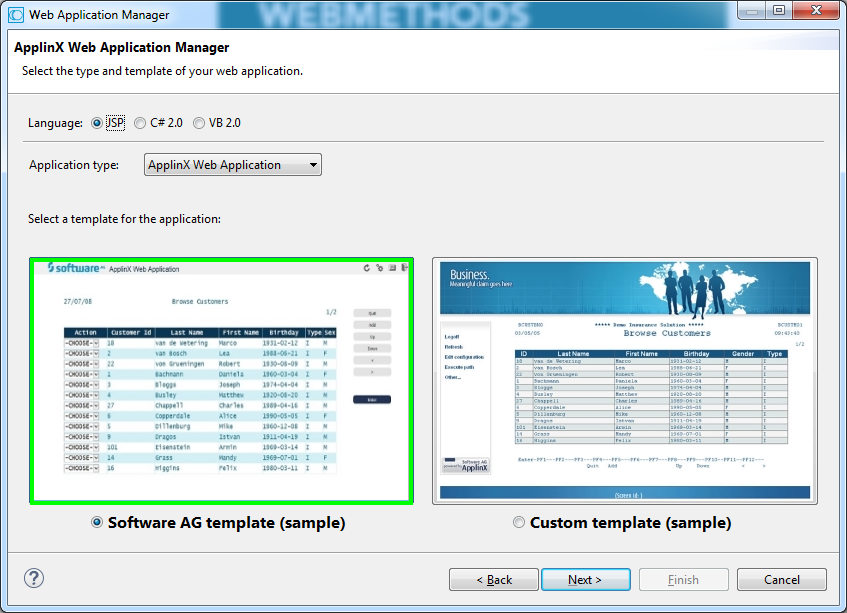
Ensure that JSP is selected. Select the application type: New application to create a basic ApplinX web application with a web look and feel or Emulation template to create an ApplinX web application with a host look and feel.
Click . The Create a New JSP Web Application screen is displayed.
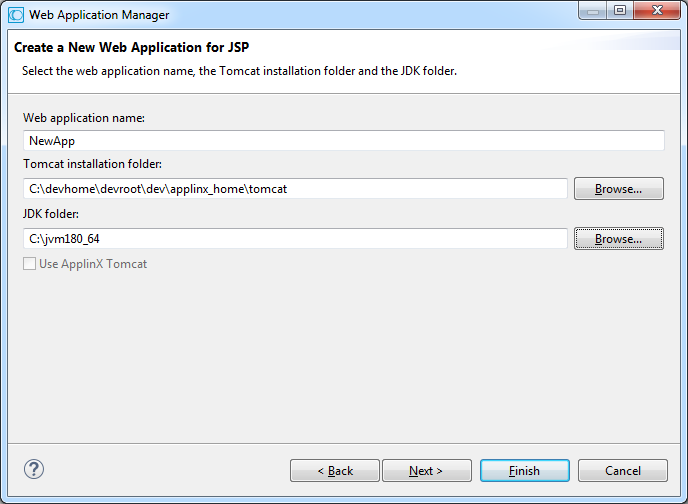
Enter a name for the web application. By default this is the name of the ApplinX application that you selected. Browse and select the folder where Tomcat is installed. Select the location of the JDK installation.
When you wish to use the ApplinX internal Tomcat, select the corresponding check box.
Click . The Wizard Summary screen is displayed.
Select whether to launch the browser when the process is completed.
Select whether to restart Tomcat. This is only relevant when Tomcat is activated from a batch file. The Framework Manager does not support restarting Tomcat when Tomcat runs as a Windows Service (in this case, you need to manually restart Tomcat).
Click . A message will be displayed indicating whether the process succeeded or failed.
Note:
Any change in the Java file requires recompilation of your new
application. Changes in JSP files do not require recompilation. Furthermore,
Tomcat requires reloading:
http://localhost:8080/manager/reload?path=/<YOUR_APP_NAME>.
To create a new ApplinX web application using Visual Studio 2015 or 2017
Install J# 2.0 redistributable package.
Install .NET Framework 3.5 SP1.
Install Microsoft Visual Studio on your computer (install Visual Studio before installing ApplinX so that when installing ApplinX, the ApplinX web application templates will be added to the available Visual Studio New Web Sites).
Open Visual Studio.
In the menu, select and then to create a new web site. The New Web Site dialog box is displayed.
Select to work either with .NET Framework 2.0 or 4.0.
Select the relevant ApplinX web application type (Visual C# or Visual Basic).
Define that index.aspx will be the start page (right-click on index.aspx and select ).
Run the web site
In the Framework Configuration Editor, define the connection parameters as follows:
Click on the Framework Configuration link. The Configuration Editor will be displayed.
In the Session node, enter the application name. By default, the application name is "InstantDemo". In the Session node, it is possible to edit and configure additional connection and project properties.
Click to save your changes.
Click to return to the web application.
Note:
This is not available when working with a SOA license.
To create a new ASP.NET application without Visual Studio .NET with .NET SDK
During ApplinX installation, select the ApplinX ASP.NET Web Framework C#/VB .NET option.
In the ApplinX Explorer, right-click on the relevant application and select . The Web Application Manager wizard is displayed.
Ensure that Create a new Web application (for IIS or Tomcat) is selected. Click . The Create a New Web Application screen is displayed.

Ensure that C# 2.0 or VB 2.0 is selected. Select the application type: New application to create a basic ApplinX web application with a web look and feel or Emulation template to create an ApplinX web application with a host look and feel.
The Create a New .NET Web Application screen is displayed.
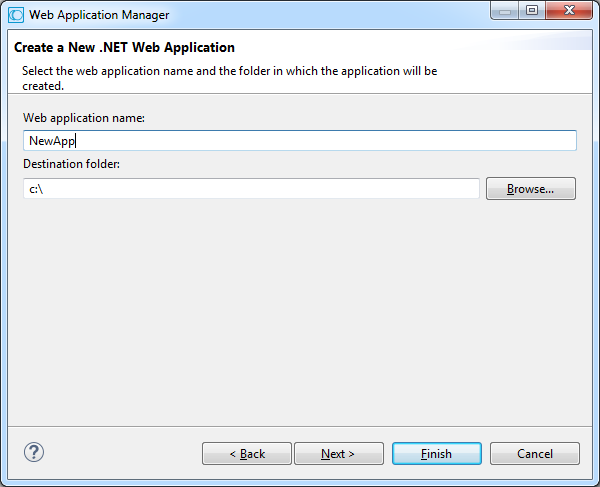
Enter a name for the web application. By default, this is the name of the ApplinX application that you selected. Browse and select the destination folder.
Click . The Wizard Summary screen is displayed.
Select whether to launch the browser when the process is completed.
Click . A message will be displayed indicating whether the process succeeded or failed.
Note:
When using the Application Manager on IIS 7.5 or 8.0, you need to convert
your application from a virtual directory to a web application (in the IIS
manager, right-click on your application and select Convert to
Application).
To upgrade a project to Visual Studio 2015 or 2017
Ensure that you have J# 2.0 redistributable package Second edition installed.
In Visual Studio 2015 or 2017, open the web application by clicking and selecting the web application.
Determine whether you would like to work with .NET 2.0 or .NET 4.0.
In ApplinX Designer, upgrade your web application using the ApplinX Web Application Manager (refer to Upgrading a .NET Web Application in Web Application Development.
Define that index.aspx will be the start page (right-click on index.aspx and select ).
You can run the web site to ensure that it performs as expected.