
The Layout Painter, which can be accessed from the development workplace, is used to write the page layout. This is an Application Designer application itself.
This document contains the following exercises:
You will now create a layout which is stored in the project you have previously created.
 To choose a layout template
Choose the button for the project .
The list of layout nodes inside the tree will be empty at the beginning:
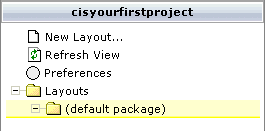
Choose New Layout... in the tree.
The following dialog appears.
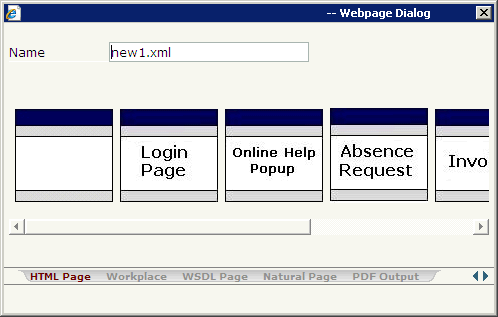
Enter "helloworld.xml" in the Name field.
This is the name of your layout definition.
Select the first template (when you move the mouse over this template, the tool tip "HTML Page" appears).
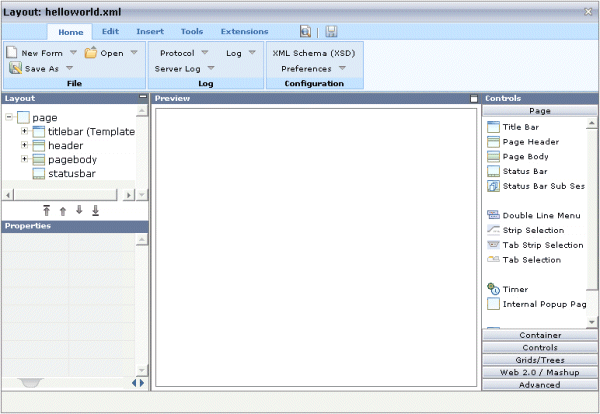
The main screen of the Layout Painter appears:
Note:
The file helloworld.xml is stored in the
/xml directory of your project.
The Layout Painter screen is divided into several areas:
Layout Area (left side)
This area consists of a layout tree and a properties area.
The layout tree contains the controls that represent the XML layout definition. You drag these controls from the controls palette into the layout tree. Each node in the layout tree represents an XML tag.
In the properties area below the layout tree, you specify the properties for the control which is currently selected in the layout tree.
Preview Area (middle)
The preview area shows the HTML page which is created using the
controls in the layout area. This page is refreshed each time, you choose the
preview button (see below).
The Code Assistant, which will also be used in this tutorial, is also shown in the preview area.
Controls Palette (right side)
Each control is represented by an icon. A tool tip is also provided
which appears when you move the mouse pointer over the control. This tool tip
also displays the XML tag which will be used in the XML layout.
The palette is structured into sections, where each section represents a certain type of controls.
The layout tree inside the Layout Painter already contains some nodes that were copied from the template that you chose in the dialog in which you specified the name of the page. To see what the page looks like, preview the layout as described below.
To preview the layout
Choose the following button which is shown at the top of the Layout Painter.
![]()
The preview area is updated and you see the page. The page already contains a title bar, a header containing a button, the page body and a status bar.
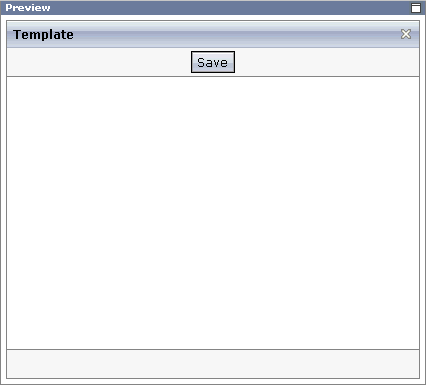
The preview area is a sensitive area. When you select a control in the preview area (for example, the title bar), this control is automatically selected in the layout tree.
When creating the layout, you can view the currently defined XML code.
To view the XML code
From the tab of the Layout Painter, choose .
A dialog box appears. At this stage of the tutorial, it contains the following XML layout definition for the nodes which were copied from the template.
<page model="DummyAdapter">
    <titlebar name="Template">
    </titlebar>
    <header withdistance="false">
        <button name="Save">
        </button>
    </header>
    <pagebody>
    </pagebody>
    <statusbar withdistance="false">
    </statusbar>
</page>
You can now proceed with the next exercise: Writing the GUI Layout.