
This tutorial provides an introduction to working with Application Designer's development workplace. It explains how to create a "Hello World!" application. This covers all basic steps you have to perform when creating pages with Application Designer: you create a layout file, you create an adapter class, and you run the application. This is about eighty percent of all you need to know. The remainder of the Application Designer documentation contains just details and some more sophisticated techniques, such as navigating between pages.
When you have completed all steps of this tutorial, the page for your "Hello World!" application will look as follows:
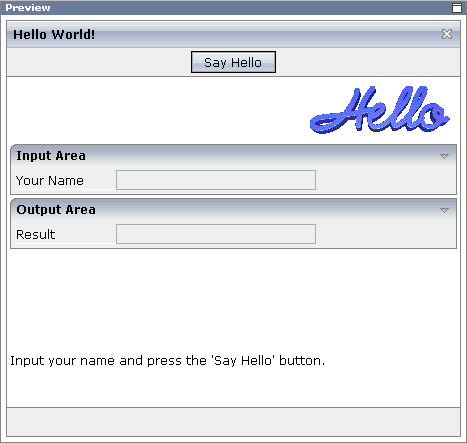
Your application will act in the following way: When you enter a name in the Your Name field and choose the button, the Result field displays "Hello World" and the name you have entered.
To reach this goal, you will proceed as follows:
You will first create a new Application Designer project.
You will then use Application Designer's Layout Painter to create the following layout:
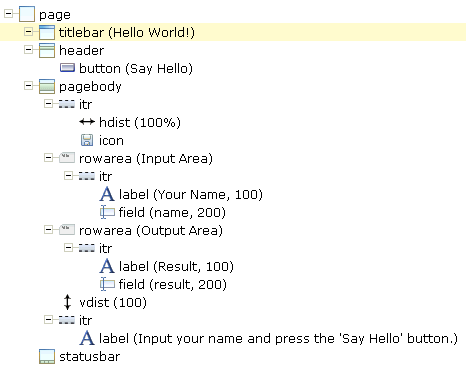
This corresponds to the following XML layout:
<?xml version="1.0" encoding="UTF-8"?>
<page model="DummyAdapter">
<titlebar name="Hello World!">
</titlebar>
<header withdistance="false">
<button name="Say Hello" method="sayHello">
</button>
</header>
<pagebody>
<itr takefullwidth="true">
<hdist width="100%">
</hdist>
<icon image="../cisdemos/images/hello.gif">
</icon>
</itr>
<rowarea name="Input Area">
<itr>
<label name="Your name" width="100">
</label>
<field valueprop="name" width="200">
</field>
</itr>
</rowarea>
<rowarea name="Output Area">
<itr>
<label name="Result" width="100">
</label>
<field valueprop="result" width="200" displayonly="true">
</field>
</itr>
</rowarea>
<vdist pixelheight="100">
</vdist>
<itr>
<label name="Input your name and press the 'Say Hello' button." asplaintext="true">
</label>
</itr>
</pagebody>
<statusbar withdistance="false">
</statusbar>
</page>
When you save your layout for the first time, an intelligent HTML page is generated.
Before you can start coding, you have to make specific definitions in Application Designer and in your development environment for Java (for example, Eclipse).
You will use Application Designer's Code Assistant to generate most of the adapter code.
You will then switch to your development environment in
order to program the adapter code for the method
sayHello which will be executed when you choose the
button of your application.
You can now proceed with your first exercise: Starting the Development Workplace.