
This document contains the following exercises:
As a last step of your layout definition, you will now define the name of the class which is the logical counterpart of your page.
![]() To define the class name
To define the class name
In the layout tree, select the top node page.
You can see the default entry
"DummyAdapter" for the
model property.
Specify the following property:
| Properties | Value |
|---|---|
model |
HelloWorldAdapter |
You use the Code Assistant, which is part of the Layout Painter, to generate code for the referenced properties and methods.
![]() To generate code
To generate code
From the tab of the Layout Painter, choose .
The following is shown in the preview area:
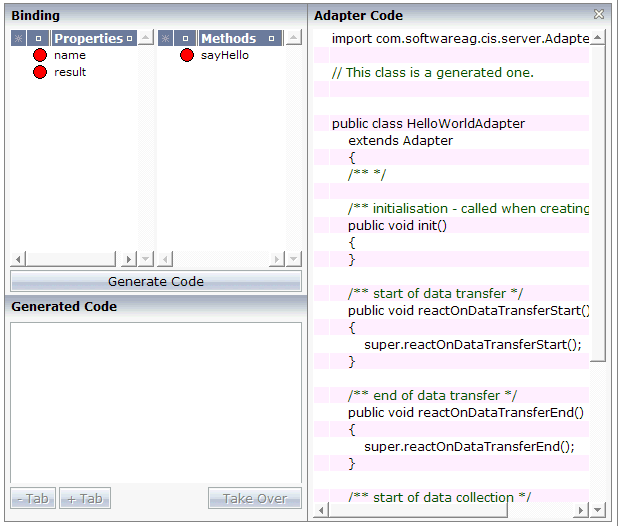
The properties and methods which cannot be found in the adapter code are indicated by red dots.
Select the property name.
Choose the button.
The generated code appears below this button.
Select the position in the adapter code at which you want to insert the code.
Choose the button to insert the code at the selected position.
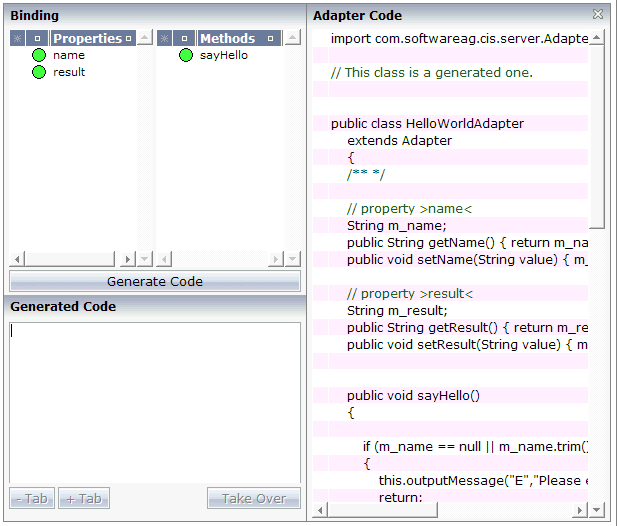
The color of the dot changes from red to green. This indicates that
the property's get and set
methods are now available in the adapter code.
Repeat the above steps for the result
property and the sayHello method.
When you have finished all required steps, the page should look as follows:
Save your changes and close the Code Assistant.
Now that the framework for the sayHello method
has been generated in the adapter code, you have to program the method itself.
![]() To program the method
To program the method
Go to your development environment for Java.
Open the file HelloWorldAdapter.java which is located in the project directory /cisyourfirstproject/src.
Add the line which is indicated in bold:
/** */
    public void sayHello()
    {
        // TODO Auto-generated method stub
    	m_result = "Hello World, " + m_name + "!";
    }
Save your changes.
You will now check whether your application provides the desired result.
![]() To test the application
To test the application
Go back to your layout in the Layout Painter.
Choose the following button which is shown at the top of the Layout Painter.
![]()
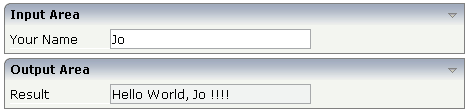
Enter your name and choose the button.
The page should perform correctly now, and successfully "talk" to the adapter you have just created:
The generated HTML file helloworld.html (which is updated each time you save your layout) can be found within the root of your application project, that is in <installdir>/tomcat/webapps/cis/cisyourfirstproject.
This HTML page has some prerequisites concerning the browser workplace in which it is running. Therefore, it is per se not usable as a directly accessible page but needs to be embedded into a frame providing a defined set of functions.
For viewing the page directly, enter the following URL inside your browser:
http://localhost:51000/cis/servlet/StartCISPage?PAGEURL=/cisyourfirstproject/helloworld.html
If the page is not displayed, check the following:
URLs are case-sensitive. Double-check your input.
Check whether the file helloworld.html is available in the directory cisyourfirstproject.
Inside the URL, a servlet StartCISPage is invoked. As parameter
PAGEURL, a certain value is passed: this value is built
from the application project name and the page name. Calling the servlet is the
generic way of opening pages which are created with Application Designer directly inside the
browser.
You have now completed this tutorial. See the remaining section of these First Steps for some background information.