Installing API Gateway
After Command Central establishes a connection with Platform Manager (present on the remote node), you can install API Gateway on the remote node.

To install API Gateway
1. From the Installations tab, select the required remote node (the remote node on which API Gateway must be installed).
2. Click the Products tab.
3. Click +. The Install Products window displays.
4. Select a repository to install API Gateway, if you are connected to multiple repositories. If a single repository is connected, it is selected by default.
5. Click Next.
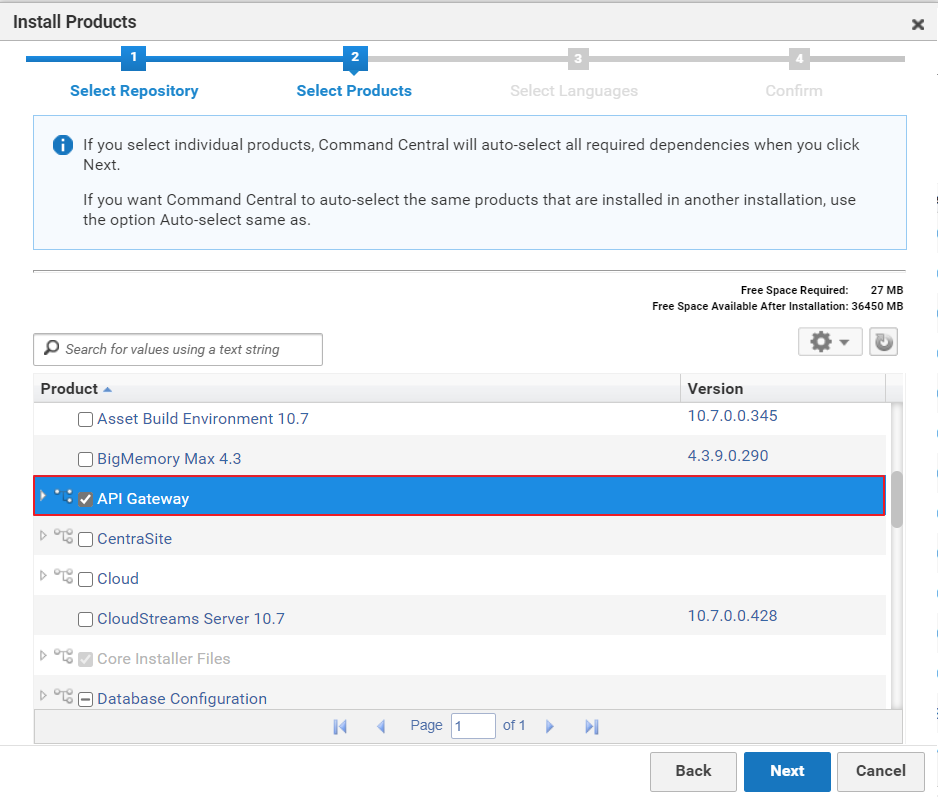
6. Select the API Gateway check box. This selects API Gateway for installation.
7. Click Next.
8. Select any additional languages of installation.
9. Click Next.
10. Verify the details and click Finish.
This starts the installation process of API Gateway on the remote node. A job is created in the Jobs menu. You can check the status of installation from the Jobs menu. To install API Gateway on multiple nodes, repeat the steps in Installing API Gateway section for each remote node.
After API Gateway is installed on a remote node, the job status is updated as successful. You can view the list of products that were installed on the remote node by execute the following steps.
11. Navigate to the Installations tab.
12. Click the required remote node (the remote node whose installation needs to be checked).
13. Click the Products tab. You can view the list of installed products.


