Creating API Gateway Instance
After you install API Gateway, the installed API Gateway is plain and not usable. To make the API Gateway usable, you must create an instance of it in Command Central. To create an instance, you must add license file, port information, and so on. You cannot use API Gateway without creating an instance.

To create an instance
1. Perform the following steps to add an API Gateway license file.
a. Click Licensing.
b. Click the Keys tab.
c. Click +.
d. Select Add License Key. The Add License Key pop-up window displays.
e. Click Choose File.
f. Navigate to the location where your API Gateway license file is located and select it. The Alias field value is auto populated after you select the API Gateway license file.
g. Click Add.
2. Perform the following steps to create an API Gateway instance.
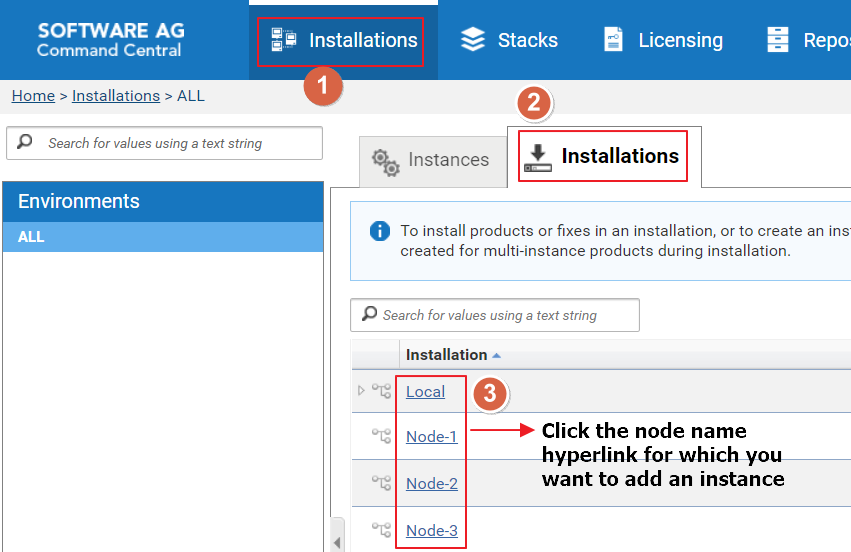
a. Click the Installations menu.
b. Click the Installations tab.
c. Click the required node name (the node for which an instance needs to be added).
d. Click the Instances tab.
e. Click +.
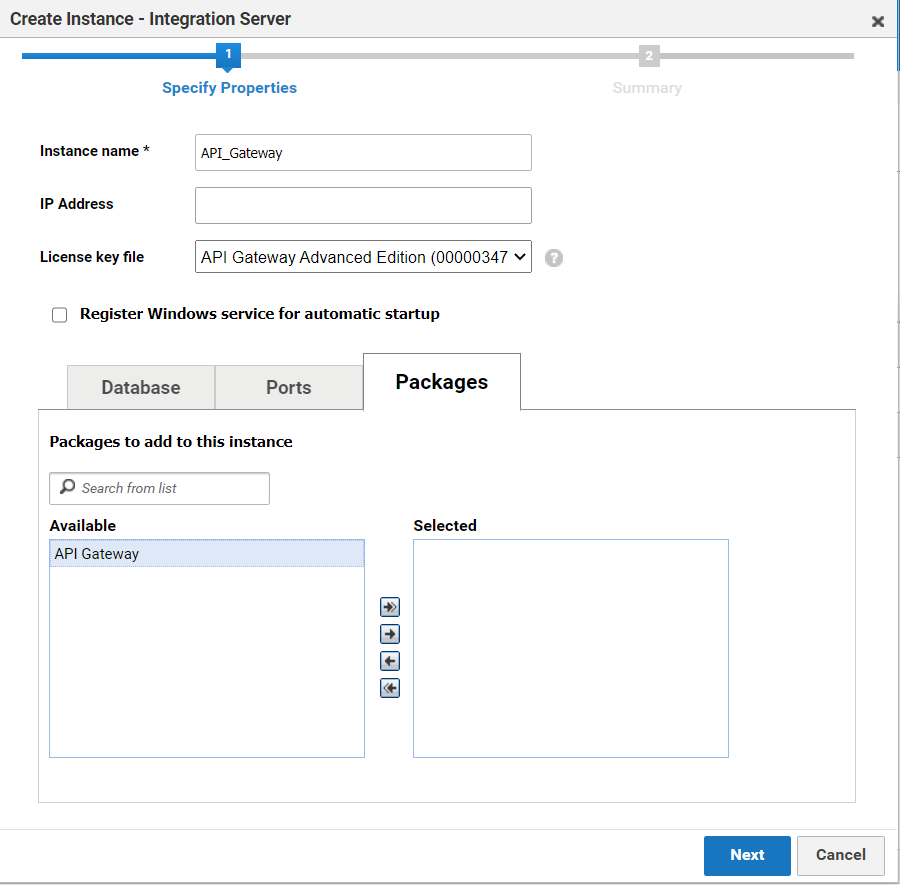
f. Select Integration Server.
g. Type a name for the instance in the Instance name field.
h. Select the API Gateway license key file from the License key file drop-down menu.
i. Configure the Database, Ports, and Packages for API Gateway.
j. Click Next.
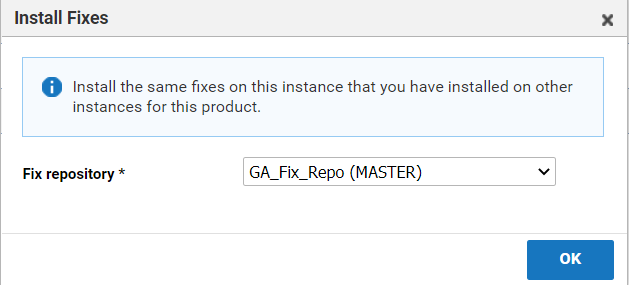
k. Verify the details and click Finish. The Install Fixes pop-up window is displayed.
l. Select a repository to install API Gateway fixes.
m. Click OK.
A job is created to create an API Gateway instance. The Operation triggered pop-up window displays. Click View Job to view the details of the job in the Jobs menu. If you do not want to view the job details, click Finish.
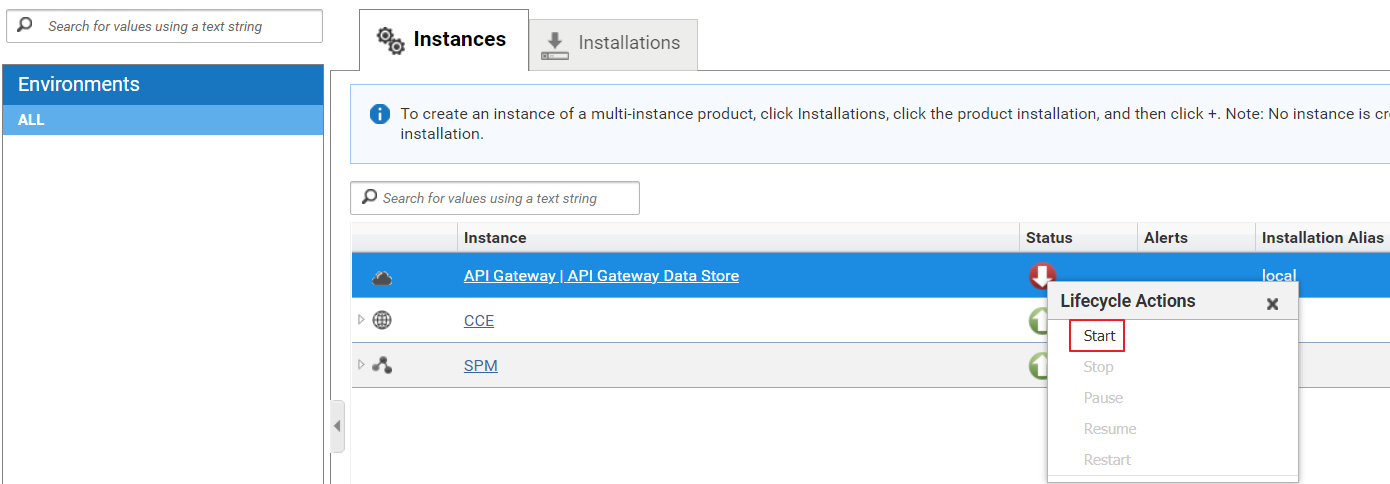
After the job is completed, you can view the API Gateway instance. If the Status column of your instance shows Stopped status, click the Stop icon and select Start.


