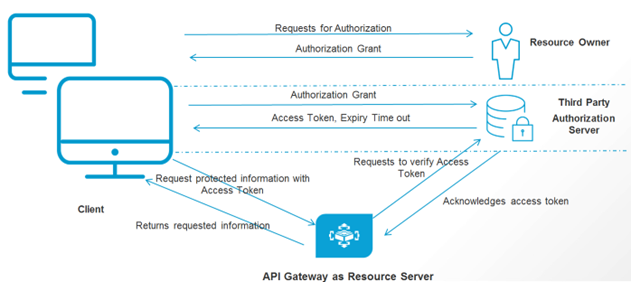
Securing APIs using OAuth 2.0 in API Gateway using Third Party Authorization Server
This use case explains with a simple example on how to secure an API using OAuth2 authorization with a third-party OAuth2 identity provider and authorization server (OKTA). Here, the third-party OAuth2 provider acts as the Authorization server and API Gateway acts as a Resource Server
Actors

Developers with basic knowledge about
API Gateway,
Integration Server, OAuth2 architecture
Customers with basic knowledge about
API Gateway,
Integration Server, OAuth2 architecture
Before you begin
Ensure that you have:
Created a tenant account in OKTA identity provider management portal
Installed
Integration Server with
API GatewayKnowledge about any REST Client
API Gateway up and running
Basic Flow
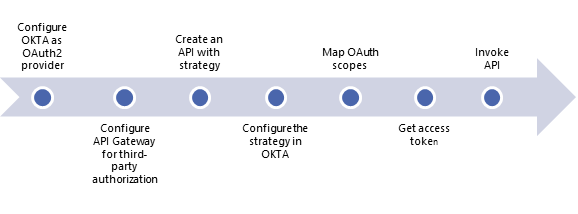
The following diagram depicts the high level steps of the basic flow for this use case.
Step 1: Configure OKTA as OAuth2 provider
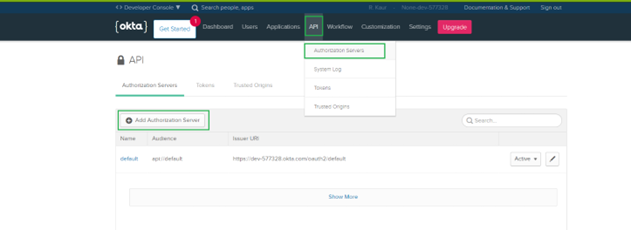
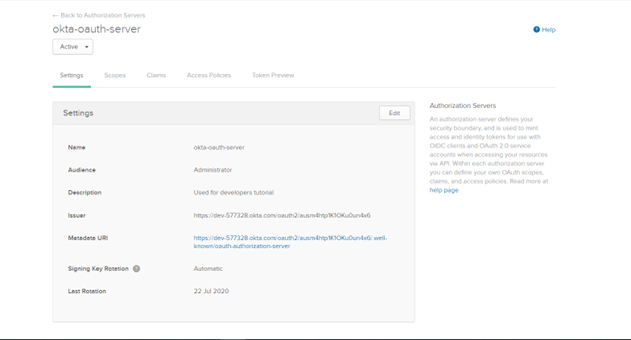
1. Create Authorization server in OKTA as follows:
a. Ensure you have a tenant account created in OKTA
b. Navigate to API > Authorization Servers
c. Click Add Authorization Server.
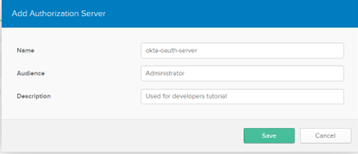
d. Provide the following details:
Name:
okta-oauth-server Audience:
Administrator Description:
Used for developers tutorial e. Click Save.
2. Get the Metadata URI.
After you configure OKTA as OAuth2 provider the metadata URL informaton is available as shown.
Copy the Metadata URI (also known as discovery URL) used to configure External Authorization server in API Gateway.
Note:
The same information is available if you click the Edit button for okta-oauth-server.
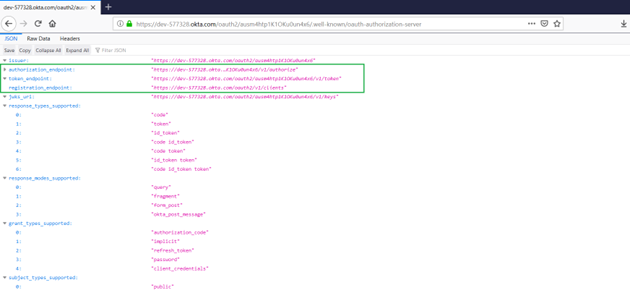
3. Get the endpoints.
Invoke the Metadata URI from the browser and retrieve the endpoints as shown.
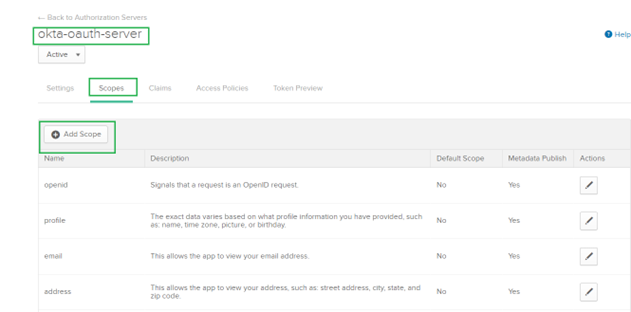
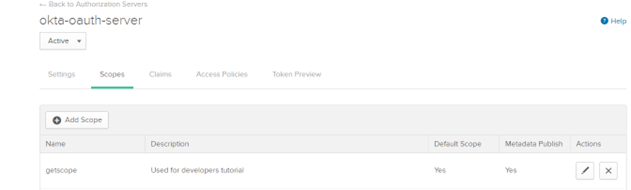
4. Create Scopes.
a. Navigate to API > Authorization Servers
b. Click Edit for okta-oauth-server.
c. Click Add Scope.
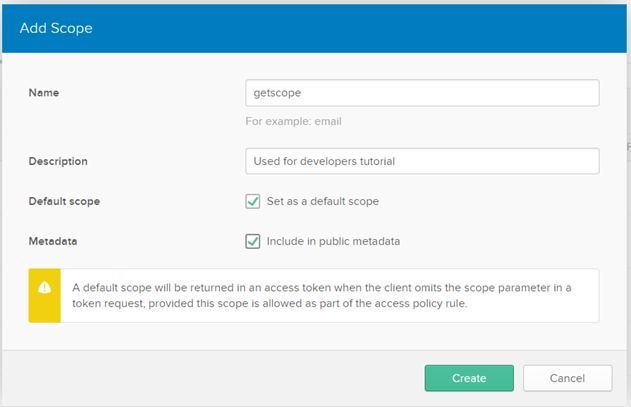
d. Provide the following information
Name:
getscope Description:
Used for developers tutorial Default Scope: Select
Set as a default scope Metadata: Select
Include in public metadata e. Click Create.
The scope is now listed under Scopes.
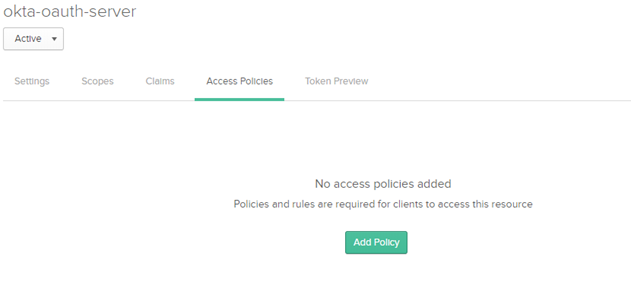
5. Create Access policies
Create access policies and rule in OKTA to avoid accessibility issues while using access token during API invocation.
a. Navigate to Access Policies.
b. Click Add Policy.
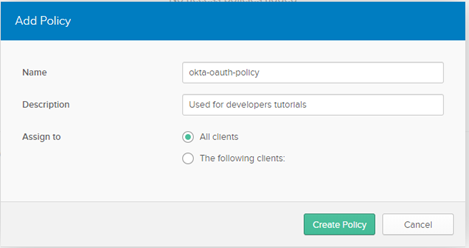
c. Provide the following information:
Name:
okta-oauth-policy Description:
Used for developers tutorials Assgn to: Select
All clients d. Click Add Rule.
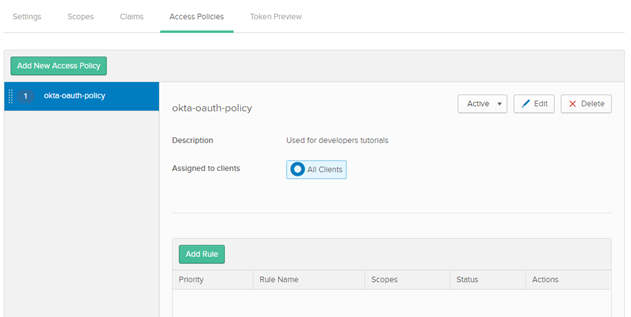
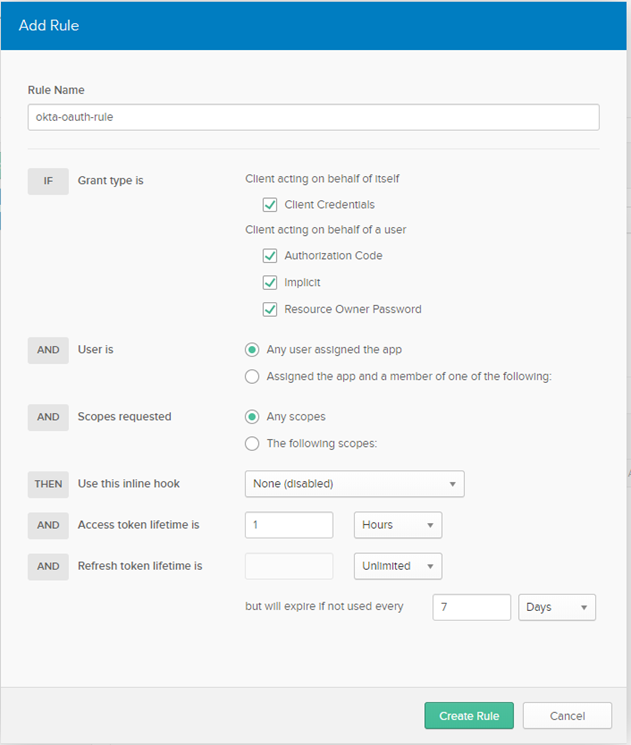
e. Provide the following information:
Rule Name:
okta-oauth-policy Do not change any default settings.
f. Click Create Rule.
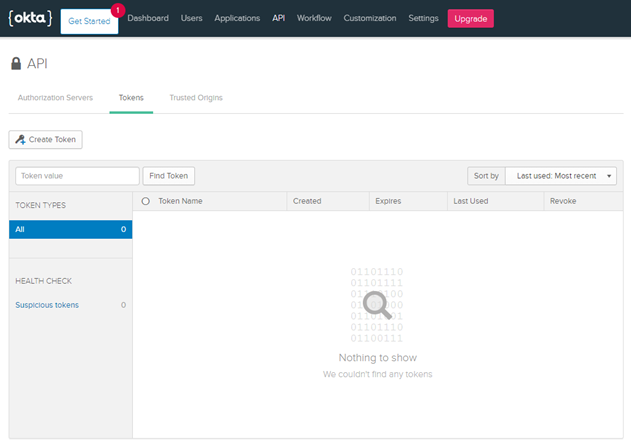
6. Create Token.
a. Navigate to API > Tokens.
b. Click Create Token.
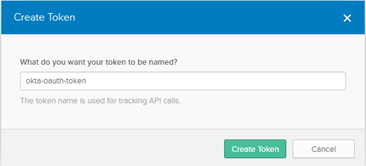
c. Provide the following information.
What do you want your token to be named? :
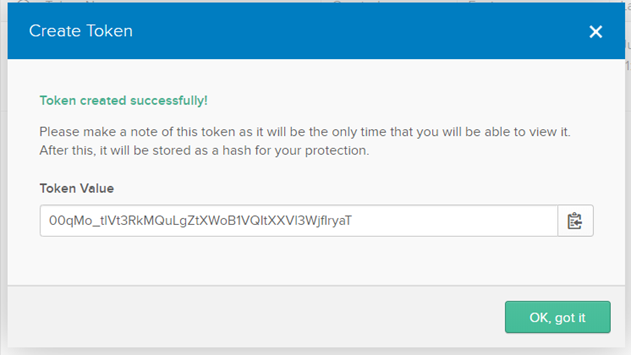
okta-oauth-token d. Copy the Token Value.
Note:
This token value is displayed only once.
e. Click OK, got it.
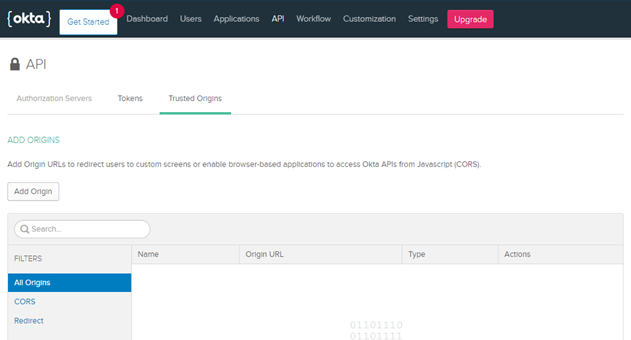
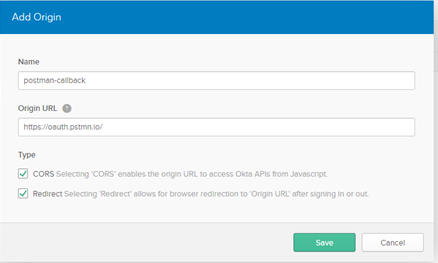
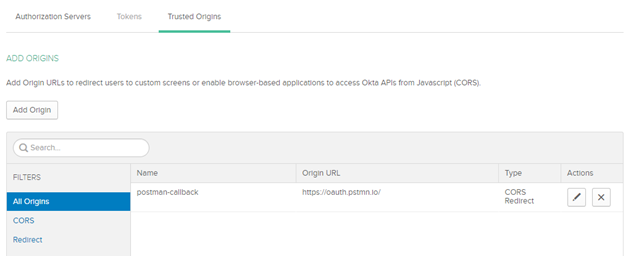
7. Add the postman callback url to Trusted Origins.
a. Navigate to API > Trusted Origins
b. Click Add Origin.
c. Provide the following information.
Name: postman-callback
Origin URL:
https://oauth.pstmn.io Type : Select
CORS and
Redirect Click
Save.
Step 2: Configure API Gateway for third-party authorization
This example uses the existing OKTA provider configured in API Gateway. API Gateway has providers OKTA and PingFederate predefined and configured as the third-party OAuth2 configuration servers.
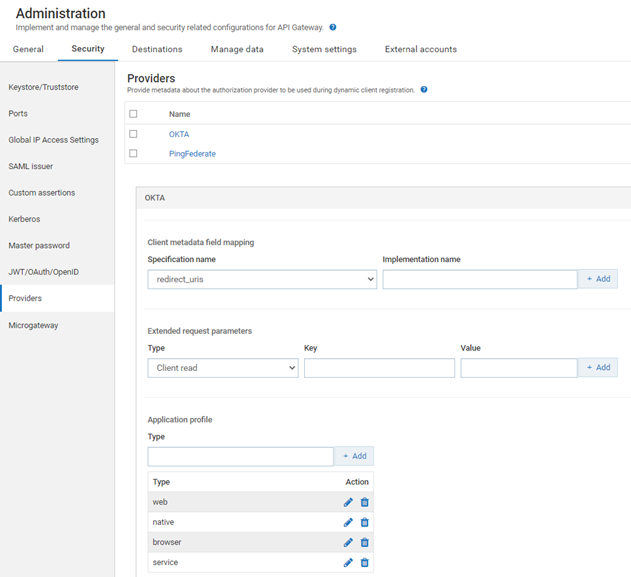
Note:
You can also create your own identity providers by navigating to Administration > Security > JWT/OAuth/OpenID > Providers. You can then click Add provider and provide the required details. This provider configuration is used in the Dynamic client registration.
1. Click Menu > Administrator.
2. Click Security.
3. Click OKTA.
4. Click JWT/OAuth/OpenID.
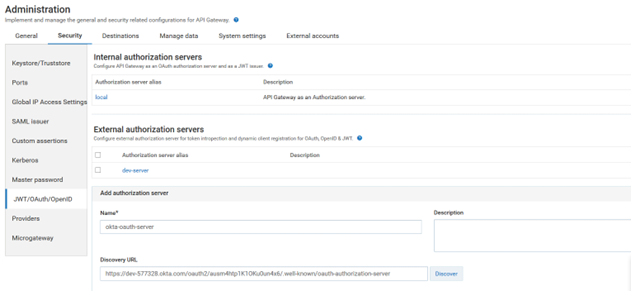
5. Click Add authorization server.
6. Provide the following information:
Name:
okta-oauth-server Discovery URL:
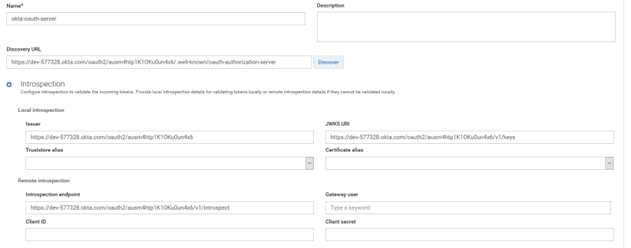
https://dev-577328.okta.com/oauth2/ausm4htp1K1OKu0un4x6/.well-known/oauth-authorization-server 7. Click Introspection.
You use Introspection to authenticate the token. It happens as follows
Local introspection. Validating the token within the gateway. This is done using the JWKS URI or the public certificate of the issuer. In this case the token should necessarily be JWT.
Remote introspection. Validating the token with the authorization server. It has introspection endpoint, which is used to validate the token. In addition, the client id and client secret are used to protect the endpoint, so that anonymous users cannot access to the resource. To invoke an endpoint you require a user; Gateway user is the one you can use to invoke the endpoint. There is no support for token caching in remote introspection.
8. Remove the Introspection endpoint from Remote Introspection.
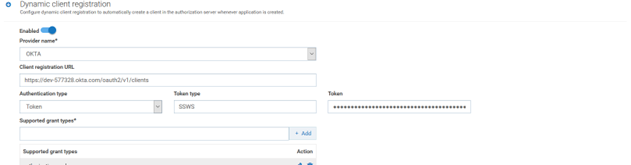
9. In Dynamic client registration, click Enable toggle button.
Use Dynamic client registration when you want to create the client automatically in the OAuth2 authorization server when an application is created in API Gateway.
10. Provide the following information:
Authentication type:
Token Token type:
SSWS Token: Copy the saved token value.
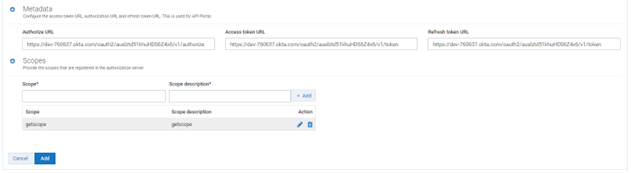
11. Click Metadata. Verify that the Metadata is auto populated with the right values.
12. Click Scopes. Verify getscope is present in the list. Delete the other scopes as as they are not required.
13. Click Add.
14. Click the added external authorization server to test it.
Step 3: Create an API with strategy
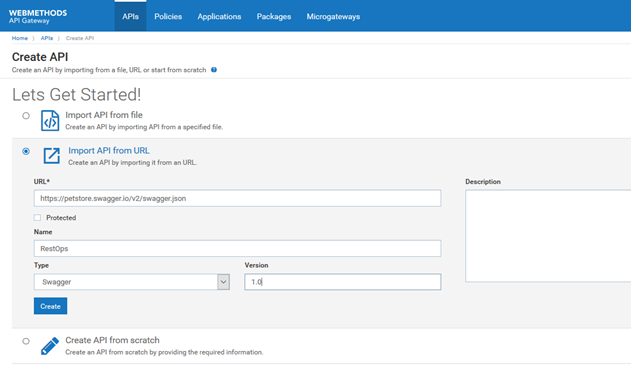
In this example we will create an API by importing from the URL https://petstore.swagger.io/v2/swagger.json, enforce it with OAuth2 policy, and create an applicatin with strategy and associate it with the API.
1. In the APIs tab click Create API.
2. Select Import API from URL.
3. Provide the following information.
URL:
https://petstore.swagger.io/v2/swagger.json Name:
RestOps Type:
Swagger Version:
1.0 4. Click Create. The API is created and the API details page for the API appears.
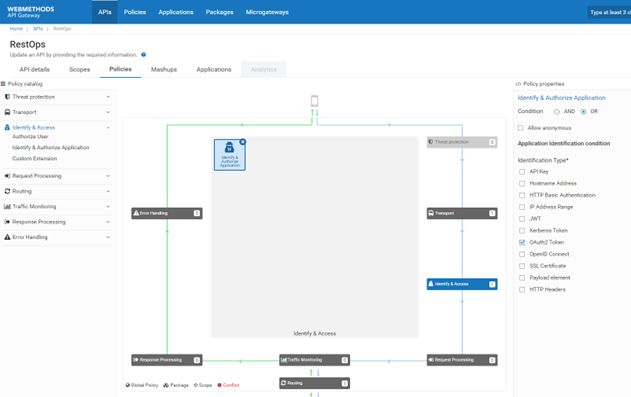
5. Enforce OAUTH2 policy on the API.
You enforce OAuth2 policy on the RestOps API. This policy ascertains that an OAuth token is required to access this API.
a. Click APIs in the title navigation panel.
b. Click RestOps.
c. Click the Policies tab.
d. Click Edit.
e. Click Identify & Access from the policy catalog section.
f. Select the Application Identification Type as OAuth2 Token and save the API.
g. Click Activate on the API details page of the API to activate the API.
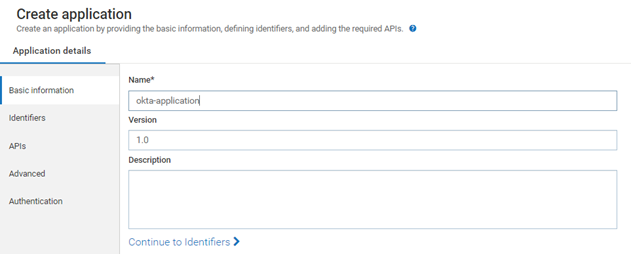
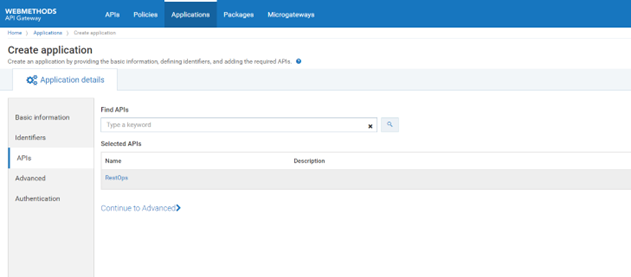
6. Create an application in API Gateway with a strategy and register it to an API.
a. Click Applications in the title navigation bar.
b. Click Create application.
c. Provide the Name as okta-application.
d. Click Continue to Identifiers.
e. Click Continue to APIs.
f. Type RestOps in the Find APIs text box. The RestOps API appears in the Selected APIs section.
g. Select the RestOps API.
h. Click Continue to Advanced.
i. Click Continue to Authentication.
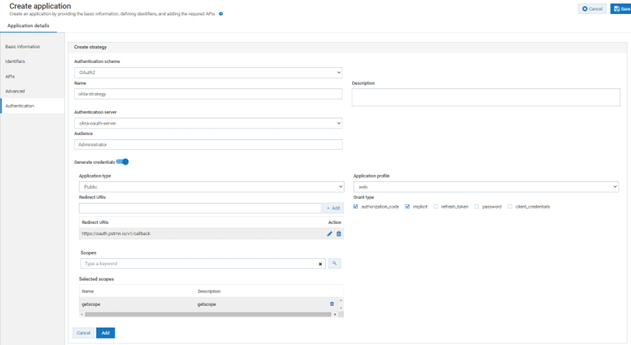
j. Click Create Strategy.
A strategy authenticates the incoming request and provides multiple authentication mechanisms or multiple authorization servers for a single authentication scheme. You can create multiple strategies authorized by an API for an application.
k. Provide the following information:
Name:
okta-strategy Authentication Server : Select
okta-oauth-server Audience :
Administrator Enable
Generate Credentials.
Redirect URIs:
https://oauth.pstmn.io/vl/callback Click
Add to add the Redirect URI.
Grant type: Select
authorization_code and
implicit.
Scopes: Search for
getscope, click the + sign to add the scope.
l. Click Add to add the strategy.
m. Click Save.
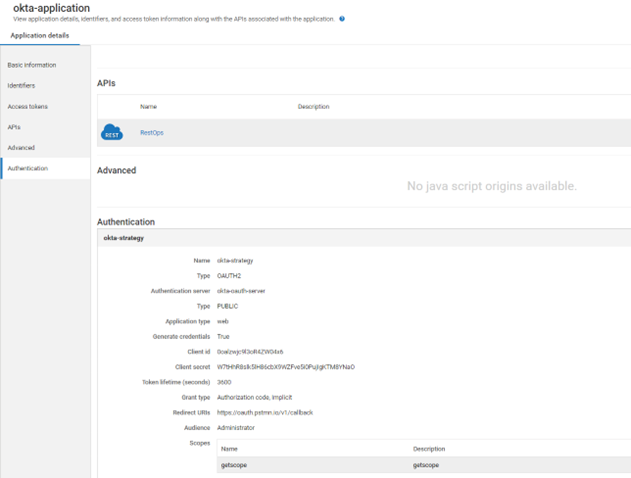
The strategy is created in OKTA as well.
n. Make a note of client_id and client_secret displayed in Applications > okta-application > Authentication > okta-strategy section.
Step 4: Configure the Strategy in OKTA
1. Login to OKTA.
2. Navigate to Application. The strategy okta-strategy should be present.
3. Click the strategy okta-strategy.
4. Click General and verify that the details are same as in API Gateway.
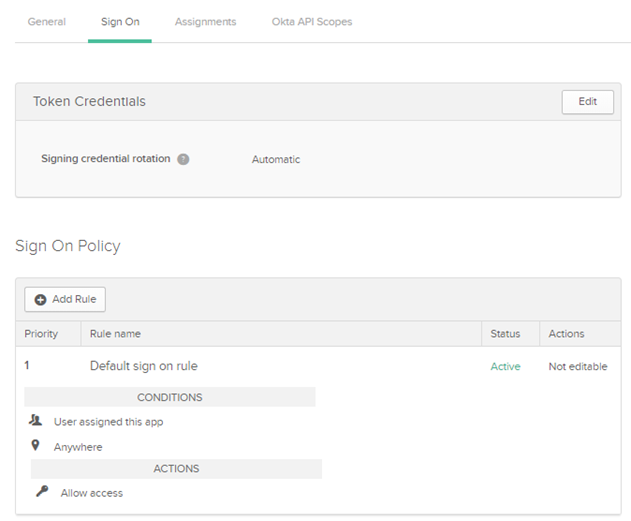
5. Click SignOn.
6. Perform the following steps in the SignOn page:
a. Click Edit in Token Credentials.
b. Signing credential rotation: Select Automatic.
c. Click Save.
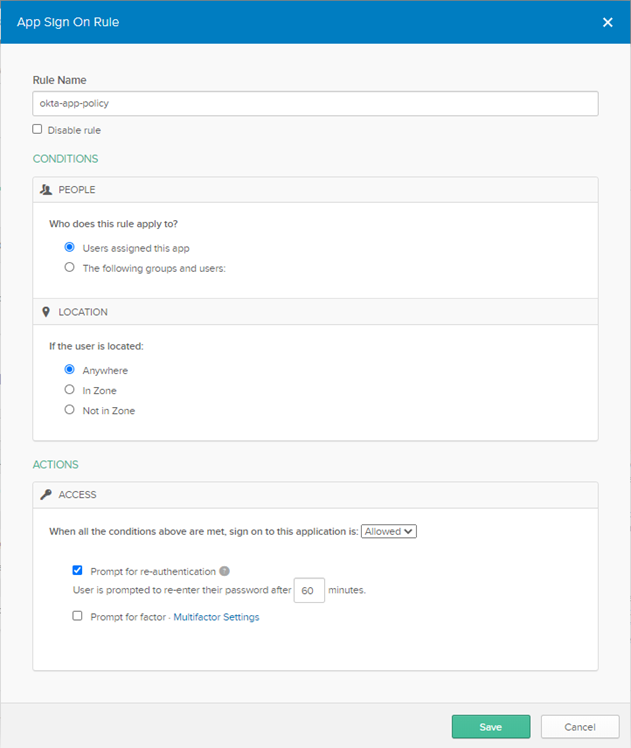
d. Under Sign On Policy click Add Rule.
e. Provide Rule Name as okta-app-rule.
f. In Access select Prompt for reauthentication.
g. Click Save.
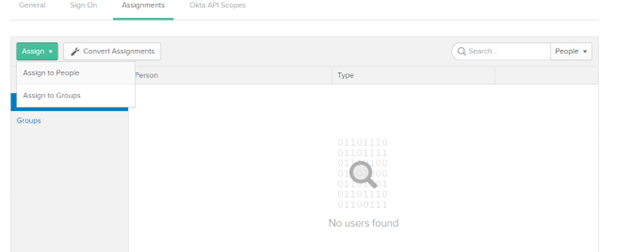
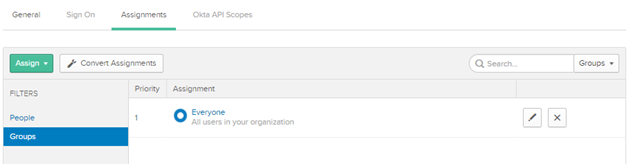
h. Click Assignments to assign Users and groups to the applicaton to avoid ACL permission issues.
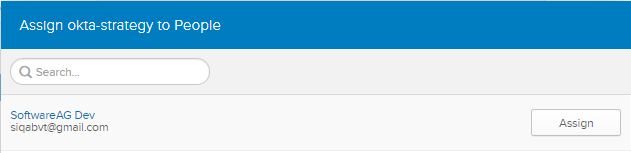
i. Click Assign and then Assign to People.
j. The login user should be listed else search the user in the search box.
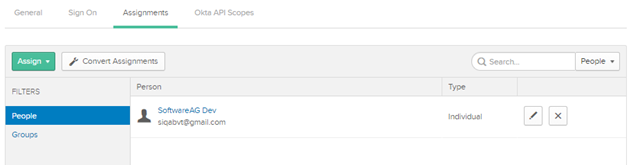
k. Click Assign.
l. Click Save and Go Back.
m. Click Done.
n. Click Assign and then Assign to Groups.
o. The group Everyone should be listed, else search the group in the search box.
p. Click Assign.
q. Click Save and Go Back.
r. Click Done.
Step 5: Map OAuth scopes
You must map the scope defined in OKTA Authorization server with the APIs in API Gateway to authorize the access tokens to be used to access the protected resources. One can map either a complete API or parts (resources or methods) of an API to the scope or can add the scope details and modify the scope details as required from the OAuth/OpenID scopes page.
1. Expand the menu options in the title bar and select OAuth/OpenID scopes.
2. Click Map scope.
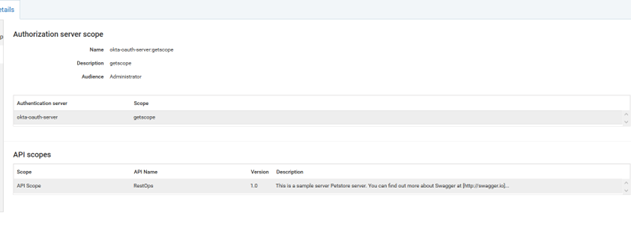
3. Type getscope in Select authorization server scope and select the listed Authorization server scope from the search list populated.
4. Provide Audienceas Administrator.
5. Click API scopes
6. Type RestOps or API Scope, which is to be linked to the authorization server, in API scopes search text box.
7. Save the changes. This maps the authorization server scope to the selected API scopes and lists the authorization scope in the scopes list.
Step 6: Get the access token
1. Open Postman, click Authorization and select OAuth2.
2. Click Get New Access Token.
3. Provide the following information:
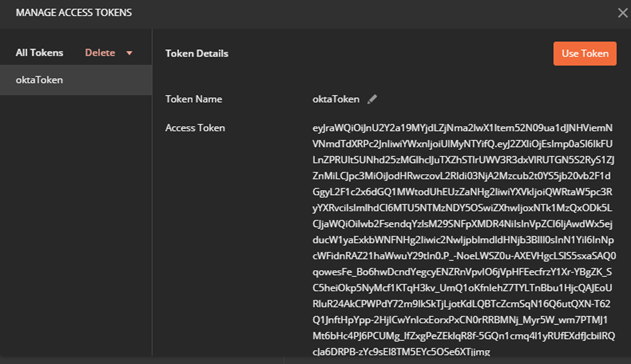
Token Name:
oktaToken Grant Type:
Authorization Code Callback URL:
https://oauth.pstmn.io/v1/callback Select Authorize using browser
Auth URL:
http://dev-577328.okta.com/oauth2/ausm4htp1K1OKu0un4x6/v1/authorize Access Token URL:
https://dev-577328.okta.com/oauth2/ausm4htp1K1OKu0un4x6/v1/token Note:
Get the Auth URL and Access token URL from Administration > Security > JWT/OAuth/OpenID > External authorization server > okta-oauth-server > Meta data section.
Client ID:
0oam51fdfAJcDyDkT4x6 Client Secret:
_MOgtr2gUHB8lkhZzM4uPL3wL53may1FgqHjHN2o Note:
The Client_ID and Client_Secret can be obtained from the Application > okta-application > okta-strategy.
Scope:
getScope State: 121
Client Authentication : Send Client credentials in body
4. Click Request Token.
You are redirected to OKTA login page.
5. Login into OKTA Page. A Authentication completed message displays and you are redirected to call back URL.
6. In Postman you will get the Access token from Postman.
Click Use Token or copy the token which you can use to invoke the API.
Step 7: Invoke API
Ensure you have the following to invoke the API
Gateway endpoints. You will find the gateway endpoints in
API Gateway UI in the
APIs >
RestOps >
Technical information section. In this example the endpoint is
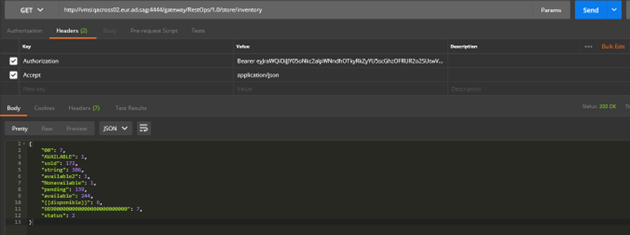
http://vmsiqacross02.eur.ad.sag:4444/gateway/RestOps/1.0/store/inventory.
The method or resource that must be invoked. The list operations are present in the
APIs >
RestOps >
Technical information section under Resources and methods. Select anyone. In this example select
/store/inventory which is a GET method.
Access token.
1. Open Postman.
2. Select Get and http://vmsiqacross02.eur.ad.sag:4444/gateway/RestOps/1.0/store/inventory.
3. In Headers add Authorization as Key and provide value as Bearer access token
4. In Headers add Accept as Key and provide value as application/json.
5. Click Send.
The API is invoked and you see the expected response with a 200 OK status.