How Do I Install API Gateway using an Image in Windows system?
This section describes the steps required to install API Gateway using an installation image in a Windows system.
Pre-requisite

Ensure that you have the
Software AG Installer, the installation image, and the license file copied to the system in which you want to install API Gateway.

To install API Gateway using an installation image
1. Double-click to open the Software AG Installer.
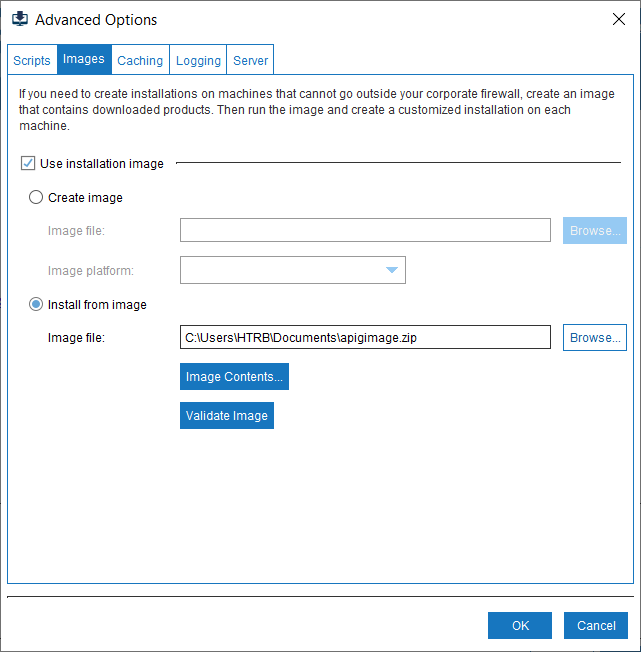
2. Click Advanced Options and select the Images tab.
3. Select Use Installation Image and select Install from image.
4. Click Browse and select the installation image file.
5. Click Ok and click Next.
6. Select API Gateway from the Products tab and click Next.
7. Read through the license agreement and select the checkbox below the agreement to provide your consent. Click Next.
8. In the Configure tab, click Browse to select the license file, from your local folder. The default load balancer ports appear. Modify the ports, if required, and click Next.
9. Check the specified configuration and click Install.
API Gateway is installed.
