Promoting Assets from API Gateway User Interface
Pre-requisites:
You must have the Manage promotions functional privilege assigned to perform this task.
Promoting assets from one (source) stage to another (target) stage includes the following high-level steps:
1. Authorization server promotion: Promote Authorization server in one of the following ways:

Export the authorization server from one environment and import it into another, if you want to use the same authorization server across multiple environments.

Create the authorization server with the same name as in the current environment, if you want to use a different authorization server instance.
Proceed to the next step once the authorization server is ready.
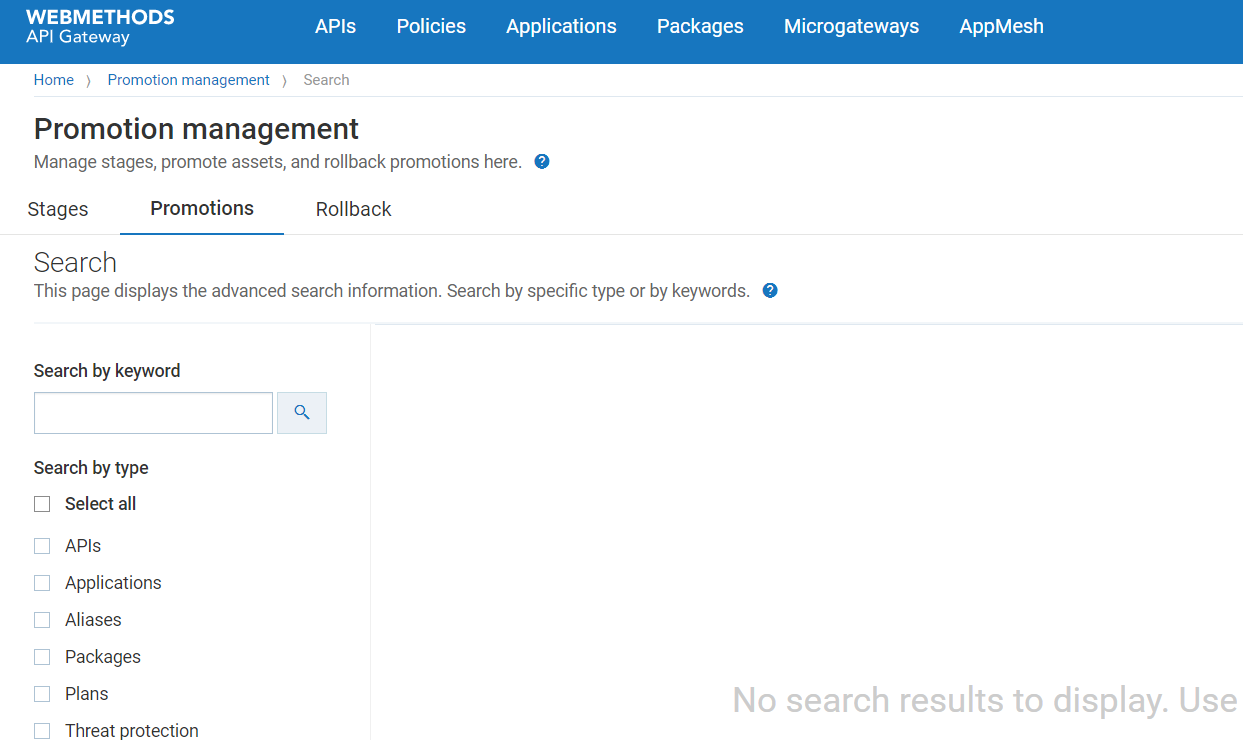
2. Select assets for promotion: During this step, you search for assets by using a keyword and by performing a type search that sorts and filters the results.
 Search using a keyword
: You can search for all assets whose string attributes (asset name, description, and so on) contain a certain keyword (character string).
 Search using a Type
: You can search for assets on the basis of types.
You may use the Search by type filter to restrict the types on which the search is conducted. In the Search by type panel, API Gateway shows you a list of supported asset types.
 Search by team
: You can search for assets assigned to team(s). Click the team(s) to view the assets that are assigned tot he selected team(s).
 Search using two keywords
.You can provide more than one keyword by separating the keywords using a pipe symbol (|). For example, to search for assets whose names contain
pet and
test, you can provide
pet|test in the search field.
 Search using wild card characters
. You can use wild card characters in your search keyword. For example, to list all assets that start with
graph, you can provide
graph*.
3. Optionally select assets' dependencies for promotion: During this step, you specify whether the dependencies (for example, a list of applications that are registered for an API, subscriptions for a package, and so on) of the selected assets will be included for the promotion.
Note:
As groups and users are part of the team, if you want to promote the Groups and Users (optional dependencies) of the team that the selected asset belongs to, you have to set the enableTeamWork extended setting to true. Only then the Groups and Users sections appear.
4. Select the stages to promote: During this step, you specify one or more target stages to which you want to promote the selected assets and their dependencies.
5. Configure the promotion details: During this step, you provide the promotion-specific information.
6. Ensure that you are promoting the assets from an lower version of API Gateway to a higher version of API Gateway. You cannot promote assets from a higher version to a lower version of API Gateway. For example, if you are using API Gateway v10.11, you can promote the assets from this version to v10,15 and other higher versions. You cannot promote assets back to the v10.7, v10.5, and so on.
Important:
If you plan to perform bulk promotion of assets from a source stage to a target stage, Software AG recommends you to perform the following:

Increase the value of
maxRegexLengthInSearchQuery setting on the
Extended Settings page under
Administration > General in both the source and target stages, considering that the generated RegEx search query length may become longer during bulk promotion of assets. The default value of this property is
37000. When you increase the value, it can lead to higher memory and CPU utilization, particularly when dealing with complex regular expressions. Therefore, Software AG recommends to closely monitor any spike in memory and CPU usage while promoting assets. For example, if your RegEx search query's length is more than
37000, asset promotion fails indicating that the length of RegEx used in RegEx Query request has exceeded the allowed maximum. In such case, you must increase the value of maxRegexLengthInSearchQuery setting to more than the value specified in the error message.

Increase the value of the
pg.gateway.elasticsearch.http.socketTimeout property, located at
SAG_Install_Directory/IntegrationServer/instances/IS_Instance_Name/packages/WmAPIGateway/config/resources/elasticsearch/config.properties. The default value of this property is
3000. To bulk promote assets, for example, 50 numbers, you would set the value of this property to
60000. Depending on the number of assets you want to promote, increment the value as
70000,
80000, and so on. You must restart
API Gateway for changes to this property to take effect.

To promote assets
1. Expand the menu options icon  , in the title bar, and select Promotion management.
 2. Select Promotions.
The Promotions page appears.
3. Click + Promote.
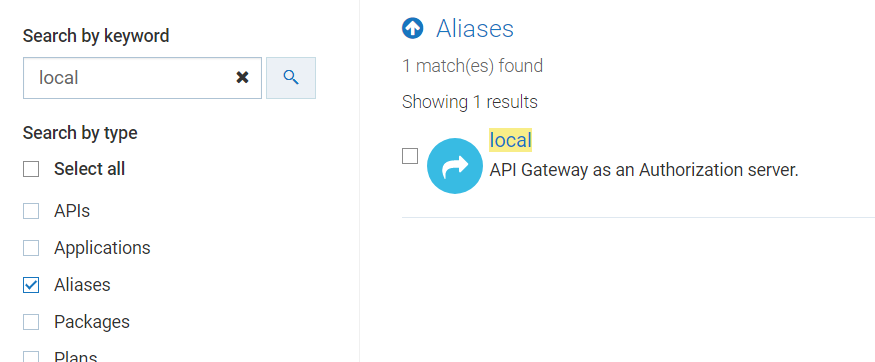
4. In the Search by keyword text box, type the keyword to search for assets. You can use one or more wildcards to specify the keywords.
Note:
You can search multiple times for the same type while retaining the previous search results.
API Gateway returns the assets that match the specified keyword.
5. In the Search by type drop-down list, select the required type(s). Select the All check box to search across all asset types.
Important:
Authorization server, External Authorization server, and Providers are listed under the Aliases category. To select any of these assets, select the Aliases check box and then choose the required asset.
API Gateway returns the assets that match the selected type(s). The number of search results is displayed in the results area, for example, Showing 10 results. If no results are found, the results area is displays a blank page.
6. Optional. Select the Include admin configurations check box if you want to include administrative configurations in the promotion.
API Gateway displays the administrative configurations that are supported for promotion.
Important:
Before you configure API Gateway to promote an administrative configuration, make sure that the corresponding administrative settings are already configured in API Gateway. For example, to include the Load balancer configuration in the asset promotion set, the required Load balancer URLs should be configured.
7. Select the assets and the administrative configurations that you want to promote.
8. Click Next.
The Assets and dependencies page appears.
9. Select the referenced assets that you want to promote.
10. Click Next.
The Stages page appears.
11. Select the target stages to which you want to promote the assets, dependencies, and administrative configurations to.
12. Click Next.
The Promote page appears.
13. Provide the following information:
Field | Description |
Name | Name of the promotion. |
Description | Description of the promotion. |
Overwrites assets except alias that already exist on the selected target stages | If you set this field to True, all the assets except for aliases are overwritten. |
Overwrites aliases that already exist on the selected target stages. | If you set this field to True, even the aliases are overwritten. |
Fix missing version | Select the check box to fix the API version history. The discrepancy between the asset versions in the source and target stages, if any, are fixed. For example, consider that you have created an API and have five versions of the API from 1 to 5, in the source. If you select versions 1,2,4, and, 5 for promotion to the target, and if this check box is not selected, versions 1 and 2 are linked separately and versions 4 and 5 are linked separately. However, if you select this check box, version 2 is linked to version 4 and hence all versions 1,2,4, and 5 are now linked in the target. |
Include application registrations | Select the checkbox to include the application registrations when you promote an API. |
14. Click Promote.
The selected assets, dependencies, and administrative configurations are promoted to the selected stages.
The Stage-specific promotion status page displays the status of the asset promotion in each of the selected stages. The available values are:

Success

Failure
The page also displays the reason if the promotion fails.

