How Do I Invoke an API Asynchronously through JMS/AMQP using a Custom Extension?
This use case explains how to add messaging as a custom extension in one of the policy stages and invoke a service asynchronously during API processing.
You want to use the AMQP messaging setup to send some data to a queue during request processing using the configured custom extension. This data that is sent can then be read from a queue, processed, and sent in an asynchronous way.
The use case starts when you have an API which has to be enforced with a messaging custom extension and ends when you successfully invoke the API with the custom extension enforced.

To invoke an API asynchronously through JMS/AMQP using custom extension
1. Ensure you have a JMS/AMQP environment set up with the required connection alias configured.
For details on setting up the JMS/AMQP setup, see
Messaging.
2. Click APIs on the title navigation bar.
3. Click the required API.
The API details page appears.
4. Click Edit.
5. Select Policies.
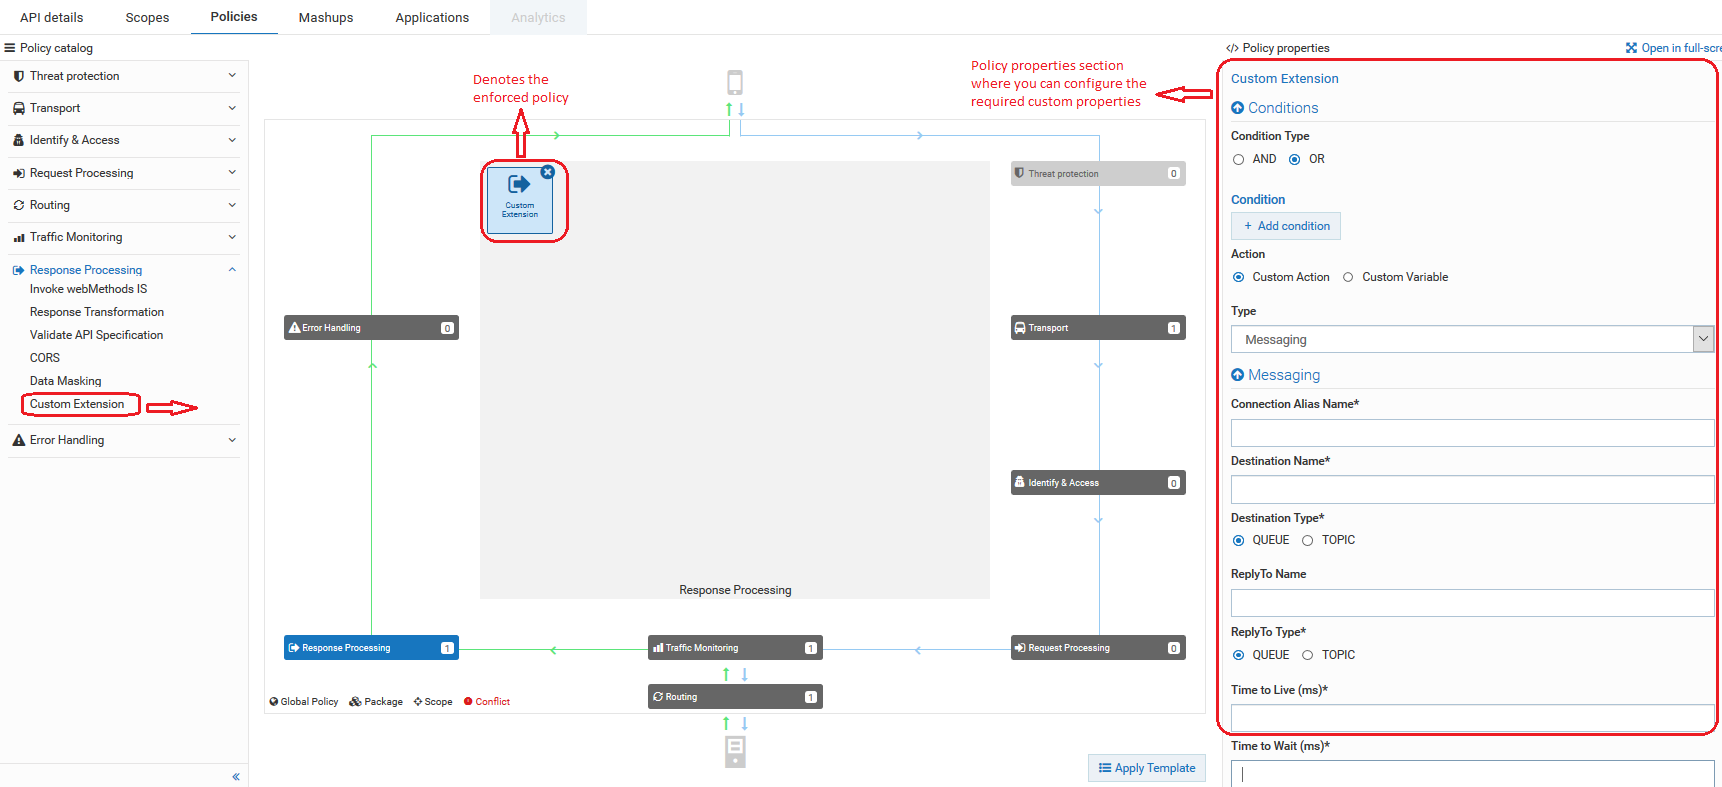
6. Click Any policy stage > Custom Extension.
This adds the custom extension policy where you can configure the required properties.
7. Provide the following information in the Conditions section, as required:
Property | Description |
Condition | Conditions are used to specify when the policy has to be executed. You can add multiple conditions with logical operators. Available values are:  AND AND. API Gateway executes this policy when all the configured conditions comply in the respective policy stage  OR OR. This is selected by default. API Gateway executes this policy when any one of the configured conditions complies. Click Add Condition and provide the following information and click Add.  Variable Variable. Specifies the variable type with a syntax.  Operator Operator. Specifies the operator to use to relate variable and the value. You can select one of the following:  Equals Equals Equals ignore case Equals ignore case Not equals Not equals Not equals ignore case Not equals ignore case Contains Contains Exists Exists Range Range Greater Than Greater Than Less Than Less Than Value Value. Specifies a plain value or value with a syntax. |
8. Click Custom Action.
9. Select Messaging in the custom extension Type field.
10. Provide the following information in the Messaging section, as required:
Property | Description |
Connection Alias Name | Name of the connection alias you have configured. You can configure the connection alias under Administration > Messaging section. For details on how to configure the connection alias, see
Messaging. |
Destination Name | Specify the destination to which the request message is sent. |
Destination Type | Specify the destination type to which the request message is sent. |
Reply To Name | Specify the destination to which the response message is sent. |
Reply To Type | Specifies the destination type to which the response message is sent. Select one of the following types:  QUEUE QUEUE. Indicates that the response message is sent to a particular queue.  TOPIC TOPIC. Indicates that the response message is sent to a particular topic. |
Time to Live (ms) | Provide a numeric value that specifies the expiration time (in milliseconds) of the JMS or AMQP message. If the time-to-live is specified as zero, expiration is set to zero, which indicates that the message does not expire. |
Time to Wait (ms) | Defines the time in milliseconds for which API Gateway listens to the Reply To Queue or Topic for the response message. |
Delivery Mode | The message delivery mode for the request message. This is the delivery mode that web service clients must specify in the JMS or AMQP message that serves as the request message for the web service. Select one of the following modes:  Non-Persistent Non-Persistent. Indicates that the request message is not persistent. The message might be lost if the JMS provider fails.  Persistent Persistent. Indicates that the request message should be persistent. The message is not lost if the JMS provider fails. |
11. Configure the custom properties of the custom extension as required.
12. Click Save.
The API is saved with the added custom extension..
13. Invoke the API.
The applied custom extension calls the queue or topic that is configured.

