Configure the SSO Service in SharePoint
This task is the second part of configuration for MOSS SSO. It is required only if you are using the SSO Service in P4S authentication and the Microsoft Office SharePoint Server (MOSS) Single Sign-on (SSO) Service is not already running in your environment.
Note: | For a complete discussion of MOSS SSO configuration, see Microsoft TechNet documentation at: |
Before you begin this task, you must
Configure the SSO Service in Windows.
To configure SSO in SharePoint
1. Open SharePoint Central Administration.
2. Click Operations.
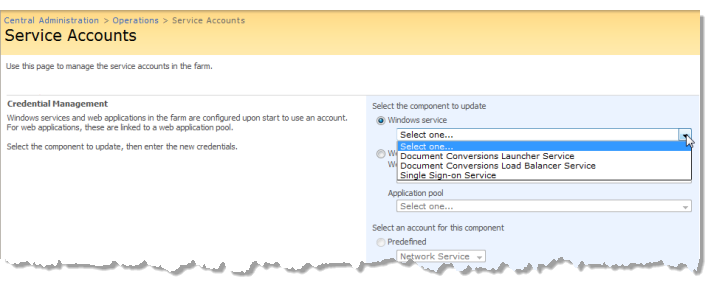
3. Under Security Configuration, select Service accounts.
4. Select Single Sign-on Service as the Windows service.
5. Enter a service account username and password and click OK.
6. In Security Configuration, click Manage settings for single sign-on.
7. On the Manage Settings for Single Sign-On page, click Manage server settings.
8. Complete these properties:
 Single Sign-On Administrator Account Name
: enter the same domain and user name that you used to configure the Single Sign-On service. If the user name you used to configure the Single Sign-On service is a member of a Windows security group, you can enter the name of the Windows security group instead of a user name.
 Enterprise Application Definition Administrator Account
: enter the same domain and user name that you used to configure the Single Sign-On service.
 Database Settings Server name
: enter the SQL Server instance name, using the
netbios\instance naming convention, to use for the Single Sign-on database.
 Database Settings Database name
: enter the name for the Single Sign-on database, such as
SSO.

Leave the default values for the
Ticket time out and
Delete audit log records older than properties.
9. Click OK.
At this point you should have a running instance of the MOSS SSO service including a new database for securely storing SSO user credentials. The next step is to
Create SSO Applications for
P4S to use in connections between
SharePoint and
Business Analytics Servers.
