Assign data sources to Combobox
To use the Combobox you have to assign a relevant data source to the component.
The component requires an Event, BigMemory, or XML data source.
Procedure
2. Click an inserted Combobox component. The relevant properties dialog is displayed.
3. Click the  Configure icon to edit the data source assignment.
 The Edit Data Souce dialog will be displayed. Here you can select a data source and create dynamic Input Parameters. The Data Flow box shows an overview of the data source configuration.
4. Optionally you can create input parameters.
You can define dynamical and reusable input parameters for XML data sources and RAQL queries, see
Create Input Parameters.
5. Select data source.

Assign
Event data source.
i. Click the Event button.
ii. Select an Event Source in the drop-down menu.
Assign
BigMemory data source.
If you have defined one or more input parameters for the selected component the
Insert input parameter button is available for the BigMemory operator. By clicking the button you can insert a defined input parameter at the cursor position. Click on the inserted parameter for more options. See
Create Input Parameters.
i. Click the BigMemory button.
ii. Select a cache manager in the Cache Alias drop-down menu.
iii. Enter a RAQL query.
You can enter any RAQL statement. See example BigMemory data source below.
Preset query: SELECT * FROM.
Assign
XML data source.
If you have defined one or more input parameters for the selected component the
Insert input parameter button is available for the XML operator. By clicking the button you can insert a defined input parameter at the cursor position. Click on the inserted parameter for more options. See
Create Input Parameters.
i. Click the XML button.
ii. Enter the URL to the XML file in the Source field.
You can also enter Presto Mashups and Mashables in the field. As soon as you start typing, all supported Presto Mashups and Mashables will be auto suggested. By selecting one of them, the URL of that artifact will be set.
iii. You can optionally add HTTP headers to the URL. Click HTTP Headers and select a header in the drop-down menu and insert a parameter in the input field.
iv. You can optionally add a HTTP basic access authentication. Click Authentication and enter a user name in the User input box. Enter the Password of the user and click Save Changes.
v. Specify the Repeating element of your data source in the corresponding input box. You can click Repeating element: Detect to read out the repeating element automatically and edit it in the input box. A repeating element already set by a user will not be considered. The repeating element will be displayed corresponding to the hierarchy of the xml elements, e. g. <element>/<repeating element>. Depending on the repeating element, the requested columns will be displayed in the Columns box.
vi. You can edit the list of requested columns of the data source. Click Columns: Detect to read out the columns of the data source automatically. The requested columns list will be displayed, based on the specified repeating element. Click Edit to configure the columns list. Click Edit to change the settings of a specific column or click Delete to remove a column from the list. By clicking Switch to text mode you can display the column list in text mode. Click Ok to save your changes.
6. In addition to the data source operator you can add an operator to change the data type of the source data.
a. Click the  Add icon and select Change data type. The relevant operator will be displayed.
 b. Select a Column in the drop-down menu to change the column data type.
c. Click on the  Text,
Text,  Number or
  Date icon to assign a New Data Typ.
 d. Depending on the selected data type you can edit addional settings, e.g. data format. Click the  Additional settings icon.
 e. Click the Add icon to add columns. 7. You can display the calculated source data of an operator. Click the  Calculate peview icon.
 8. Assign a data column to the combobox.
You can assign a separate column of the data source to the combobox. The data will be displayed in the drop down menu of the combobox.
a. Assign a Data column to the Visible Column field via drag and drop. Enter a New Column Name if necessary.
b. Select a Format in the drop-down menu and enter an Initial selected value if necessary. The Format option is only available for columns of type text and date.
c. Activate the Sort descending option to display the values in a descending order in the drop-down menu.
9. Click Edit Data Source if you want to change the source settings.
10. Click OK.
The combobox will be displayed with real data of the assigned data source.
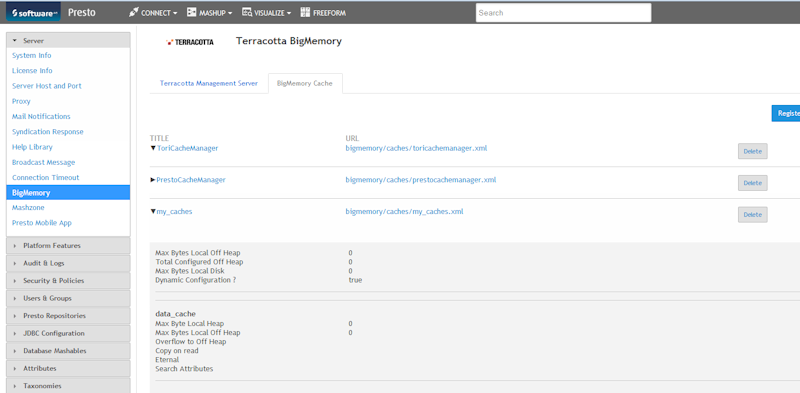
Example: BigMemory Data source
To use the RAQL source operator, you have to configure a BigMemory connection in Presto in advance, see
BigMemory connection in Presto.
To use the RAQL BigMemory operator you have to follow these conventions. The Cache Alias pattern is <configuration name>.<cache name>. <cache name>. <configuration name> is the Title you specified as name for the configuration, <cache name> is one of the caches available in the configuration. In this example, the Cache Alias is "my_caches.data_cache".
In the statement field, you can enter the RAQL statement. If you refer to a cache within the configuration, you just specify the cache name (i. e. without the configuration name). In the above example, if you wanted to address the "data_cache" cache, you would formulate your RAQL statement similar to this:
SELECT description FROM data_cache