Connections and Global Settings
Click Settings on the top toolbar to open a window where connections and global TMC options can be configured. The Settings window includes Connections, Polling, and Security panels.
Working With Connections
Connections allow you to monitor and administer nodes, both clustered and standalone. Clustered connections are for Terracotta Server Arrays, and Connection Groups are for standalone connections to agents that are assigned to groups to simplify management tasks.
Connections from the TMS to agents are made using a location URI in the following form:
<scheme>:<host-address>:<port>
URIs showing "http:" are for non-secure connections.
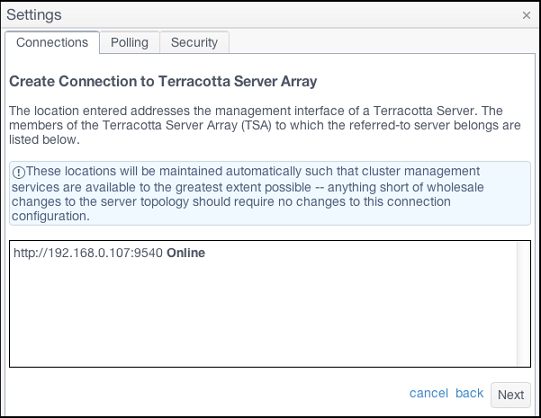
If the URI is for a server in a Terracotta Server Array, all other nodes participating in the cluster are automatically found. It is not required to create separate connections for those other nodes. A typical URI for a server is similar to:
http://myServer:9540
where an IP address or resolvable hostname is followed by the management-port number (9540 by default). This port is configured in tc-config.xml.
A typical URI for a Terracotta client or BigMemory Go will appear similar to:
http://myHost:9888
where an IP address or resolvable hostname is followed by the agent's management port (9888 by default), which has been set in the node's configuration file. For BigMemory Go, for example, use the managementRESTService element in ehcache.xml.
Adding a Connection
When you initially log on to the TMC, only default connections exist. If a node that can be monitored is running on localhost at the port specified by one of the default connections, that default connection appears as an active connection. Other default connections appear as unavailable (inactive) connections.

To add a new connection:
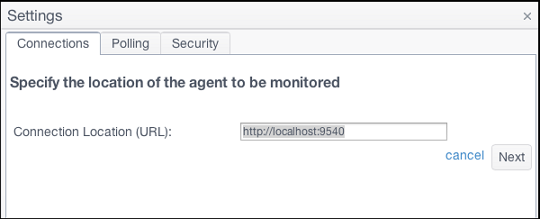
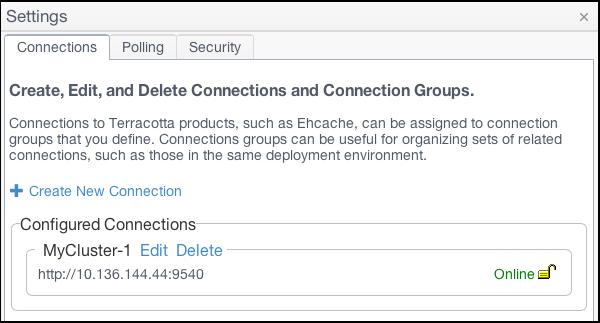
1. Click +Create New Connection button in the Connections panel of the Settings window, or at the top of the home page. The first window of the New Connection wizard appears.
2. Enter the location URI of the node you want to monitor, then click Next.
A screen appears confirming the agent found at the given location. If no agent is found, a warning appears and no connection can be set up. The location is relative to the machine running the Terracotta Management Server (TMS). The default location, "localhost", is the machine the TMS is running on, which might not be the machine your browser is running on.
3. Choose an existing connection group for the connection, or create a new one, then click Next.
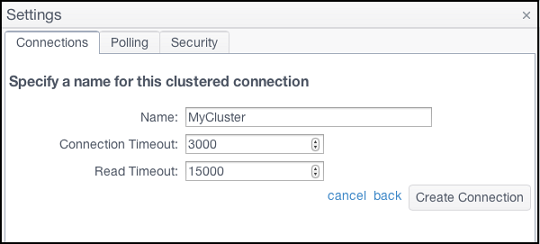
4. Enter a name to identify the connection.
5. Enter a connection timeout or accept the default value.
The connection timeout ensures that the TMC does not hang waiting for a connection to an unreachable node.
6. Enter a read timeout or accept the default value.
The read timeout ensures that the TMC does not hang waiting for a connection to an unresponsive node.
7. Click Create Connection to save the new connection or Cancel to discard the new connection.
Editing and Deleting Connections
Managed connections that appear in the connections list can be edited or deleted.
Delete a Connection
To delete an existing standalone connection, click Settings on the toolbar to view the Connections panel. Locate the connection under its connection group in the Configured Connections list and click the red X next to that connection's name.
To delete an existing cluster connection, click Settings on the toolbar to view the Connections panel. Locate the connection group in the Configured Connections list and click Delete next to that group's name.
Alternatively, from the home page, click the trash icon

in the connection pane you want to delete.
Edit a Standalone Connection
To edit a standalone connection:
1. Click Settings on the toolbar.
2. In the
Connections panel, click the pencil icon
for the connection you want to edit.
3. Edit the connection's location, group, and name.
You can choose a group for the connection from the menu of existing groups, or create a new connection group. If you create a new group, enter a name for the group.
4. Enter a connection timeout or accept the default value.
The connection timeout ensures that the TMC does not hang waiting for a connection to an unreachable node.
5. Enter a read timeout or accept the default value.
The read timeout ensures that the TMC does not hang waiting for a connection to an unresponsive node.
6. Click Save Changes to save the new values or Cancel to revert to the original values.
Edit a Cluster Connection
To edit a cluster connection, click Edit for the cluster group, then edit the group name, connection location, and timeouts. Click Save Changes to save the new values or Cancel to revert to the original values.
Polling Period
In the Settings window, click the Polling tab to set the Polling Interval Seconds, which controls the granularity of polled statistical data. Note that shorter polling intervals can have a greater effect on the overall performance of the nodes being polled. To reset to default values, click Reset to Defaults.
Security Settings
In the Settings window, click the Security tab to configure security. If you choose to change the type of security used by the TMS, note the following:

Changing security settings requires restarting the TMC.
Changing the type of security might require additional configuration information and infrastructure.
If you add security, connections to unsecured nodes might be lost.
If you disable authentication, connections to secured nodes might be lost.
For SSL connections, you can use a custom truststore instead of the default Java cacerts. The custom truststore must be located in the default directory specified in the Security panel.
For more information about setting up security, see
Setting up Security.