Getting Started with the Terracotta Management Console
About the Terracotta Management Console
This document describes the Terracotta Management Console (TMC), which is a browser-based application served by the Terracotta Management Server (TMS). The TMC provides a complete view of your Terracotta Server Array (TSA) and connected clients.
With the TMC you can:

observe the cluster topology and categories of connected clients
view statistics
clear cache contents
and more
Installing the TMS
The TMS is a standard Java web application and bundled web container. It gathers information from throughout the cluster and serves it to the TMC for display in your browser. The TMS is located in the installed Terracotta kit under the tools/management directory.
Configuring the TMS
Certain aspects of the TMS can be customized via the properties file located in the installed Terracotta kit at tools/management/conf/tmc.properties. While that file contains many more properties, those that follow are the most likely to be useful to the TMS administrator:
server.port=9480
tms.defaultUrl=terracotta://localhost:9410
spring.pid.file=${tmc.home:build/tmc}/run/tmc.pid
tms.storageFolder=target/tmc/data
tms.offheapSizeMB=1024
tms.persistenceMode=HYBRID
tms.offheapMonitoringFrequencyMs=30000
tms.offheapThreshold=80
tms.statisticsMaxAgeMinutes=1500
tms.statisticsScavengerFrequencyMs=30000
tms.eventLogMaxRecords=5000
tms.eventLogScavengerFrequencyMs=60000
Security
Please see the section
TMS Security in the
Terracotta Server Administration Guide for information on how to configure TMS security.
In essence, you need to configure the following properties in the tmc.properties file:
tms.security.root.directory
tms.security.audit.directory
tms.security.https.enabled
tms.security.authentication.scheme
tms.security.authorization.scheme
tms.security.root.directory.connection.default
and provide the correct files in the security root directory.
Starting and Stopping the TMS
To start the TMS, execute the script start.bat (on Windows) or start.sh (on UNIX-based systems), located in tools/management/bin under the installed Terracotta kit.
To terminate the TMS, use the associated stop.bat or stop.sh script, or platform-provided process management tools.
Adding Manageability to your Ehcache CacheManager
In order to get the fullest manageability and monitorability you must configure your CacheManager to make use of a ManagementRegistryService:
import org.ehcache.config.builders.CacheManagerBuilder;
import org.ehcache.management.registry.DefaultManagementRegistryConfiguration;
CacheManager cacheManager = CacheManagerBuilder.newCacheManagerBuilder()
.using(new DefaultManagementRegistryConfiguration()
.setCacheManagerAlias("MyCacheManager")
.addTags("my-client-tag", "another-client-tag"))
.build(true);
Configuring the management registry will activate it and will allow various capabilities to be exposed via the TMS REST interface with the alias and tags you provide. We recommend you to assign the same alias to equivalent instances of your CacheManager, across different clients so as to support statistics aggregation.
If you do not make use of a management registry, your CacheManager will still appear in the TMC but most management and monitoring features will not operate.
Tip: If you want to exclude a cache manager from the TMC UI, you can add the following tag: tmc-excluded.
For related information, see the section
Ehcache API Developer Guide > Management and Monitoring with Ehcache.
Adding Manageability to your TCStore Dataset
Unlike for an Ehcache CacheManager, there is no need to explicitly add manageability to your TCStore Dataset.
Still, if you are using a clustered dataset manager, it is good practice to set an alias to your dataset and some tags:
DatasetManager datasetManager = DatasetManager.clustered([...])
.withClientAlias("myDsManager")
.withClientTags("node-1", "webapp-2", "testing")
.build();
Tip: If you want to exclude a dataset manager from the TMC UI, you can add the following tag: tmc-excluded.
Connecting to the TMC
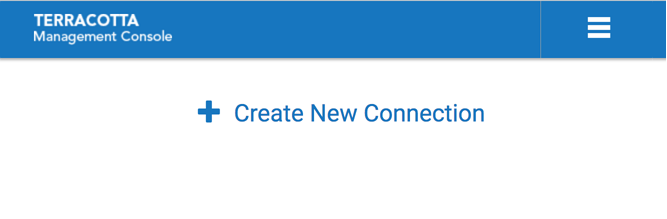
After starting the TMS, open a browser and visit http://localhost:9480. The TMC will load and present you with the Home Page, where persistent connections to your clusters can be created, viewed and managed.
Screenshot: TMC Home Page, Create New Connection