Creating an SSL network interface to a Universal Messaging Realm Server
Network Interfaces can be added to a Universal Messaging realm using the Universal Messaging Administration API or by using the Universal Messaging Enterprise Manager.
To add an SSL interface using the Enterprise Manager GUI, follow the steps below:
Step 1: Click on the interfaces panel for a realm. In the example below an interface is being added to the realm "node1". An interface could also be added however to any other realm shown in the Enterprise Manager. This ability makes centralized remote administration very easy using Universal Messaging.
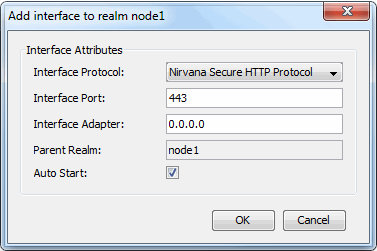
Step 2: Click on the Add Interface button in order to bring up the Add Interface dialog box. In the dialog choose the network protocol you would like to use for this interface. The choices are Sockets, Secure Sockets, HTTP and HTTPS. Choose either Secure Sockets or Secure HTTPS to add an SSL interface.
In this example HTTPS is chosen as the protocol and the interface is added to the network adapter 192.168.1.5. This will run the network interface on that IP Address. Alternatively, you could add a hostname that will resolve to the IP address of the chosen interface, or you can also specify 127.0.0.1 for localhost or 0.0.0.0 for all network interfaces on this machine.
Step 3: When a new interface is added, if the Auto Start option is not selected the realm interface will not start automatically when a realm starts, and it will have to be started manually.
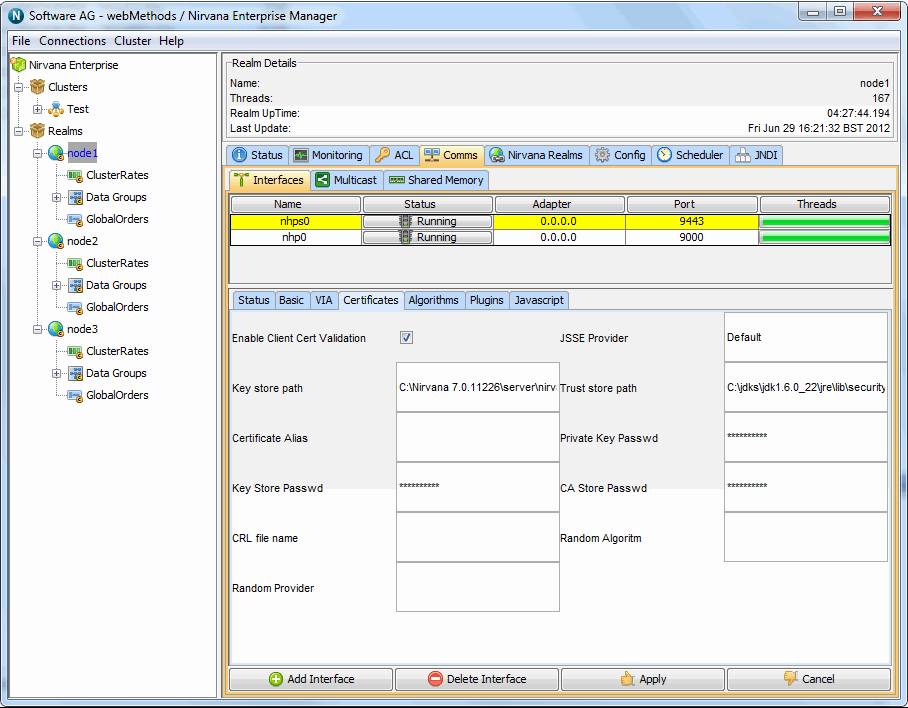
After the interface has been added you should see the following in your interfaces panel:
In this example you can see that this realm now has 2 network interfaces and that the one just added ("nhps0") has been started.
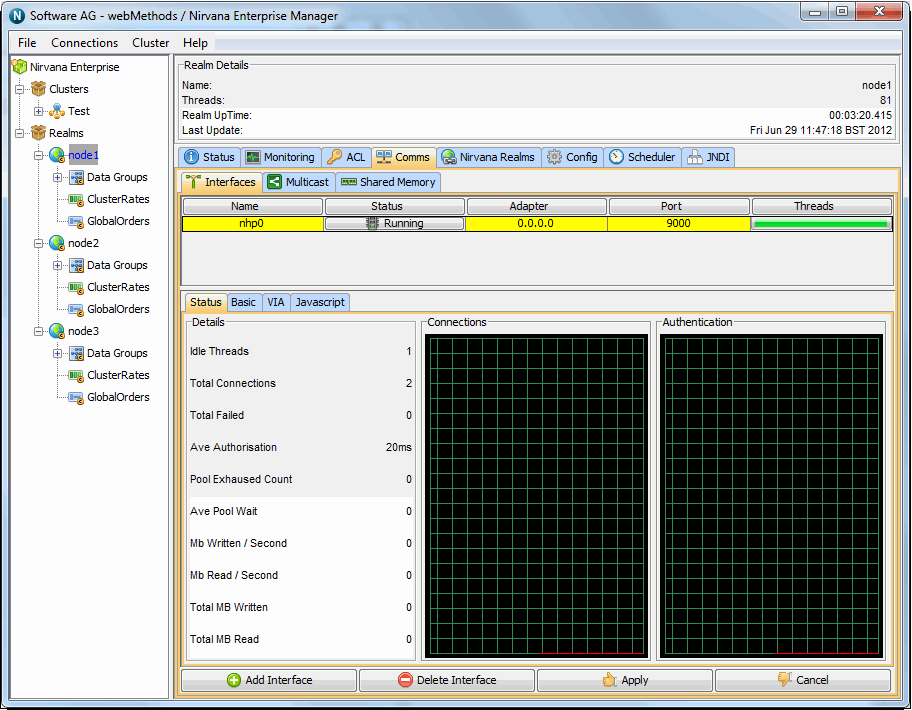
If you did not choose to start the interface automatically, then in order to start the interface you need to click on the line containing the stopped traffic light. This will populate the tabs at the bottom with details for this interface.
Click on the Certificates tab. You will see that the first 2 text boxes have been automatically filled in. In the Universal Messaging download, we provide a utility called Certificate Generator (see
How to generate certificates for use) that can generate sample .jks files containing certificates bound to localhost, for the server, the client and the truststore used by jsse. In this example we are going to use the sample jks files in order to demonstrate creating an SSL interface.
If you would like instructions on generating your own certificates (see
How to generate certificates for use) for use with Universal Messaging please see our FAQ.
The text field titled 'Key store path' should contain something similar to:
c:\Universal Messaging\server\umserver\bin\server.jks
which should be the path to the sample Java keystore for the server, bound to localhost. The text field 'Trust store path' should contain something similar to the following:
c:\Universal Messaging\server\umserver\bin\nirvanacacerts.jks
Next, fill in the entries for the 'Key Store Passwd' and 'CA Store Passwd' with 'password'. This is the password for both the server keystore and the CA (truststore) keystore.
Next select the 'Basic' tab and click on the autostart interface checkbox. Clicking on this box means that the interface will be started automatically when the Universal Messaging realm server is started.
Note:
If you intend to use an SSL interface for inter-realm communication, you need to ensure that the option "Allow for InterRealm" is selected and the option "Allow Client Connections" is deselected. Similarly, If you intend to use an SSL interface for communication between clients and the realm, you need to ensure that the option "Allow for InterRealm" is deselected and the option "Allow Client Connections" is selected. Related information is available in the section
Setting up Inter-Realm Communication.
Then click on apply and the Interface will be started.
Alternatively if you do not wish to autostart then double click on the line with the stopped traffic light. This will bring up a dialog which allows you to start that network interface.
If the network interface fails to start then please inspect the Universal Messaging log file via the messages tab. Please contact your software supplier if any other issues arise.
Similarly, if you wish to stop an interface, simply double-click on the interface you want to stop from the interface table, and click on the 'stop' button.
There is no limit to the number of network interfaces that can be added to a realm and each can have its own configuration such SSL chains etc applied. This allows you to isolate customers from each other while still using only one Universal Messaging realm server.
In this example we have used our own sample Java keystores which will only work when using the loopback interface of your realm server host. If you wish to provide SSL capabilities for remote connections, you must ensure you have your own keystores and valid certificate chains.
Connecting to an NHPS Interface
To connect to an nhps interface on a Universal Messaging server in the Enterprise Manager, you configure the following truststore and client keystore properties in the Software AG_directory \UniversalMessaging\java\instance_name\bin\Admin_Tools_Common.conf file of the server:
 set.default.CAKEYSTORE=<path_to_truststore>
 - Required.
set.default.CAKEYSTOREPASSWD=<truststore_password> - Required.
set.default.CKEYSTORE=<path_to_client_keystore> - Required only when client authentication is enabled.
set.default.CKEYSTOREPASSWORD=<keystore_password> - Required only when client authentication is enabled.
The certificates must be in .jks (java keystore) format.
Important:
If you have these properties configured both in the Software AG_directory \UniversalMessaging\java\instance_name\bin\nenterprisemgr.conf file and Admin_Tools_Common.conf file, the values in nenterprisemgr.conf override the values in Admin_Tools_Common.conf. Software AG recommends that you configure the properties in the Admin_Tools_Common.conf file.
In addition, optionally, you can configure an nhps url to which clients connect by default. You specify the url as a value of the -DRNAME property in the nenterprisemgr.conf file of the server, for example:
wrapper.java.additional.3=-DRNAME=nhps://umserver:8000
Enabling Client Authentication
You use the Enable Client Cert Validation check box on the Interfaces > Certificates tab to enable or disable client authentication for an nhps interface on a Universal Messaging server. If you enable client authentication, you must specify the client keystore certificate and kesystore password as properties in the Admin_Tools_Common.conf file of the server instance.