Zone Administration
Overview of Zone Administration
The Enterprise Manager provides menu items for performing the administrative functions on zones. In a zone, messages that are published to a channel on one realm are automatically forwarded to a channel of the same name on other realms in the zone.
Note:
Messages on queues are not forwarded between realms in a zone; the zone functionality applies only to channels.
For general information about using zones, refer to the
Architecture section of the
Universal Messaging Concepts guide.
Zone administrative functionality is offered in the Enterprise Manager menu bar and in the navigation tree:
The Zone tab in the menu bar allows you to perform operations on zones, such as creating and deleting zones.
The Zones node in the navigation tree is the parent node of any zones you create.
The zone administration operations that you can perform are described in the following sections.
Creating a Zone
To create a zone and define it with an initial set of realms or clusters, proceed as follows:
1. Open the dialog for creating a zone.
You can do this in one of the following ways:

In the Menu bar, select
Zone > Create Zone, or
In the navigation tree, select the Zones node, and from the context menu choose
Create Zone.
2. In the dialog, specify a name that will be assigned to the zone.
3. Add realms or clusters to the zone.
If you select the radio button for realms, you see all of the realms that you can add to the zone. If you select the radio button for clusters, you see all of the clusters that you can add to the zone.
Specify the realms or clusters you want to add to the zone, then click Add.
4. Click OK to create the zone and close the dialog.
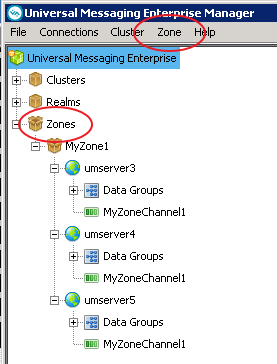
The newly created zone is now displayed under the Zones node in the navigation tree.
If you expand the node of the new zone, you will see the realms that belong to the zone.
Note:
1. A zone can contain either realms or clusters, but not a mixture of realms and clusters.
2. A zone cannot be empty; it must contain at least one realm or cluster.
Modifying the set of realms or clusters in a zone
To modify the set of realms or clusters in a zone, proceed as follows:
1. Under the Zones node in the navigation tree, select the node representing the required zone. In the context menu, select Modify Zone Members.
This displays the realms/clusters that are currently members of the zone, and also the realms/clusters that are currently not members but which are available to become members.
2. As required, add realms/clusters to the zone's existing members, or remove existing members.
3. Click OK to save the modified zone and close the dialog.
Deleting a zone
To delete a zone, proceed as follows:
1. Select the Zones node in the navigation tree, then in the context menu, select Delete Zone.
Alternatively, select Zone > Delete Zone from the menu bar.
2. Select the required zone from the displayed list and click OK to delete the zone.
Creating a channel in a zone
You can create a channel for a zone, and the channel will be automatically created on all realms/clusters in the zone.
To create a channel in a zone, proceed as follows:
1. Select the node for the zone in the navigation pane. Then, in the context menu of the node, select Create Channel.
2. In the Add Channel dialog, specify the attributes of the channel that you wish to create.
3. Click OK to complete the dialog and create the channel.
The Enterprise Manager now creates the channel on all realms or channels in the zone.
Modifying a channel in a zone
If you wish to modify the attributes of a channel that was created in a zone via Create Channel, you must modify the attributes for the channel in each of the zone members (realms, clusters) individually.
Note:
Any changes you make to the channel definition for a realm/cluster in a zone are NOT propagated automatically to the other zone members. If you wish to keep all zone members in sync, you have to update the other zone members individually.
To modify a channel on one realm/cluster in a zone, proceed as follows:
1. Select the node for the channel under the node for the realm/cluster on which the channel is defined.
2. In the context menu of the channel, select Edit Channel.
3. In the Modify Channel dialog, make your changes and click OK to complete the dialog.
Channel interface attributes for use in zones
For the message forwarding mechanism between realms in a zone, Universal Messaging requires each affected realm to use an interface that has the attribute
Allow for InterRealm activated. See the section
Interface Configuration for a description of this attribute.
General notes on using zones
This section summarizes some operational aspects of using zones.
If a zone member (a realm or cluster) is not active (e.g. the server is down), no Enterprise Manager operations will be allowed on the zone until all zone members are available again.
Any given realm or cluster cannot be a member of more than one zone at the same time.