How to use the Insert and Select operations using the Database Application
What is a Database Application?
The Database Application allows you to perform database operations with cloud databases. All the database operations are performed using JDBC Driver provided by the database vendor.
You can create an integration with any cloud databases using the Database Application which supports operations such as Insert, Select, Delete, Update, and so on. All the operations in the Database Application share similar user interfaces and design approaches.
Actors

Administrator

User who creates integration to the database
Preconditions

Knowledge to create and execute an operation

Basic knowledge of Database and SQL queries

An existing database with appropriate permissions

A valid tenant that contains
Integration Cloud subscription with access to Database Application
Basic Flow
1. Login to Integration Cloud with the tenant credentials.
2. You can create a new project or use an existing project to create an account, operation, and so on using the below screen:
3. Click Applications and find the Database application as shown below:
4. You can now create an account, operation, and integration using the below screen:
5. Let us assume that you want to insert a row into an EMPLOYEE table using the INSERT operation and then select the inserted row using the SELECT operation. The sample structure for the Employee table can be as shown below:
EMP_NO NUMBER(4)
EMP_NAME VARCHAR2(10)
JOB VARCHAR2(9)
MANAGER NUMBER(4)
HIRE_DATE DATE
SALARY NUMBER(7,2)
COMM NUMBER(7,2)
DEPT_NO NUMBER(2)
6. Do the following to insert a row into the Employee table:
a. Add a JDBC driver.
Navigate to the particular project where you want to create the operation Then, go to Applications > Database > DRIVER MANAGEMENT > Add Driver. Provide values as shown below and click Add.
Note:
The Database Application also provides pre-bundled JDBC drivers. If you want to use a pre-bundled JDBC driver, you need not add a new JDBC driver.
b. Create a new account.
Navigate to the particular project where you have already added the JDBC driver. Then go to Applications > Database > ACCOUNTS > Add New Account.
Provide the values for each field as shown below and save the account details:
Note:
The Truststore Alias field is used only when you create a secure connection.
c. Configure the Insert operation.
Navigate to the particular project where you have created the account.
Then go to Applications > Database > OPERATIONS > Add New Operation.
Follow the below steps to configure the Insert operation:
a. On the Account screen, provide the name of the operation, description and choose the account to create the operation as shown below:
b. On the Operation screen, select the Insert operation from the list of operation templates:
c. For Tables, click Add Table, and select the Employee table as shown below:
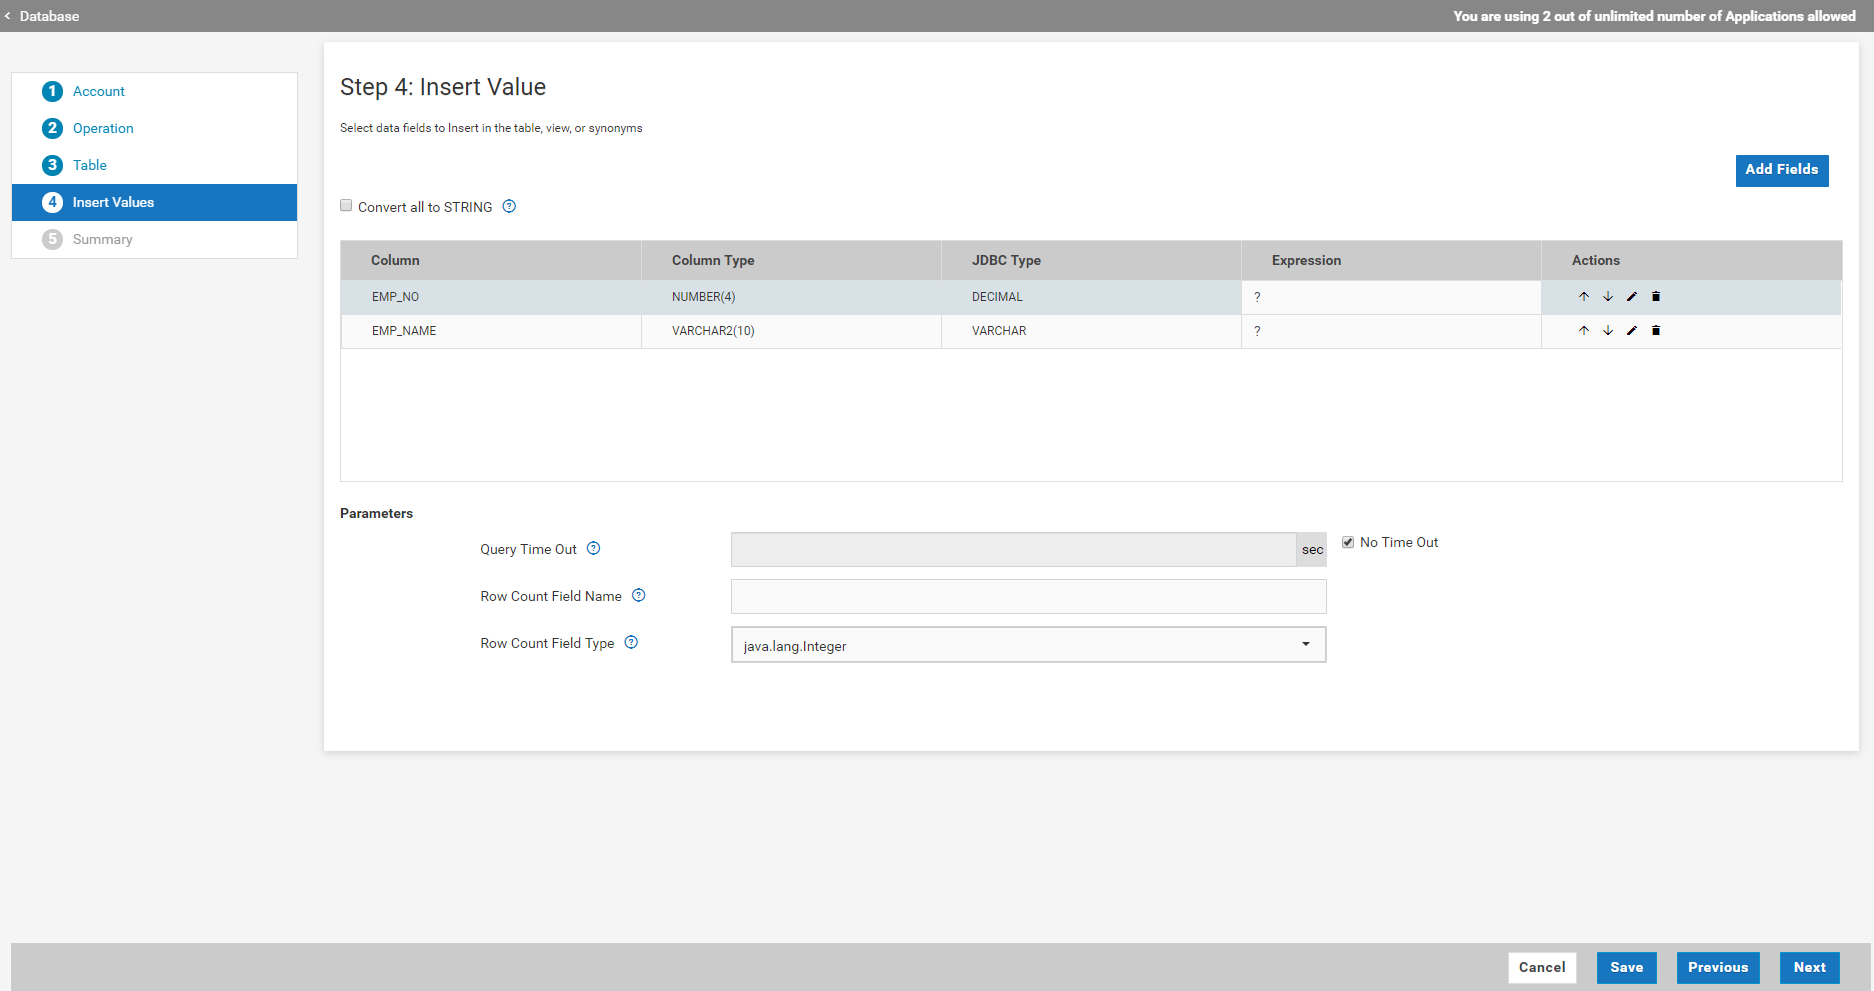
d. For Insert Values, click Add Fields, and select the table columns:
Note:
The default value for the Expression field is ?, which specifies to provide the value for that particular column when you execute the Insert operation.
e. The Summary displays the operation details such as the name of the Operation, Account, and SQL query formed. Click Finish or Save.
d. Execute the Insert operation and provide values for the selected columns.
7. To select a row from the Employee table, do the following:
a. Add a JDBC Driver.
The JDBC Driver is already added while creating the Insert operation.
b. Create a new account.
The account is already created while creating the Insert operation.
c. Configure the Select operation.
To configure, navigate to the respective project where you have created the account.
Later navigate to Applications > Database > OPERATIONS > Add New Operation.
Do the following to configure the Select operation:
a. On the Account screen, provide the name of the operation, description, and choose the account to create the operation as shown below:
b. On the Operation screen, choose the Select operation from the list of operation templates as shown below:
c. For Tables, click Add Table and select the Employee table as shown below:
d. If you select multiple tables, select Joins to configure the joins for those tables. You can skip this option if you have selected a single table.
e. For Data Fields, click Add Fields, and select the table columns as shown below:
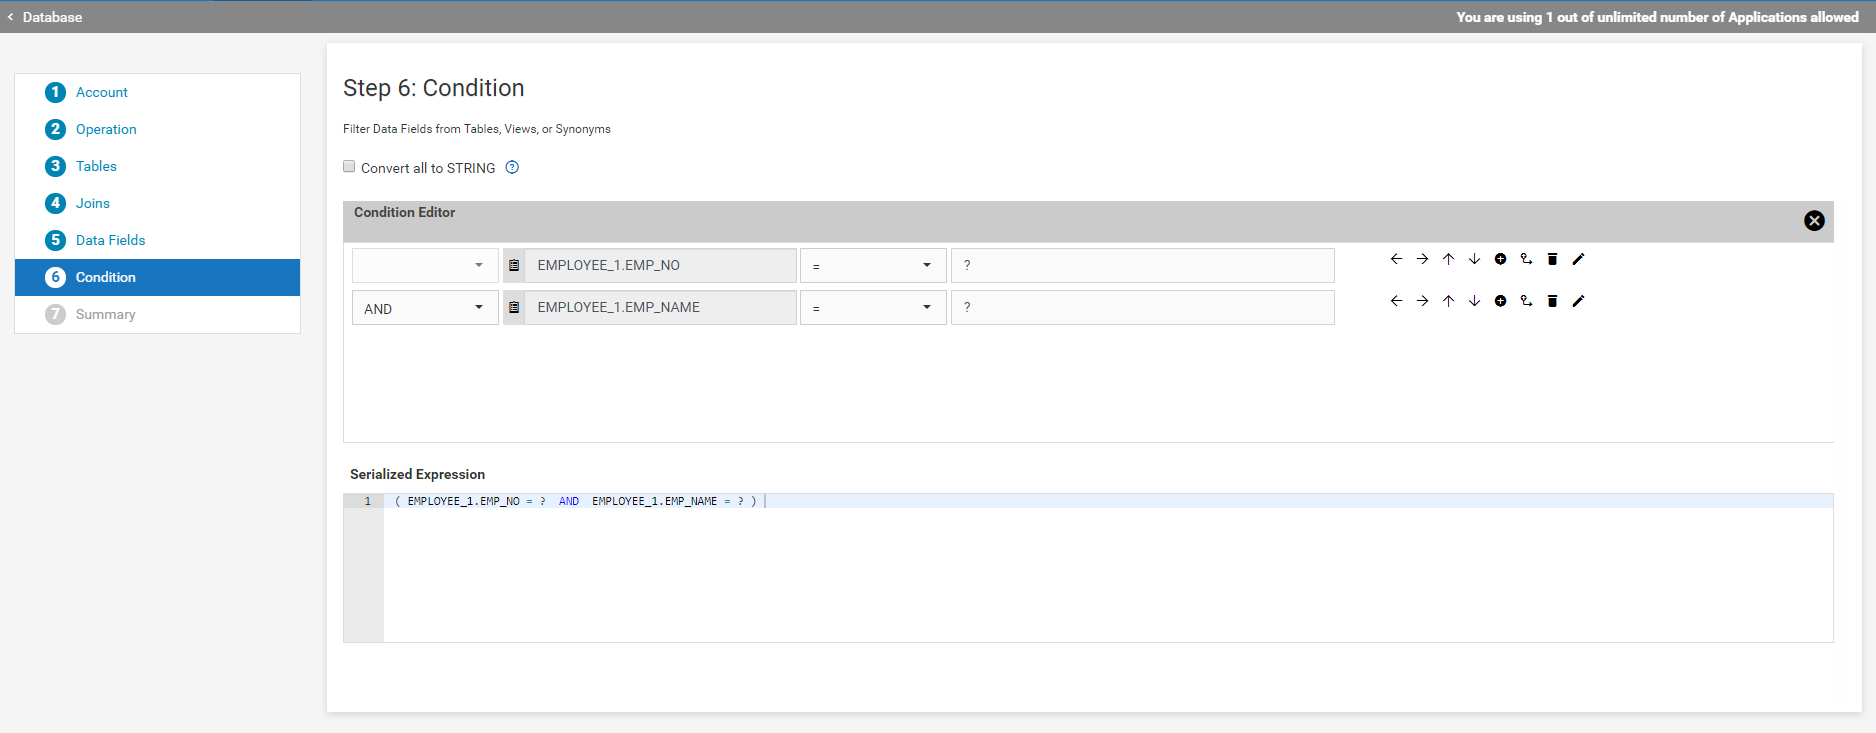
f. In the Conditions screen, configure the WHERE clause of the SQL query as shown below:
Note:
The default value for the Expression field is ?, which specifies to provide the value for that column when you execute the Select operation.
g. The Summary displays the operation details such as the name of the operation, account, and SQL query formed. Click Finish or Save.
d. Execute the Select operation.


